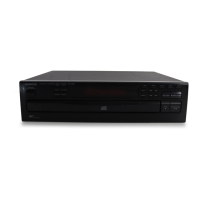
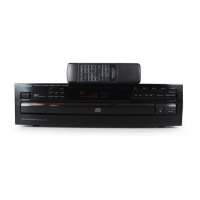
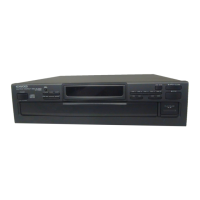
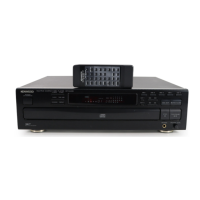
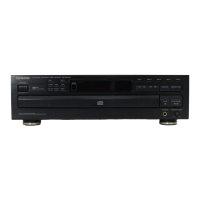
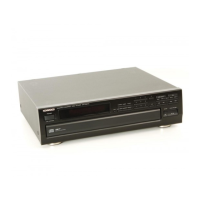
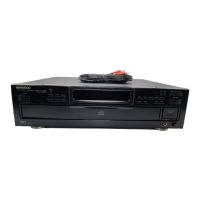
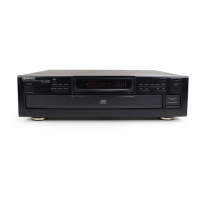
This document is an instruction manual for the KENWOOD DP-R893 CD Player. It provides detailed information on its operation, features, specifications, and maintenance.
Function Description:
The KENWOOD DP-R893 is a CD player designed for high-quality sound reproduction. It supports playing standard compact discs and offers various playback modes including manual play (TRACK mode), programmed play (PGM mode), repeated play (one-disc, programmed, and all-disc repeat), and random play. The unit features a rotary tray that can accommodate up to five discs, allowing for continuous playback without frequent disc changes. An "Auto-Space" function in programmed mode automatically inserts a 4-second space between tracks, which is useful for recording to cassette decks with DPSS functions or for continuous sound between tracks in classical music or live recordings. The player also includes an editing function to facilitate recording CD contents onto tape, ensuring optimal use of tape sides and full recording of tracks. It can divide the recording time into two files (A and B) for two tape sides, and allows adjustment of recording time intervals. The unit also has a timer stand-by function, enabling playback to start at a desired time when connected to a commercially available audio timer.
Important Technical Specifications:
- Format: Compact disc digital audio system
- Laser: Semiconductor laser
- Playing rotation: 200 rpm - 500 rpm (CLV)
- D/A converters: 1 bit
- Oversampling: 8 fs
- Audio:
- Frequency response: 4 Hz - 20 kHz, ±1.0 dB
- Signal to noise ratio: More than 98 dB
- Dynamic range: More than 98 dB
- Total harmonic distortion: Less than 0.006 % at 1 kHz
- Wow and flutter: Unmeasurable limit
- Output level/impedance: 2.0 V/3.3 kΩ
- General:
- Power consumption: 18 W
- Dimensions: W: 440 mm (17-5/16"), H: 120 mm (4-3/4"), D: 380 mm (14-15/16")
- Weight (Net): 5.4 kg (11.9 lbs)
The unit is designed for operation on 120 V AC in the U.S.A. and Canada, 240 V AC in Australia, and 230 V AC in Europe. For other countries, it features an AC voltage selector switch (Type A or B) on the rear panel, allowing selection between 110-120 V AC and 220-240 V AC.
Usage Features:
- Controls and Indicators: The front panel includes a POWER switch, rotary tray, P.MODE key, CHECK key, CLEAR key, TIME DISP. key, RANDOM key, REPEAT key, EDIT-1/EDIT-2 keys, OPEN/CLOSE key, DISC SKIP key, DISC selector keys (DISC 1-DISC 5), Skip keys, Search keys, STOP key, and PLAY/PAUSE key. The display shows play mode indicators (TRACK, PGM, RANDOM, EDIT-1, REPEAT), EDIT file indicators, P.C. indicator, Disc No. indicators, Music calendar (1-20), TRACK NO. indicator, and a time counter (SINGLE TIME, TOTAL TIME, Program No.).
- Loading Discs: The rotary tray can hold up to five discs. Discs should be placed on the tray without touching the playing surface. The DISC SKIP key rotates the tray for inserting multiple discs.
- Manual Play (TRACK mode): After loading discs and closing the tray, pressing PLAY/PAUSE will start playback from the selected disc (or disc 1 if multiple discs are inserted). Tracks can be selected directly using numeric keys on a KENWOOD amplifier/receiver remote control (if connected via system control cord). The TIME DISP. key allows checking elapsed time and remaining time for the track or the entire CD.
- Programmed Play (PGM mode): Users can program up to 20 desired tracks in a specific order. Tracks are selected by disc number and track number. The CHECK key allows reviewing the programmed order. Tracks can be added, changed, or cleared from the program.
- Repeated Play:
- One-disc repeat: Repeats all tracks on a single selected disc.
- Repeated playback of programmed tracks: Repeats all tracks in the programmed order.
- All-disc repeat: Repeats all tracks on all discs in the tray.
- Random Play: Plays tracks from all discs in the tray in a random, non-selected order. Another track can be selected randomly during playback using the skip keys. Random play can be canceled to resume normal play or stop.
- Editing Function: This feature helps in recording CD content onto tape. It divides the recording time into two files (A and B) for two tape sides and automatically selects tracks that fit within the specified time. The recording time can be set using the TIME DISP. key and adjusted with the skip keys.
- Timer Operations: The unit can be set to start playback at a desired time when connected to an audio timer. The amplifier and the unit must be turned ON, and the disc inserted, before setting the timer.
Maintenance Features:
- Disc Handling: Always hold compact discs by the edges to avoid touching the playing surface. Do not attach paper or tape to either side of the disc.
- Cleaning Discs: If fingerprints or foreign matter are present, wipe the disc lightly with a soft cotton cloth from the center outwards in a radial manner.
- Storage: When not in use for extended periods, remove the disc from the player and store it in its case.
- Cleaning the Unit: Do not use volatile solvents such as alcohol, paint thinner, gasoline, or benzine to clean the cabinet. Use a clean, dry cloth.
- Condensation: The manual provides instructions on how to handle condensation, which can occur when the unit is moved from a cold to a warm place, when a heater starts operating, or in high humidity environments. If condensation occurs, the unit should be dried by turning the power ON and leaving it for several hours.
- Transportation: Before moving the unit, turn the power ON without loading a disc, wait a few seconds for a specific display to appear, and then turn the power OFF.
- Troubleshooting: A dedicated section provides a table of common symptoms, their causes, and remedies, such as loose power plugs, upside-down discs, dirty or cracked discs, condensation on the optical lens, and loose connection cords. It also advises against using contact cleaners containing oil.
- Safety Precautions: Emphasizes the importance of reading all safety and operating instructions. Warnings include avoiding electric shock, proper power cord protection, ensuring adequate ventilation (at least 10 cm from walls), keeping the unit away from water, heat sources, magnetic fields, and not removing the enclosure. It also provides guidelines for outdoor antenna grounding (for units with antenna terminals) and proper AC outlet usage. The manual includes reproductions of labels related to laser product safety, indicating it is a Class 1 laser product.