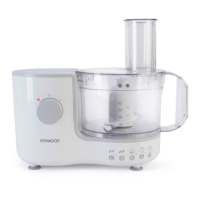
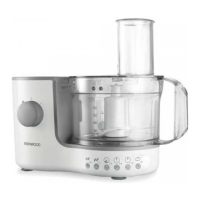
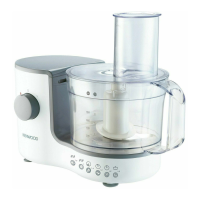
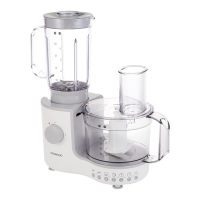
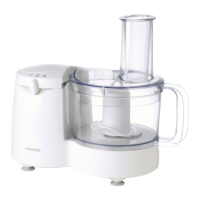
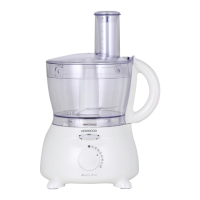
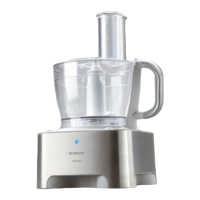
The Kenwood Food Processor, available in Type FP12 and Type FP19 models, is a versatile kitchen appliance designed for a variety of food preparation tasks. This manual provides instructions for its safe and effective use, covering both the food processor and blender attachments.
Function Description
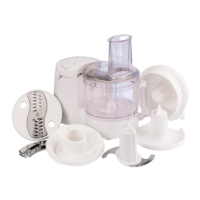
The Kenwood Food Processor serves multiple functions, including chopping, pureeing, grating, slicing, emulsifying, and blending. It is equipped with various attachments to facilitate these tasks:
- Knife Blade (15): This is the most versatile attachment, used for chopping meat, bread, and vegetables, as well as for making pastry, cakes, and yeast dough. The texture achieved depends on the processing time, with the 'pulse' feature recommended for coarser textures.
- Emulsifying Disc (16): Designed for light mixtures such as cream and mayonnaise.
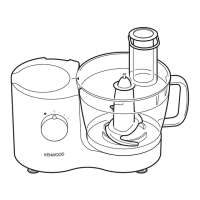
- Slicing Plate (17) & Grating Plate (18): These plates, used with the plate carrier (19), allow for slicing and grating various ingredients like carrots, potatoes, cheese, and onions. Food should be placed in the feed tube (2) and pushed down evenly with the pusher (1).
- Max Capacity Disc (20): Used with the knife blade when blending liquids in the bowl (4) to prevent leaking and enhance chopping performance.
- Citrus Juicer (21): (If supplied) Consists of a cone (a) and a sieve (b) for extracting juice from citrus fruits.
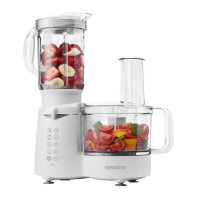
- Blender Attachment (Type FP19 only): This attachment, comprising a goblet (12), lid (13), and filler cap (14), is used for blending cold liquids, drinks, smoothies, and ice crushing. It connects to the blender outlet/interlock (10) on the power unit (8).
Important Technical Specifications
The appliance operates with a power unit (8) that includes a speed/pulse control (7). The FP120 model features 1 speed, while the FP190 model offers 2 speeds. Cord storage (9) is located at the back of the appliance.
Maximum Capacities and Operation Times:
| Function/Attachment |
Maximum Operation Time |
Rest Period Between Operations |
| Dough Tool |
1 min |
Unplug and cool for 15 mins |
| Blender |
1 min |
Unplug and cool for 15 mins |
Recommended Usage Chart (Examples):
| Tool/Attachment |
Function |
Type FP19 (Speed) |
Time (Secs) |
Quantity |
| Knife Blade |
All in one cake mixes |
2 |
10 - 20 |
800g Total weight |
|
Pastry - rubbing fat into flour |
1 - 2 |
10 |
250g Flour weight |
|
Chopping/pureeing/pates |
2 + P |
15 - 30 |
300g Meat weight |
|
Yeasted mixes |
2 |
45 - 60 |
340g Flour weight / 540g Total weight |
|
Nuts |
2 |
30 |
100g |
|
Onion (cut into ¼) |
P |
- |
200g |
|
Soups and milkshakes |
1 - 2 |
30 |
800ml |
| Emulsifying Disc |
Whipping cream |
1 |
15 - 30 |
250ml |
|
Mayonnaise |
2 |
60 |
4 Egg yolks |
| Slicing Plate |
Slicing - carrots, potato, cabbage, etc. |
1 - 2 |
- |
- |
| Grating Plate |
Grating - cheese, carrot, etc. |
2 |
- |
- |
| Citrus Juicer |
Citrus fruits |
1 |
- |
- |
| Blender |
Cold liquids, Drinks and Smoothies |
2 |
- |
1 litre |
|
Milk based drinks |
1 - 2 |
15 - 30 |
800ml |
|
Ice crushing |
P |
30 |
125g (6 ice cubes) |
Usage Features
- Safety Interlock (5): The processor will only operate if the bowl (4) and lid (3) are fitted correctly and locked into position. The blender attachment also requires the processor bowl and lid to be in place to function.
- Pulse Function (P): For short bursts of processing, the pulse control can be held in position.
- Feed Tube (2) and Pusher (1): Food is added through the feed tube, and the pusher is used to guide it down, ensuring hands and utensils stay clear of blades.
- Blender Operation: For the blender, ensure the lid (13) is in place. Never run the blender empty or for longer than 60 seconds to ensure its longevity. For frothy liquids, blend less than 1 litre.
- Hot Ingredients: DO NOT process hot ingredients. SCALD RISK: Hot ingredients should be allowed to cool to room temperature before placing in the bowl or goblet.
- Attachment Assembly: Always fit the bowl and attachment onto the processor before adding ingredients. For cutting plates, select the desired plate and fit it into the carrier with the cutting side uppermost.
- Dough Preparation: For yeast dough, place dry ingredients in the bowl, then add liquid through the feed tube with the appliance running. Process until smooth and elastic.
- Mayonnaise: For mayonnaise, add all ingredients except oil to the blender. With the appliance running, slowly add oil through the filler cap hole.
- Ice Crushing: Use the pulse function in short bursts until the desired consistency is achieved.
Maintenance Features
- Cleaning:
- Always switch off and unplug the appliance before cleaning.
- Blades and Cutting Plates: Handle with extreme care as they are very sharp. Wash by hand and dry.
- Power Unit (8): Wipe with a damp cloth and dry. Do not immerse in water. Ensure the interlock area is clear of food debris.
- Blender Base: Do not immerse the blender base in water.
- Blender Goblet (12): Fill with warm water, fit the lid and filler cap, then switch on for 20-30 seconds. Empty, rinse, and air-dry. Use a brush if still dirty.
- All Other Parts: Wash by hand and dry. All attachments (except the blender base) are dishwasher safe.
- Discolouration: Some foods may discolour the plastic parts, which is normal and will not affect the plastic or food flavour. Rub with a cloth dipped in vegetable oil to remove discolouration.
- Cord Storage (9): Wrap excess cord around the bracket at the back of the appliance.
- Fuse Information: If the plug supplied has a 3A fuse, it must be replaced with one of the same rating if it fails. For non-rewireable plugs, the fuse cover must be refitted.
- Service and Customer Care: For help with using, servicing, or repairs, contact Kenwood customer care. Have your model number (e.g., TYPE FP12 or TYPE FP19) and date code ready. Spares and attachments can also be ordered. Refer to www.kenwoodworld.com for up-to-date service centre details.
- Warranty: The product is covered by a warranty that complies with legal provisions. It covers repair or replacement if the product malfunctions within one year, provided it has been used according to instructions, not misused, damaged, modified, or used commercially. A receipt is required for proof of purchase.
- WEEE Disposal: At the end of its working life, the product must not be disposed of as urban waste. It should be taken to a special local authority waste collection centre or a dealer providing this service.