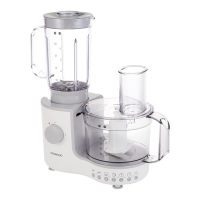
slicing and shredding plates
what the cutting plates can do.
s
licing plate - slices carrots, potato, cabbage,
cucumber, courgette, beetroot, onion.
s
hredding plate - grates cheese, carrot, potato and
foods of a similar texture.
to assemble the plate carrier
1 Select the desired plate and fit into the carrier with the
cutting side uppermost.
l
Locate one end of the plate under the rim and press
the other end into position. It will only fit one way
round .
using the cutting plates
shredding plate
Cut pieces of food to fit the feed tube. Fill the tube
almost to the top and push down using the pusher
with an even pressure whilst the machine is running.
Longer shreds can be obtained by stacking pieces
horizontally in the feed tube eg carrot.
slicing plate
If necessary cut food to fit the feed tube. Core foods
such as apples and peppers. Pack the food in an
upright position in the feed tube. The height should be
slightly shorter than the feed tube. Using the pusher,
push down with an even pressure whilst the machine
is running.
hints
l
Use fresh ingredients.
l
Don’t cut food up too small. Fill the feed tube fairly full,
this prevents food from slipping sideways during
processing.
l
When slicing or shredding: food placed upright comes
out shorter than food placed horizontally.
l
After using a cutting plate there will always be a small
amount of waste on the plate or in the food.
l
Do not allow food to build up to the underside of the
plate - empty regularly.
l
Push food down the feed tube using an even
pressure.
maxi blend canopy
When blending, use the maxi blend canopy in
conjunction with the knife blade. It allows you to
increase the liquid processing capacity of the bowl and
improve the chopping performance of the blade.
1 Place the canopy into the bowl over the knife blade -
do not push down .
2 Fit the lid .
citrus press (if supplied)
The citrus press is used to juice citrus fruit ie oranges,
l
emons, limes and grapefruits.
1
Fit the bowl onto the processor. Add the strainer and
t
urn clockwise until the fin on the strainer aligns with
the mark on the processor body .
2 Attach the cone onto the drive shaft turning until it
drops all the way down .
3 Cut the fruit in half. Switch on and press the fruit onto
the cone.
care & cleaning
l
Always switch off and unplug before cleaning.
l
Handle blades and cutting plates with care - they are
extremely sharp.
l
Some foods may discolour the plastic. This is perfectly
normal and won’t harm the plastic or affect the flavour
of your food. Rub with a cloth dipped in vegetable oil
to remove the discolouration.
power unit
l
Wipe with a damp cloth, then dry. Ensure that the
interlock area is clear of food debris.
l
Don’t immerse the power unit in water.
l
Wrap excess cord around the bracket at the back of
the appliance.
liquidiser
1 Fill with warm water, fit the lid and filler cap, then
switch on for 20-30 seconds.
2 Empty, then rinse. If it’s still dirty, use a brush.
3 Wipe, then leave to air-dry.
l
Do not immerse the liquidiser base in water.
all other parts
l
Wash by hand, then dry.
l
All attachments (except the liquidiser) can be
washed on the top rack of your dishwasher. A short
low temperature programme is recommended.
8

 Loading...