Do you have a question about the Keter DUOTECH ARTISAN 7x7 and is the answer not in the manual?
Provides customer support contact details and warranty activation instructions.
Instructions for preparing the ground surface and constructing a base foundation for the shed.
Guidance on leaving adequate space around the assembly site for external access.
Essential checks and safety guidelines to follow before starting assembly.
Lists necessary tools and specifies the number of people required for assembly.
Identifies the specific parts used for the shed's floor assembly.
Details the identification of roof and metal parts used in the shed.
Identifies window parts, small hardware, and screws.
Connects and secures the shed's floor panels.
Attaches front panels and illustrates correct installation methods.
Prepares and attaches the initial wall panels to the shed.
Secures and attaches subsequent wall panels.
Secures and attaches more wall panels.
Attaches the next sections of wall panels.
Completes the attachment of all wall panels.
Secures and attaches the final wall panels.
Attaches and secures remaining wall panels.
Attaches and secures the upper wall sections.
Assembles the components of the window frame.
Applies sealant and assembles the right window unit.
Applies sealant and assembles the left window unit.
Attaches and secures window frame components.
Installs window panes into the assembled frames.
Attaches and positions the main roof support beams.
Secures and attaches additional roof support elements.
Attaches further roof support components.
Secures and attaches roof brackets to the structure.
Attaches main roof beams and the roof ridge.
Secures roof panels and attaches roof clips.
Secures the roof panels using screws.
Attaches roof trim and prepares roof panels for installation.
Installs and secures the main roof panels.
Attaches eave trim and secures the overall roof structure.
Secures roof panels and the roof structure components.
Secures the roof panels at multiple points for stability.
Secures and attaches the main shed doors.
Assembles door hardware and aligns door panels.
Attaches and secures the sliding door tracks.
Attaches and secures the door hinges to the doors.
Attaches door brackets and hinges to the frame and doors.
Attaches the final set of door hinges.
Installs the latches for the shed doors.
Secures door hinges and attaches door support elements.
Secures roof support and attaches door handles.
Attaches door locks and other accessories.
Attaches door holders and secures the shed's base structure.
Overview of shed maintenance and available painting options.
Provides specific instructions for painting the Keter Duotech shed walls.
Instructions for anchoring the shed to a foundation for stability.
Key safety measures and maintenance advice for shed use and upkeep.
Essential safety measures and handling instructions for the shed.
Explains the terms and conditions of the limited lifetime warranty.
Details the unlimited warranty coverage and limitations.
Outlines the terms of the limited lifetime warranty.
| Brand | Keter |
|---|---|
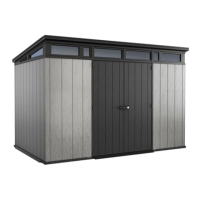
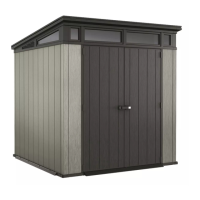
| Model | DUOTECH ARTISAN 7x7 |
| Category | Outdoor Storage |
| Language | English |