Have questions? We’re here to help. Visit keurig.com/new for troubleshooting
videos, maintenance recommendations, and the full Use & Care Guide.
Still need help? Give us a call at 1-866-901-BREW (2739)
Coffeehouse taste
in your own home.
FIND YOUR PERFECT POD
With over 70 brands and hundreds
of varieties, find your match at
keurig.com/new
cleaned periodically with a damp, soapy, non-
abrasive cloth. Rinse the reservoir thoroughly after
cleaning. This will ensure that no cleaning
solutions remain in the area as they may
contaminate the water supply. Do not dry the
inside of the water reservoir with a cloth as lint
may remain.
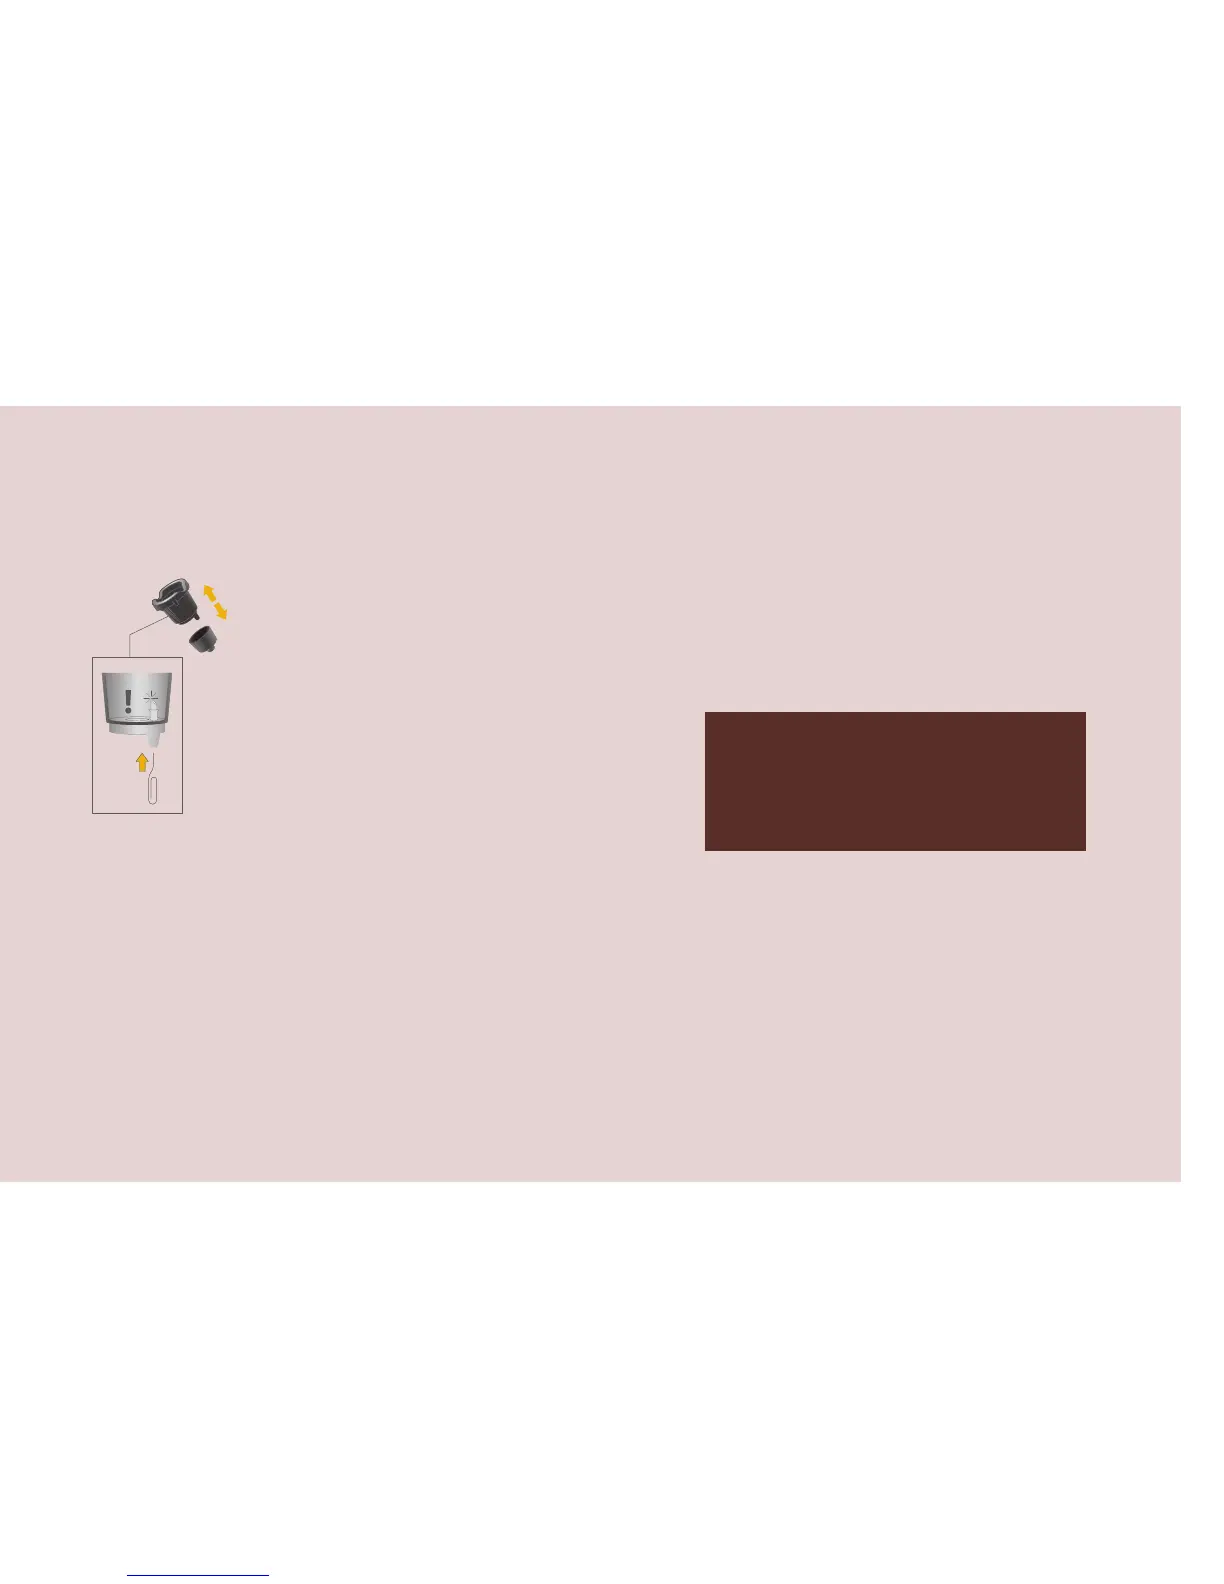
Exit Needle
Remove the pod holder assembly
and detach the funnel. Locate
the exit needle on the inside
bottom of the K-Cup® pod holder.
Insert a straightened paper clip
into the exit needle to loosen any
coffee grounds.
Entrance Needle
Lift the brewer handle and locate the entrance
needle on the underside of the lid. To clean both
holes in the needle, hold the brewer handle in the
upward position and with your other hand,
carefully insert a straightened paper clip into
both holes. Gently move it around to loosen any
coffee grounds. Lower the handle completely and
run two water-only brew cycles. Do not insert a
K-Cup® pod.
CAUTION: There are sharp needles that puncture
the K-Cup® pod above the K-Cup® pod holder and
in the bottom of the K-Cup® pod holder. To avoid
risk of injury, do not put your fingers in the
K-Cup® pod holder.
DC0000001254 REV C