Part #: 60-201038-000
Revision A, May 2008
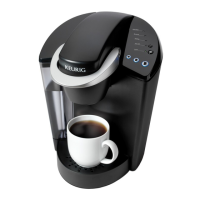
1. Unpacking the
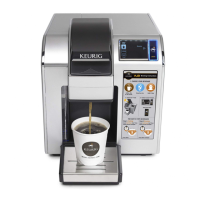
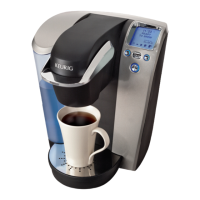
Model B145 Brewer
a. Carefully remove the Brewer by placing the box
on its side, and pulling the Brewer out of the box
and removing the protective materials.
b. Place the Brewer upright on a flat surface. Remove
three pieces of adhesive tape from Brewer.
c. Unwrap cord and plug Brewer into a 3 prong
grounded outlet.
d. Ensure Brew/Drain is set to Brew.
2. Priming
a. Press Power Button to turn the Brewer on and
the green light next to the Power Button will
become illuminated.
b. The blue light next to ‘ADD WATER’ will be
illuminated. Remove the Water Reservoir from
Brewer by first removing Lid from Reservoir,
then lifting Reservoir straight up and away from
Brewer. Rinse and fill with cold water. Replace
the Water Reservoir back on the Brewer and
replace the Lid.
c. Place a cup or mug on the Drip Tray Plate.
d. The green lights above the Brew Button will
flash. If it is not flashing, ensure that the handle
is pressed all the way down. These lights will
continue to flash until the PRIME sequence is
complete. Press the Brew Button to start the
initial PRIME.
e. The Brewer will automatically fill (priming it) and
then the water will be heated. This will take less
than 5 minutes. During the heating period, the
red light next to 'HEATING' will become illumi-
nated. When the water is heated, the red light
will turn off.
f. Raise and lower the handle (without inserting a
K-Cup), the blue brew light will start to flash.
Select the large brew size, make sure you have a
large 10 oz. cup or mug on the drip plate. Press
the Brew Button to start a cleansing brew, during
which hot water will flow into your cup or mug.
Pour the hot water into the sink.
g. The Brewer may take 20 seconds to refill and
reheat between brews and the red light next to
‘HEATING’ will be illuminated. During this time
the pump may cause a vibration noise. This is
normal. The red light will turn off when the water
has heated and the Brewer is ready.
h. The one-time priming process is now complete
and you are ready to brew!
3. Choose
a. Place a cup or mug on the Drip Tray Plate.
b. Select a K-Cup
®
portion pack.
Do not remove the foil lid.
4. Brew
a. Lift the Handle, place the K-Cup in the K-Cup
Holder Assembly and then push the Handle all
the way down to puncture the K-Cup.
Please be careful to avoid the sharp needles in
the K-Cup Assembly Housing & Lid.
b. Select the brew size you want using the rotary
selector switch.
c. Press the Brew Button this will yield a serving of
the selected size; small 6 oz., medium 8 oz. or
large 10 oz. (nominal sizes only).
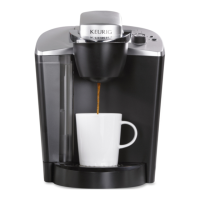
Quick Start Guide
Let the Magic Begin FAST!
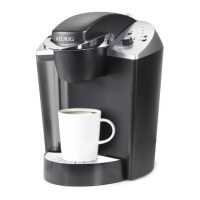
Thank you for purchasing a Keurig
®
- Model B145 Gourmet Single
Cup Brewing System.
IMPORTANT: You cannot use your Keurig brewer until it has been primed for its first use
as set forth below. Please follow these easy steps and you will discover what Deliciously
Simple
™
truly means.
Please note, if your Brewer has been exposed to temperatures below freezing, it is recommended you
allow two hours for an unpacked brewer to warm to room temperature before priming or brewing.
Please consult the Use & Care Guide for additional information on your Brewer. If you
are experiencing problems, contact Customer Service at 1-866-901-BREW (2739).
© 2008 Keurig Incorporated