EasyManua.ls Logo

KIBI Circular KBF1009 User Manual

Default Icon
2 pages
To Next Page IconTo Next Page
Page #1 background imageLoading...
Page #1 background image
Problem Cause Action
Low flow
Aerator(4) or fliter(8) may be
clogged
Unscrew aerator to check rubber packing or replace
aerator.
(Note: some models require wrench to remove aerator.)
Faucet leaks from
under handle
Bonnet(2) nut has come loose
or cartridge(3) needs to be
reseated
Remove handle and cap. Using a wrench, ensure bonnet
nut is tight.
Water will not shut off
completely.
Dirty or worn out plastic washer
in the cartridge.
Adjust or replace cartridge.
WARNING: Failure to securely tighten bonnet nut with a
wrench could result in water damage.
LIMITED LIFETIME WARRANTY
KIBI provides its customers with an extensive warranty as a result of our excellent workmanship and high quality
components used in our products.
Mechanical warranty: A limited lifetime warranty is provided on all mechanical parts to be free from manufacturing
defects in materials and workmanship under normal use for as long as the original purchaser owns their home.
Finish warranty: A 5-year warranty is provided on all KIBI faucet finishes to the original purchaser against manu-
facturing defects in materials and workmanship.
At its sole discretion, KIBI will repair or replace any part or finish that proves to be defective in material and/or
workmanship under normal installation, use and service.
This warranty is extended to the original consumer owner, but does not cover installation or any other labor
charges. In no event shall KIBI be liable for any incidental, consequential or special damages, installation cost,
labor, travel time, freight costs incurred, lost profits, or contingent liabilities. KIBI makes no representation that its
products comply with any or all local building or plumbing codes. It is the consumers responsibility to determine
local code compliance.
TROUBLE SHOOTING
CLEAN AERATOR AND FLITER
CLEANING AND CARE
Clean the faucet often with a soft cloth to keep it looking like new. For heavy cleaning you can use mild liquid deter-
gents or non-abrasive liquid polisher. Rinse with water and dry with a soft cloth. Avoid abrasive cleaners, steel wool
and harsh chemicals as these will dull the finish and void your warranty.
If you’ve followed the instructions carefully and your faucet still does not work properly, take these corrective steps.
Installation Guide
www.kibiusa.com
Circular
KBF1009
Question and Answer IconNeed help?

Do you have a question about the KIBI Circular KBF1009 and is the answer not in the manual?

KIBI Circular KBF1009 Specifications

General IconGeneral
BrandKIBI
ModelCircular KBF1009
CategoryPlumbing Product
LanguageEnglish

Summary

Troubleshooting Faucet Issues

Low Flow

Addresses low water flow issues by checking the aerator for clogs or damage.

Faucet Leaks Under Handle

Details how to fix leaks under the handle by tightening the bonnet nut or reseating the cartridge.

Water Not Shutting Off

Explains how to resolve water not shutting off by adjusting or replacing the cartridge washer.

Cleaning and Care Instructions

General Faucet Cleaning

Provides guidance on cleaning the faucet using mild detergents and soft cloths, avoiding abrasives.

Limited Lifetime Warranty

Warranty Terms and Conditions

Details the terms and conditions of KIBI's limited lifetime warranty for mechanical parts and finish.

Faucet Installation Guide

Initial Setup and Surface Preparation

Initial steps to shut off water, remove old faucet, and clean the mounting surface.

Mounting Hardware Removal

Instructions for removing existing mounting hardware from the pipe before installation.

Faucet Body Installation

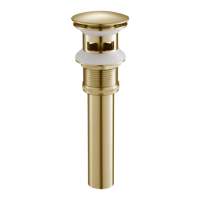
Guidance on placing the O-ring and inserting the faucet into the mounting hole.

Mounting Bracket Assembly

Steps to assemble washers and mounting bracket onto the faucet's thread shank from under the sink.

Tightening Mounting Nuts

Instructions for adjusting faucet position and tightening mounting nuts securely.

Supply Hose Connection and Leak Check

Steps to connect supply hoses, turn on water, and check for leaks, emphasizing proper connection.

Related product manuals