Do you have a question about the Kichler Lighting Ridley and is the answer not in the manual?
Controls fan speed using three buttons (High, Medium, Low).
Button used to turn the fan off.
Turns light fixture on/off or controls dimming.
Replace existing wall switch with the control system.
Mount the control system on a wall or flat surface.
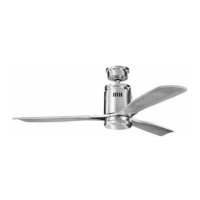
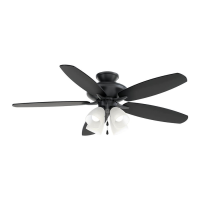
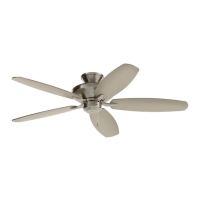
The Ridley™ A Kichler® Décor™ ceiling fan is a sophisticated and versatile device designed to provide both air circulation and illumination, enhancing the comfort and aesthetic of any room. This ceiling fan is equipped with a Basic Function CoolTouch™ Control System, offering convenient operation and a range of features for optimal performance.
The primary function of the Ridley ceiling fan is to circulate air, creating a cooling effect in warm weather and distributing warm air more efficiently in cooler weather. This is achieved through its three fan speeds: high, medium, and low. For warm weather operation, the fan should be set to forward (counter-clockwise) to create a downward airflow, which produces a cooling effect. This allows users to set their air conditioner to a warmer setting without compromising comfort. In cool weather, the fan should be set to reverse (clockwise) to create an upward airflow, which moves warm air off ceiling areas. This enables users to set their heating unit to a cooler setting while maintaining general comfort. The fan's rotation direction can be adjusted using a reverse slide switch located on the top of the motor housing.
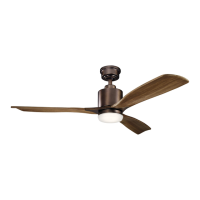
In addition to air circulation, the Ridley fan includes a lighting fixture. It is designed to accommodate a 100W, E-11 JD TYPE halogen lamp and features a glass shade for diffused illumination. The lighting function is controlled by the CoolTouch™ Control System, allowing users to turn the light on/off and dim it to their desired brightness level. The light dimming function is operated by pressing and holding the light button on the remote control. It's important to note that this appliance is equipped with a "Wattage Limiting Device" required by the United States Department of Energy, which is factory-installed and cannot be removed. Installing lamps in excess of 190 total watts will disable the unit's light fixture, requiring a reset by turning off the power, reinstalling lamps totaling less than 190 watts, and then restoring power.
The CoolTouch™ Control System is a key feature, offering remote control functionality for both fan speed and light operation. This system is equipped with 16 possible frequency combinations to prevent interference with other remote control units. The frequency switches on both the receiver and transmitter are preset at the factory, but users can recheck them to ensure they are set to the same position for proper operation. The remote control also includes a "Hand Held" device option, allowing users to remove the transmitter from the wall plate and use it as a portable control.
Installation of the Ridley ceiling fan requires careful attention to safety rules and electrical connections. All wiring must comply with the National Electrical Code and local electrical codes, and installation should be performed by a qualified licensed electrician. The fan must be mounted to an outlet box marked "ACCEPTABLE FOR FAN SUPPORT," capable of securely supporting a minimum of 50 pounds. A minimum clearance of 7 feet from the trailing edge of the blades to the floor is required for safe operation. For sloped (vaulted) ceilings, a longer downrod may be necessary to maintain proper clearance between the blade tips and the ceiling, with a minimum clearance of 12 inches suggested for optimal operation. Canadian installations specifically require a safety support cable to prevent the ceiling fan from falling.
The CoolTouch™ Control System transmitter can be installed either by replacing an existing wall switch or on any flat surface. When replacing an existing wall switch, the BLACK leads (hot) should be wire-nutted together and pushed back into the outlet box. For any installation, the metal plate and CoolTouch™ wall plate are secured with screws, and plastic plugs are inserted into the wall plate. The transmitter can be inserted into the wall plate for stationary use or removed to function as a "Hand Held" device.
Operating the fan is straightforward with the CoolTouch™ remote control. The remote features distinct buttons for high, medium, and low fan speeds, an off button for the fan, and a button for light control (on/off and dimming). The remote control requires two batteries, which should be inserted with the positive (+) side facing up. It's advisable to remove the batteries if the fan will not be used for extended periods. The remote's Dip Switch #5 should be set to the X position to disable the dimming function if CFL lamps are used, as they are not dimmable.
Maintaining the Ridley ceiling fan is relatively simple, focusing on cleaning and addressing common issues. For cleaning the fan or fan blades, only a dry dust cloth or a lightly dampened cloth should be used; water or detergents are not recommended.
Troubleshooting common problems is also covered in the manual. If the fan does not start, users should check circuit fuses or breakers, ensure all electrical connections are secure (with the main power OFF), and verify that the transmitter batteries are installed correctly and have a good charge. For noisy fan operation, users should check that all motor housing screws and fan blade bracket screws are snug. Wire nut connections should not rub against each other or the interior wall of the switch housing. A 24-hour "breaking-in" period is often sufficient for new fan noises to disappear. If an optional light kit is installed, screws securing the glassware should be tight, and light bulbs should not touch any other component. The fan should not be connected to wall-mounted variable speed controls, as these are incompatible. The upper canopy should not touch the ceiling.
Fan wobble, a common issue, can be addressed by ensuring all blade and blade arm screws are secure. Unequal blade levels are a frequent cause of wobble, which can be checked by measuring the distance from the ceiling to the tip of each blade; the deviation should be within 1/8 inch. A Blade Balancing Kit is provided for noticeable wobble. Interchanging two adjacent blades can also help redistribute weight for smoother operation.
For remote control malfunction, it's important to remember that ceiling fans with remote control systems cannot be operated with other control systems, except for a basic On/Off wall switch if desired. Users should ensure that the frequency dip switches in both the transmitter and receiver have identical settings. Additionally, the Black Antenna on the receiver should not be tangled with other electrical wires and should be extended around the inside of the ceiling canopy for optimal signal transmission. The fan must be installed at a maximum distance of 30 feet from the CoolTouch™ Remote Transmitter for optimal signal transmission.
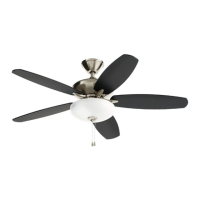
| Blade Span | 52 inches |
|---|---|
| Number of Blades | 5 |
| Motor Type | AC |
| Light Kit Included | Yes |
| Mounting | Downrod |
| Energy Star Certified | No |