Phase Switch:
The phase switch
lets you invert the phase of the
signal played
through your powered
subwoofer. This
is
useful
if
the speakers
in
your system
are
out of phase with the subwoofer.
Toggle this switch
to find the position that gives you the best bass response.
Input Level:
The inputs on
KICKER
powered
enclosures are
capable
of receiving either
Hi
(speaker-level)
or
Low-level
(RCA)
signals
from your source unit.
Set the
Input Level
switch
on
the side
panel
to match the outputs
of your source unit.
Crossover Control:
The
variable
crossover
on
the side
panel allows you to adjust the crossover frequency from
50-200~z.
The setting for this
control
is
subjective; 80Hz
is
a good place
to start.
Input
Gain Control:
The input gain
control
is
not a
volume control.
It
matches the output of the source unit to
the input
level
of the powered
enclosure's amplifier.
Turn
the source unit up to about
3/4
volume
(if
the source
unit goes to
30,
turn
it
to 25). Next,
slowly
turn the gain on the powered
enclosure
up
(clockwise) until you can
hear audible
distortion, then turn
it
down a
little.
Bass Boost Control:
The
variable
bass boost
control
on the side
panel
is
designed to give you increased
output (0-18dB) at
40
Hz.
The setting for this control
is
subjective.
If
you turn
it
up, you must readjust the input
gain
control
to avoid
clipping
the powered
enclosure's amplifier.
Remote Bass Control:
With the
included
remote bass
control,
you have the
ability
to
control the output
level
of your powered
enclosure remotely.
When
plugged
into the
enclosure,
the remote bass
control
bypasses and
takes the
place
of the gain control
on the side
panel.
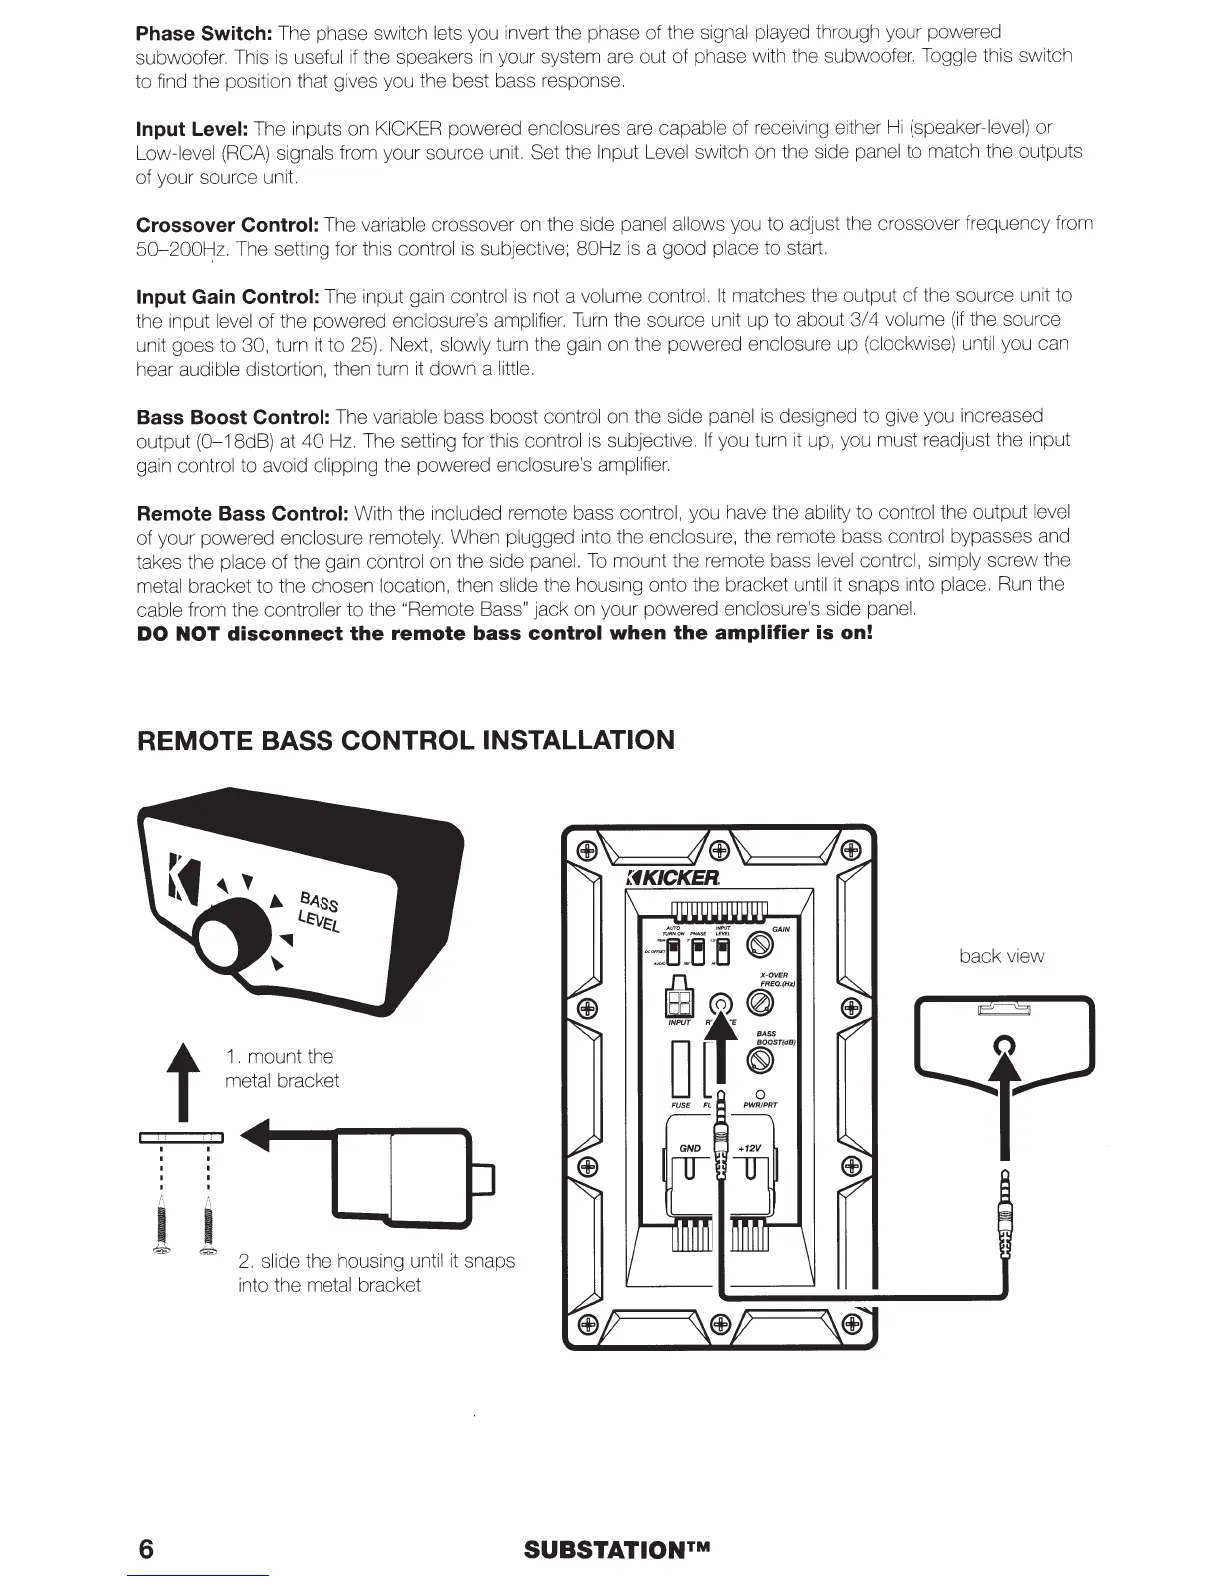
To
mount the remote bass
level
control, simply
screw the
metal bracket to the chosen
location,
then slide
the housing onto the bracket until
it
snaps into
place.
Run
the
cable
from the
controller to the
"Remote
Bass" jack
on
your powered
enclosure's
side
panel.
DO
NOT
disconnect
the
remote
bass
control
when
the
amplifier
is on!
REMOTE BASS CONTROL INSTALLATION
6
t
I
I
1
i
~
1.
mount the
metal
bracket
I I P
2.
slide the housing
until
it
snaps
into the
metal bracket
!fKICKER
SUBSTATION™
back view

 Loading...