EasyManua.ls Logo

KidKraft Deluxe Big & Bright Kitchen User Manual

KidKraft Deluxe Big & Bright Kitchen
13 pages
To Next Page IconTo Next Page
Page #1 background imageLoading...
Page #1 background image
Deluxe Big & Bright Kitchen
Assembly Instructions
Item# 53100
Please retain this information
for future reference
To order replacement parts,
please visit www.kidkraft.com
USE AND MAINTENANCE:
-Use on level surfaces only
-Please check assembly at regular intervals, and
frequently tighten hardware if necessary. If maintenance
is not carried out, the product could cease to function
properly.
Customer Service
1-800-933-0771
www.kidkraft.com
1
1
2
3
4
5
6
7
8
10
12
15
16
17
9
11
13
14
18
20
21
22
19
23
25
24
27
28
29
26
30
31
32
33
34
35
36
37
x 2
x 3
38
39
40
41
42
43
44
45
WARNING: CHOKING HAZARD
Small parts and sharp points, not
suitable for children under 3 years.
CAUTION: Adult Assembly Required.
Hardware contains small screws with
sharp points. Keep unassembled parts
out of reach of small children.
Question and Answer IconNeed help?

Do you have a question about the KidKraft Deluxe Big & Bright Kitchen and is the answer not in the manual?
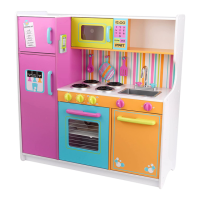
KidKraft Deluxe Big & Bright Kitchen Specifications

General IconGeneral
BrandKidKraft
ModelDeluxe Big & Bright Kitchen
CategoryBaby & Toddler Furniture
LanguageEnglish

Summary

KidKraft Kitchen Assembly Overview

Kitchen Assembly Steps

Step 1: Initial Component Connection

Connect first structural pieces using designated hardware for the kitchen base.

Step 2: Side Panel and Support Assembly

Assemble side panels and internal supports to form the main structure.

Step 3: Installing Internal Dividers

Install internal partitions and supports for the kitchen's core framework.

Step 4: Attaching Shelving Units

Mount vertical shelving and divider panels into the main frame.

Step 5: Door and Handle Preparation

Attach door hinges and handles to the pre-cut door panels.

Step 6: Mounting Main Doors

Secure the assembled doors to the main kitchen unit.

Step 7: Attaching Oven and Drawer Fronts

Install decorative fronts for oven and drawer sections.

Related product manuals