EasyManua.ls Logo

KidKraft So Chic Dollhouse User Manual

KidKraft So Chic Dollhouse
15 pages
To Next Page IconTo Next Page
Page #1 background imageLoading...
Page #1 background image
Customer Service
1-800-933-0771
www.kidkraft.com
CAUTION: Adult assembly required.
Hardware contains small screws with
sharp points. Keep unassembled parts
out of the reach of small children.
USE AND MAINTENANCE:
-Use on level surfaces only
-Please check assembly at regular intervals, and frequently
tighten hardware if necessary. If maintenance is not carried out,
the product could cease to function properly
So Chic Dollhouse
Assembly Instructions
Item #65078
Please retain this information
for future reference
To order replacement parts,
please visit www.kidkraft.com
WARNING: CHOKING HAZARD
Small parts and sharp points, not
suitable for children under 3 years.
Questo manuale d’istruzione è fornito da trovaprezzi.it. Scopri tutte le offerte per KidKraft Casa delle
bambole So Chic o cerca il tuo prodotto tra le migliori offerte di Giocattoli
Question and Answer IconNeed help?

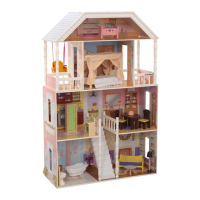
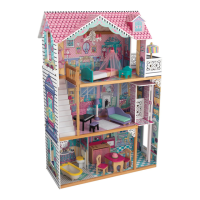
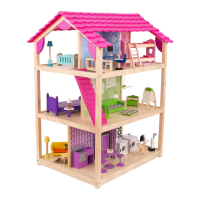
Do you have a question about the KidKraft So Chic Dollhouse and is the answer not in the manual?

KidKraft So Chic Dollhouse Specifications

General IconGeneral
Assembly RequiredYes
Weight44.1 pounds
MaterialWood
Recommended Age3 years and up
Furniture IncludedYes
Item Weight44.1 pounds

Summary

Product Information and Safety

General Safety and Assembly Requirements

Adult supervision required; two people needed for assembly. Keep small parts away from children.

Use and Maintenance Instructions

Guidelines for proper use, cleaning with mild soap, and regular maintenance checks.

Component Identification

Dollhouse Parts List

Visual inventory of all wooden and accessory parts included in the kit.

Hardware and Required Tools

List of all fasteners (screws, dowels) and the necessary tools for assembly.

Assembly Steps

Step 1: Initial Frame Assembly

Assemble the base and side supports using specified hardware.

Step 2: Adding Second Level Supports

Attach horizontal supports to the side panels for the second floor.

Step 3: Attaching Vertical Panels

Connect vertical side panels to the base structure.

Step 4: Securing the Base

Attach casters to the bottom panel using screws.

Step 5: Installing Interior Walls

Insert and secure interior partition walls into the base.

Step 6: Connecting Side Structures

Join the assembled side frame to the base structure.

Step 7: Adding Lower Shelves/Floors

Attach horizontal supports to the side panels for the lower floor.

Step 8: Installing Third Level Base

Attach the third floor panel to the side structures.

Step 9: Connecting Third Level Walls

Insert and secure interior partition walls for the third level.

Step 10: Securing Third Level Structure

Fasten the third level interior walls to the main structure.

Step 11: Adding Fourth Level Base

Attach the fourth floor panel to the main structure.

Step 12: Adding Upper Shelves/Floors

Attach horizontal supports to the side panels for the upper floor.

Step 13: Attaching Side Supports

Connect additional side supports to the upper structure.

Step 14: Installing Staircases

Attach staircases to the designated levels of the dollhouse.

Step 15: Adding Balcony Railings

Install railings on the balconies and upper levels.

Step 16: Attaching Support Beams

Secure diagonal support beams to the dollhouse structure.

Step 17: Attaching Roof Supports

Connect side roof supports to the dollhouse frame.

Step 18: Installing Back Wall Panel

Attach the rear vertical panel to the dollhouse frame.

Step 19: Attaching Front Facade Elements

Install front facade elements and supports.

Step 20: Attaching Roof Panels

Secure the roof panels to the top of the dollhouse.

Step 21: Final Roof Attachment

Complete the roof assembly by attaching the final panels.

Product Care and Warranty

Important Information and Cleaning

Notes on product uniqueness, cleaning methods, and surface care recommendations.

Sole and Limited Warranty

Details the 90-day warranty against manufacturing defects and claim process.

Related product manuals