Xsede®
4
Part 3095953, Revision -
Assembly Instructions
Proper product installation, in accordance with these instructions, is the responsibility of the installing agent. If you have
any questions concerning these instructions, please call Kimball Customer Care.
Installation (cont.)
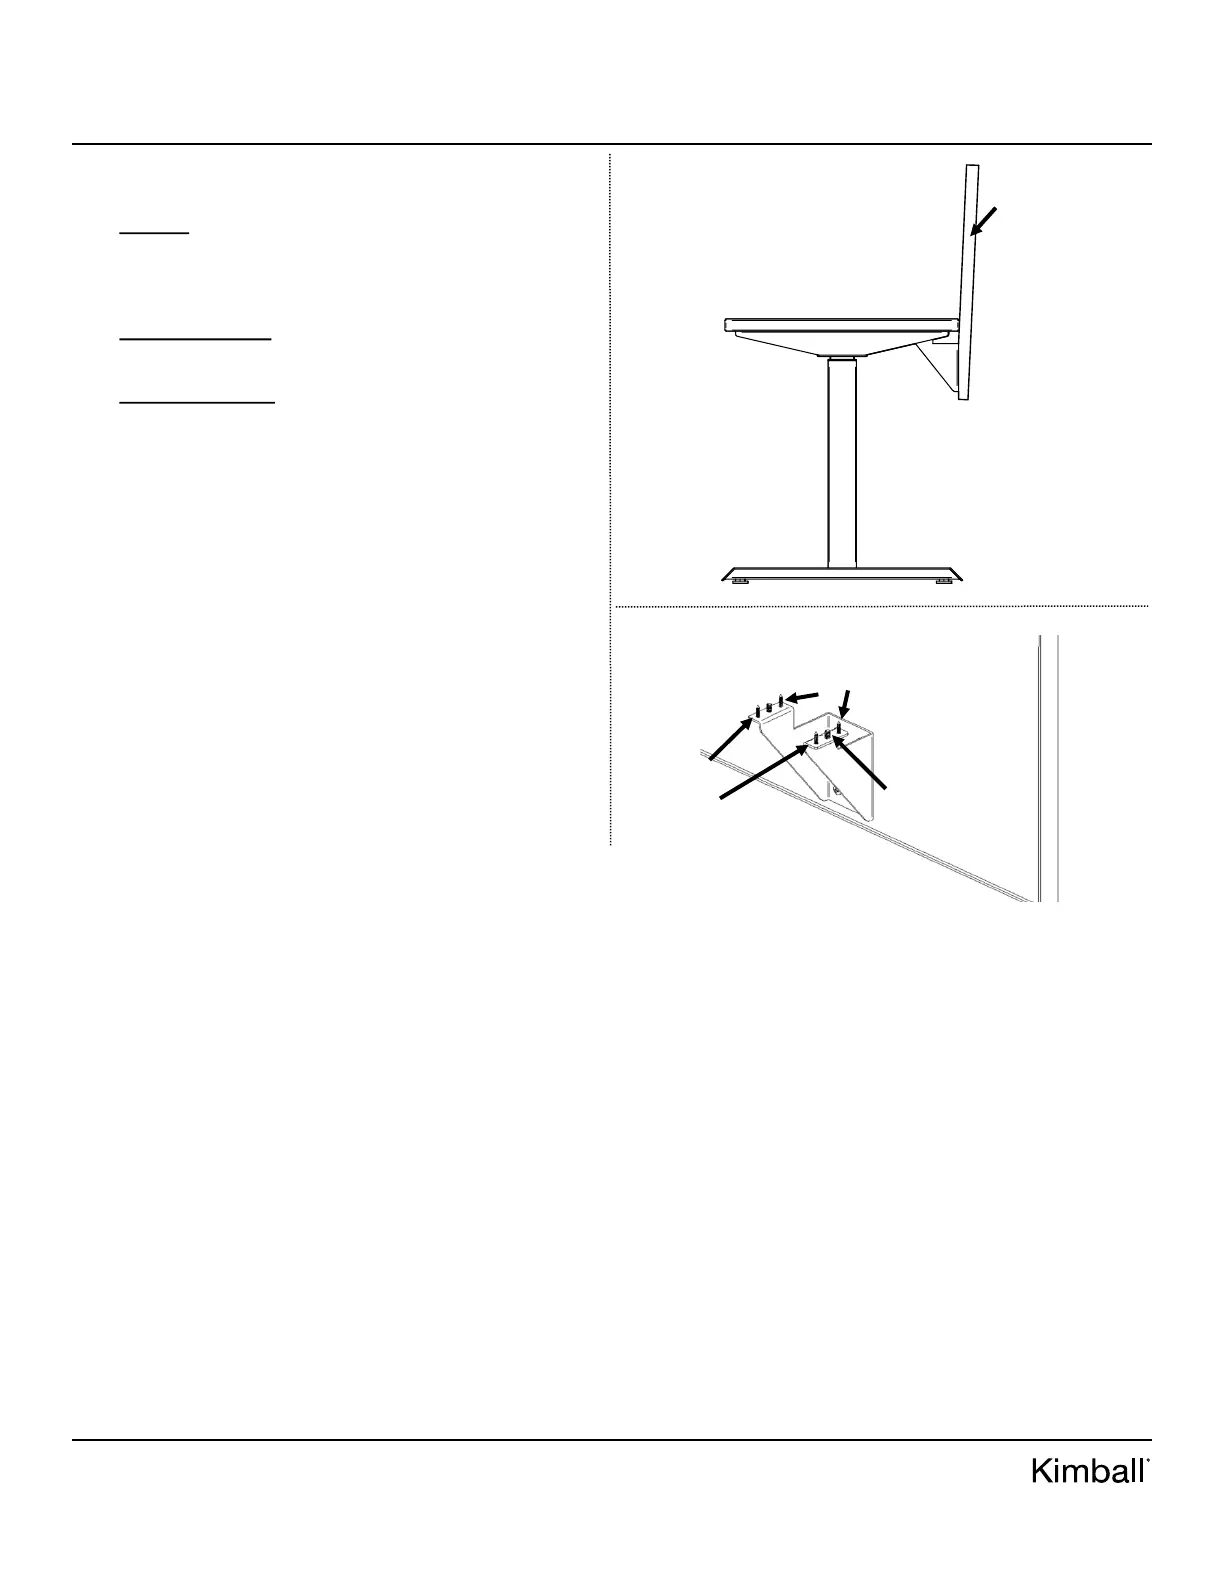
7. After screens have been attached, sight down side view for
required alignment of screen to screen. See Figure E.
8. To align screens vertically, locate the 1/4-20 X 1/2” pan
head machine screw in parts bag. Thread screw into screen
brackets on both sides until tension is felt. This will indi-
cate screw is flush with the bottom of the work surface.
9. Screen leaning in: use #2 Phillips bit drive and unscrew
back wood screws and tighten 1/4-20 X 1/2” Phillips ma-
chine screw until desired vertical position is obtained.
10. Screen leaning out: use #2 Phillips bit drive and unscrew
front wood screws. Tighten 1/4-20 X 1/2” Phillips machine
screw until desired vertical position is obtained.
11. Screw #8 X 3/4” wood screws back into work surface using
#2 Phillips bit drive. Note: Don’t over tighten or screens
will lean.
Figure E
Figure F
1/4-20 X 1/2”
Pan Head
Machine Screw
(set screw)
FRONT
WOOD
SCREWS
BACK
WOOD
SCREWS
SIDE
VIEW
SCREEN
MIS-ALIGNED
(Leaning In)
 Loading...