Xsede®
3
Part 3095953, Revision -
Assembly Instructions
Proper product installation, in accordance with these instructions, is the responsibility of the installing agent. If you have
any questions concerning these instructions, please call Kimball Customer Care.
Xsede Privacy Screens
Tools Required
• Box Cutter/Utility Knife
• Cordless Drill w/#2 Phillips head bit drive
Hardware Required
1 - Privacy Screen
2 - Privacy Screen Brackets
8 - 1/4-20 X 3/4” Pan Head Phillips Wood Screws
2 - 1/4-20 X 1/2” Pan Head Phillips Machine Screws (used for
screen alignment)
8 - Screen Spacers 1/4” Thick
Installation
Note: Privacy Screens should be installed after bases/tops.
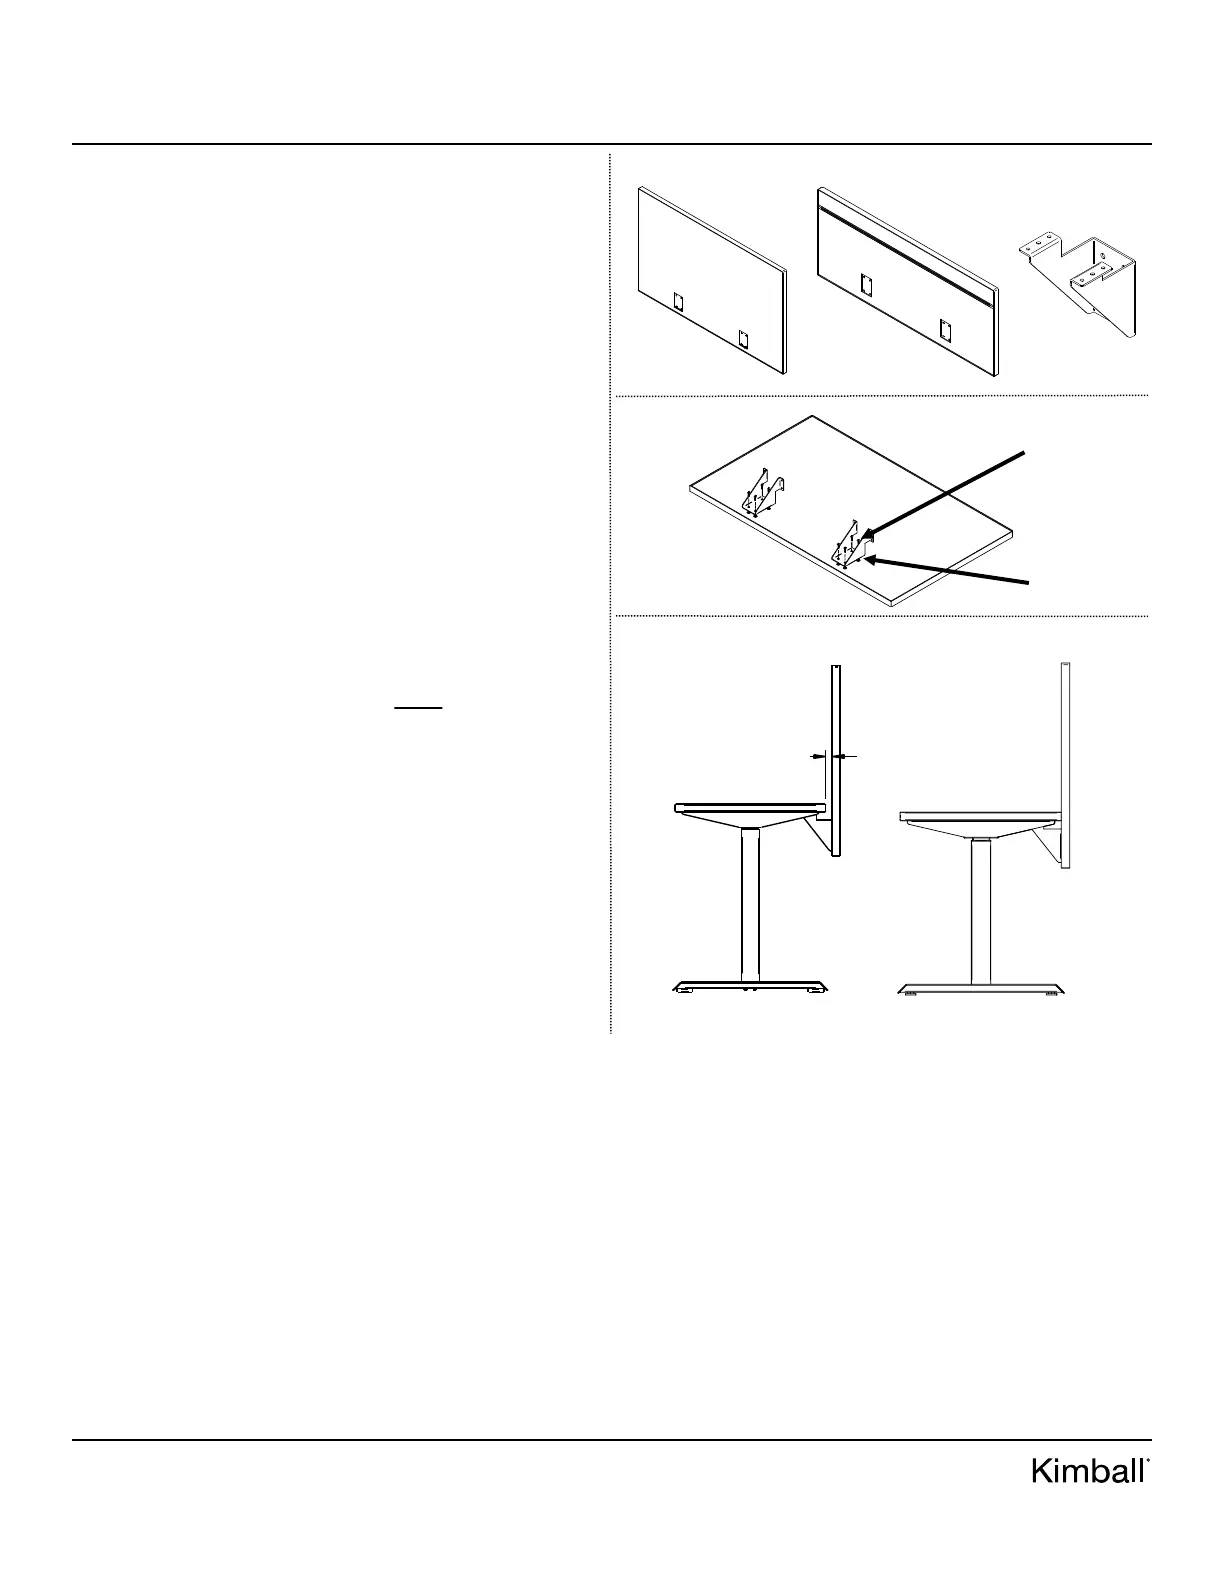
1. Using a knife, open box removing screen, brackets, and
parts bag. See Figure A.
2. Lay screen on a non-marring surface for assembly.
3. Slide screen spacers over threaded inserts. Place screen
brackets over (4) holes positioning as such shown in Fig-
ure B. Attach using drill w/#2 Phillips drive 1/4-20 X 3/4”
machine screws through spacers into inserts. Note: Don’t
over tighten or threaded inserts might pull out of core.
4. When assembling screen to L-base or Single base, there is a
range to mount screen either flush to top - or maximum 1”
wire gap. This is to ensure table stability. Don’t exceed
1” gap between surface and screen. See Figure D for
mounting options.
5. When attaching screens to bench base, there *MUST* be a
1” gap in between screens for prevention of pinched fingers
when screens raise and lower. See Figure D.
6. To attach privacy screens, the edge of screen and edge of
work surface will set flush to each other as shown in Fig-
ure C, left picture. For screen attachments, using drill w/
#2 Phillips drive, attach all #8 X 3/4” wood screws, 4 for
each bracket to worksurface.
Figure A
Figure B
Figure C
 Loading...