EasyManua.ls Logo

Kimball XSEDE - User Manual

Kimball XSEDE
4 pages
Print Icon
To Next Page IconTo Next Page
Loading...
Xsede®
1
Part 3095953, Revision -
Assembly Instructions
Proper product installation, in accordance with these instructions, is the responsibility of the installing agent. If you have
any questions concerning these instructions, please call Kimball Customer Care.
Tools Required
Box Cutter/Utility Knife
Cordless Drill (optional; for M4 Allen drive ONLY)
(2) M4 Allen key/drive
Hardware Required
1 - Center Screen
4 - M6-1 X 12 Button Head Cap Machine Screws
4 - M6 Rhombus Nuts
4 - M8-1.25 X 8MM Set Screws
Installation
Note: Center Screens should be installed after bases/tops.
1. Using a knife open boxes removing all components/
hardware carefully and place aside. See components in Fig-
ure A.
2. Push button head screws through holes on brackets and
thread rhombus nuts onto button head screws on the bottom
side of bracket. See Figure B. Note: Thread rhombus
nuts loosely onto button head screws. Over threading
wont allow the rhombus nuts to turn in extrusion. See
Step 4.
3. Place screen carefully on top of aluminum extrusion, push-
ing rhombus nuts into grooves in extrusion. Center screen
in between data beam. See Figure C, Note: check rhom-
bus nuts are oriented as shown in Figure B correctly
before completing this step. This is to make sure screen
drops into accessory rail.
4. Tighten button head screws threading rhombus nuts using
M4 Allen drive. Rhombus nuts will turn as you tighten but-
ton head screws.
5. Sight down side view of data beam and check for alignment
of screen to screen requirements. If screens are leaning a
certain way, see next step.
Figure A
Figure B
Nut
Orientation
(Bottom View)
Fastener
Attachment
Fastener
Threading
Figure C
Figure E
Figure D
LOOSEN
CONNECTOR
BOLT & NUT;
BOTH SIDES
OF SCREEN
Xsede Fixed Center Screen
Accessory Rail Mount
SIDE VIEW
EXTRUSION
SCREEN 1
SCREEN 2
SCREEN 3
SIDE
VIEW
Question and Answer IconNeed help?

Do you have a question about the Kimball XSEDE and is the answer not in the manual?

Summary

Xsede Fixed Center Screen Accessory Rail Mount

Installation Steps

Detailed instructions for attaching the Xsede fixed center screen.

Screen Alignment and Adjustment

Guidance on adjusting screen angles and ensuring proper alignment.

Xsede Privacy Screens

Installation Process

Steps for installing privacy screens, including bracket and screw usage.

Screen Alignment and Mounting Options

Adjusting screen vertical alignment and mounting to surfaces.

Overview

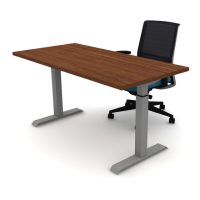
This document outlines the installation and adjustment procedures for the Xsede Fixed Center Screen Accessory Rail Mount and Xsede Privacy Screens, manufactured by Kimball.

Xsede Fixed Center Screen Accessory Rail Mount

Function Description:

The Xsede Fixed Center Screen Accessory Rail Mount is designed to securely attach a center screen to an aluminum extrusion, likely part of a larger furniture system such as a desk or workstation. This mount ensures the screen is centered and properly aligned within the system, providing a stable and integrated display solution.

Important Technical Specifications:

  • Hardware Required:
    • 1 - Center Screen (the screen itself, not part of the mount kit)
    • 4 - M6-1 X 12 Button Head Cap Machine Screws
    • 4 - M6 Rhombus Nuts
    • 4 - M8-1.25 X 8MM Set Screws
  • Tools Required:
    • Box Cutter/Utility Knife (for opening packaging)
    • Cordless Drill (optional, specifically for M4 Allen drive)
    • (2) M4 Allen key/drive (for tightening screws)

Usage Features:

  • Installation Process:
    1. Unpacking: Carefully remove all components and hardware from the packaging.
    2. Initial Assembly: Push button head screws through bracket holes and loosely thread M6 rhombus nuts onto the screws on the bottom side of the bracket. It's crucial not to overtighten at this stage to allow the rhombus nuts to turn freely in the extrusion.
    3. Screen Placement: Carefully place the screen on top of the aluminum extrusion, guiding the rhombus nuts into the extrusion grooves. The screen should be centered between the data beam. Ensure the rhombus nuts are correctly oriented as shown in Figure B (Nut Orientation - Bottom View) to facilitate proper engagement with the accessory rail.
    4. Tightening: Tighten the button head screws using an M4 Allen drive. This action will cause the rhombus nuts to turn and secure the screen.
  • Alignment and Adjustment:
    • Initial Check: After tightening, visually inspect the screen from a side view to check for alignment. If the screen is leaning, further adjustment is needed.
    • Tilting Adjustment (Figure G):
      • If the screen is leaning, loosen the connector bolts and nuts that hold the brackets and screen together using two M4 Allen key/drives (as shown in Figure E).
      • Locate the M8 set screws underneath the channel of the screen bracket on both sides (as shown in Figure F).
      • Tilting Right: If the screen is leaning to the right, tighten the set screws on the opposite side of the bracket.
      • Tilting Left: If the screen is leaning to the left, tighten the set screws on the opposite side of the bracket.
      • Use the M4 Allen key provided in the bench base parts box to loosen and tighten the set screws.
      • After alignment is achieved, tighten the connector bolts and nuts using two M4 Allen drive/keys. Avoid overtightening, as this can cause the screens to lean again.

Maintenance Features:

  • The instructions emphasize careful handling during installation to prevent damage to components.
  • Proper tightening of screws and nuts is crucial for stability and alignment, suggesting that periodic checks might be beneficial to maintain the screen's position.
  • The use of standard Allen keys for adjustments means that maintenance can be performed with common tools.

Xsede Privacy Screens

Function Description:

The Xsede Privacy Screens are designed to be attached to workstations (L-base, Single base, or bench base) to provide privacy. The installation process ensures proper alignment with the work surface and allows for a specific wire gap, contributing to both functionality and aesthetics.

Important Technical Specifications:

  • Hardware Required:
    • 1 - Privacy Screen (the screen itself)
    • 2 - Privacy Screen Brackets
    • 8 - 1/4-20 X 3/4" Pan Head Phillips Wood Screws (for attaching brackets to the work surface)
    • 2 - 1/4-20 X 1/2" Pan Head Phillips Machine Screws (used for screen alignment)
    • 8 - Screen Spacers 1/4" Thick (placed between bracket and wood core)
  • Tools Required:
    • Box Cutter/Utility Knife (for opening packaging)
    • Cordless Drill with a #2 Phillips head bit drive (for driving screws)

Usage Features:

  • Installation Process:
    1. Unpacking: Open the box and carefully remove the screen, brackets, and parts bag.
    2. Preparation: Lay the screen on a non-marring surface.
    3. Bracket Attachment: Slide the 1/4" thick screen spacers over the threaded inserts on the screen. Position the privacy screen brackets over the four holes, as shown in Figure B. Attach the brackets using the 1/4-20 X 3/4" machine screws through the spacers into the inserts. Caution: Do not overtighten, as this can cause the threaded inserts to pull out of the screen's core.
    4. Mounting to Base (L-base or Single base):
      • When attaching to an L-base or Single base, the screen can be mounted either flush with the top of the work surface or with a maximum 1" wire gap. This gap is critical for table stability. Do not exceed 1" between the surface and the screen.
    5. Mounting to Bench Base:
      • When attaching to a bench base, a 1" gap MUST be maintained between the screens. This is a safety feature to prevent pinched fingers when the screens are raised or lowered.
    6. Attaching to Worksurface: The edge of the screen and the edge of the work surface should be flush (as shown in Figure C, left picture). Use a drill with a #2 Phillips drive to attach the privacy screens. Drive all eight #8 X 3/4" wood screws (four for each bracket) into the worksurface.
  • Alignment and Adjustment:
    • Initial Check: After attachment, visually inspect the screen from a side view to ensure proper alignment.
    • Vertical Alignment: Locate the 1/4-20 X 1/2" pan head machine screw from the parts bag. Thread this screw into the screen brackets on both sides until tension is felt. This indicates the screw is flush with the bottom of the work surface.
    • Correcting Leaning (Figure E):
      • Screen Leaning In (towards the user): Use a #2 Phillips bit drive to unscrew the back wood screws. Then, tighten the 1/4-20 X 1/2" Phillips machine screw until the desired vertical position is achieved.
      • Screen Leaning Out (away from the user): Use a #2 Phillips bit drive to unscrew the front wood screws. Then, tighten the 1/4-20 X 1/2" Phillips machine screw until the desired vertical position is achieved.
    • Final Tightening: Once alignment is set, screw the #8 X 3/4" wood screws back into the work surface using a #2 Phillips bit drive. Caution: Do not overtighten, as this can cause the screens to lean.

Maintenance Features:

  • The instructions emphasize careful handling during unpacking and assembly to prevent damage to the screen and its components.
  • The warning against overtightening screws (both machine screws for brackets and wood screws for attachment) highlights the importance of proper torque to prevent damage to the screen's core and maintain alignment.
  • The use of standard Phillips head screws and a cordless drill makes installation and subsequent adjustments relatively straightforward.
  • The specific instructions for correcting leaning screens provide a clear maintenance procedure for ensuring optimal screen alignment over time.

Kimball XSEDE Specifications

General IconGeneral
BrandKimball
ModelXSEDE
CategoryIndoor Furnishing
LanguageEnglish

Related product manuals