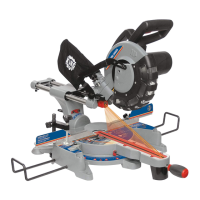
Do you have a question about the King Canada 8385N and is the answer not in the manual?
| Brand | King Canada |
|---|---|
| Model | 8385N |
| Category | Saw |
| Language | English |
Keep dated proof for warranty and servicing purposes.
Replacement parts are available at authorized King Canada service centers.
2-year limited warranty covering defects in materials and workmanship.
Manual serves as a guide; specifications are subject to change.
Refer to the King Canada website for updated parts diagrams and lists.
Ensure proper voltage, grounding, and avoid electrical hazards.
Follow safe practices for handling, operation, and personal protective equipment.
Maintain a clean, well-lit, and safe work environment, keeping others away.
Keep tool maintained, use correct accessories, and check for damage.
Use correct blades and avoid cutting prohibited materials.
Follow procedures for starting, stopping, and disconnecting the saw safely.
Ensure proper setup, blade sharpness, and workpiece security during operation.
Adhere to general advice for cleaning, support, and tool care.
Connect to a 110-120V, 15-AMP circuit breaker to avoid shock or fire.
Machine must be grounded; use proper outlet and plug.
Machine is ready for 110-120V operation with correct outlet/plug.
Use appropriate gauge extension cords to prevent power loss.
Check for damage, remove packing materials and loose parts.
Assemble and tighten the miter lock handle before any cut.
Utilize positive stops for common angles; lock table securely.
Install vertical vise on the left or right side of the guide fence.
Use extension wings to support workpieces; extend and secure.
Attach dust bag for efficient operation; empty when half full.
Secure saw to a bench using bolts; ensure surface is not warped.
Slide fence extensions outwards for support; ensure clearance for bevel cuts.
Adjust stop to limit cut depth; use adjustment screw and lock nut.
Loosen lock knob and adjust head for desired bevel angle; retighten.
Align blade to table using a square; adjust bevel lock knob and screws.
Adjust 45° stop bolts after setting blade square; use combination square.
Align fence to blade using a square; loosen/retighten screws as needed.
Align cut line with laser beams before cutting; do not stare into lasers.
Adjust laser guide assembly position for accurate kerf alignment.
Perform 90° crosscuts with miter/bevel at 0°; ensure slide lock is engaged.
Use sliding action for wide workpieces; unlock slide knob.
Cut across grain with blade angled to fence; set miter to 0° and bevel as needed.
Use miter and bevel angles simultaneously for complex cuts; test cut first.
Adhere to warnings regarding blade size, thickness, and material cutting.
Step-by-step guide for blade replacement, including safety precautions.
Ensure blade teeth point downwards; check rotation arrow.
Ball bearings sealed; clean tool regularly. No other maintenance required.
Wipe off chips/dust; keep guards clean; lubricate sliding parts.
Check/replace carbon brushes after approx. 50 hours of use; wear limit noted.

