King Electrical Floor Heating Cable Installation Manual
17
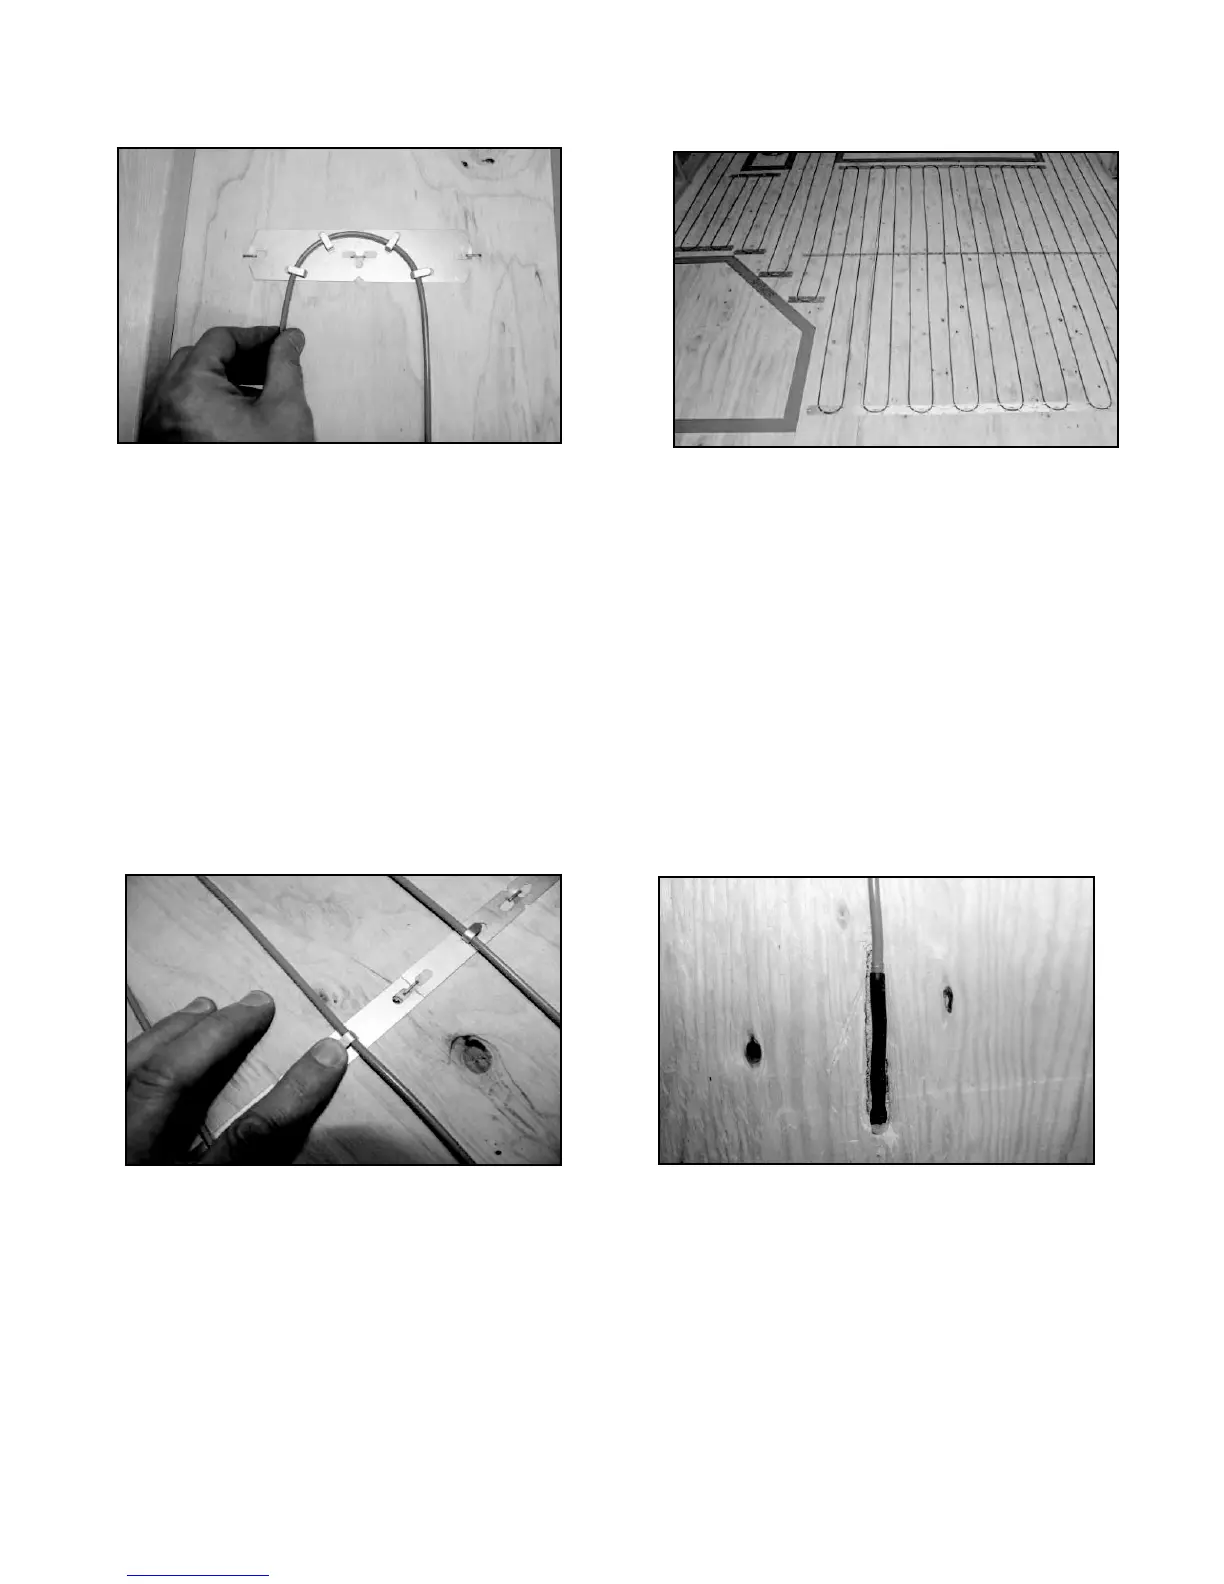
8.1 Begin at the cold lead splice by running the blue
heating cable into the first end strap. Pull the cable
around the end strap keeping light tension on the
cable while seating it under as well as all the way
into the tabs. The tabs are designed in a semicircle
creating a 180 degree turn while maintaining the
proper 1” bend radius.
8.3 Once the area is completed, lightly press down the
center straps and one hole straps to secure the cable.
DO NOT use a tool, push lightly by hand. It is not
Necessary to clamp the cable firmly, apply just
enough pressure to keep the cable from coming up
when applying the thin set. It is not necessary to push
down the end straps as the tension on the cable will
be hold under the tabs in the semicircle.
8.5 The tail splice is slightly larger in diameter than the
heating cable and must be recessed into the subfloor.
Make a .25” channel into the subfloor and secure the
tail splice into the channel and secure with hot glue.
8.4 At the end of the run use the one hole strapping pieces,
cut from the center strapping to secure the cable.
ALWAYS maintain a minimum distance of 2” spacing.
IMPORTANT: NEVER LAY ONE CABLE OVER THE TOP OF ANOTHER.
NEVER STAPLE OVER A CABLE, AND ONLY USE
STRAPPING TAB TO HOLD DOWN THE CABLE.
8.2 Lace the heating cable back and forth while maintaining
light tension. Lace across the area desired spacing, DO
NOT space cable closer than 2”. DO NOT pull the cable
too tight. It is only necessary to create enough tension to
keep the cable from lifting up when applying thin set.
Lace around end straps
Weave cable back and forth
Push down center strap tabs
Chisel grove for end splice and secure
STEP 8: Lacing the cable through the strapping