Do you have a question about the KINGrinder K4 and is the answer not in the manual?
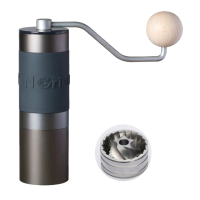
The KINGrinder is a manual coffee grinder designed for precision grinding with an exterior adjustment mechanism. It is suitable for both K4 and K6 models, offering a range of grind settings from extra fine to coarse, catering to various brewing methods.
The primary function of the KINGrinder is to grind roasted coffee beans into a desired consistency. It operates manually, requiring the user to load beans into the chamber and then turn a handle to actuate the burr set. The grinder's design emphasizes control over the grind size, allowing users to fine-tune their coffee preparation. The exterior adjustment nut is a key feature, enabling easy and precise changes to the grind setting without disassembling the unit. This makes it convenient for users who frequently switch between different brewing methods that require varying grind sizes. The internal mechanism involves a burr set that crushes the beans, a spring to maintain tension, and bearings to ensure smooth operation. The receiver collects the ground coffee, making it ready for brewing.
Operating the KINGrinder is straightforward. To begin, the user rotates the adjustment nut to select the desired grind setting. The adjustment nut has clear markings, including a zero point and numerical indicators, to guide the user. After setting the grind, the handle and PC lid are removed, and 30-35 grams of coffee beans are loaded into the grinder. The PC lid and handle are then reattached, and the handle is spun clockwise until all the beans are ground.
The grinder offers flexibility in how the PC lid and handle are used. In its default setting (Method A), the PC lid and handle are separate, which allows for "drill-grinding" if desired, implying the possibility of attaching a drill for automated grinding. Alternatively, for a more integrated setup (Method B), the PC lid and handle can be attached by taking out the black O-ring and placing the white O-ring into the groove, creating a more secure connection.
Adjusting the grind setting is a precise process. To find the zero point, the user gently rotates the adjustment nut clockwise until it reaches zero. It's important to note that the number on the adjustment nut might not perfectly align with the number of clicks from the grind setting, so users should pay attention to the tactile feedback. Once the zero point is established, the user rotates the adjustment nut anti-clockwise to achieve their desired grind size. Rotating the adjustment nut anti-clockwise further will result in a coarser grind, while rotating it clockwise (towards zero) will result in a finer grind. The manual provides a helpful table with recommended grind settings for K4 and K6 models, ranging from "Extra Fine" (15-50 for K4, 15-25 for K6) to "Coarse" (150 for K4 and K6), with intermediate settings like "Fine," "Medium-Fine," and "Medium."
Maintaining the KINGrinder is designed to be simple and to prolong the life of the device. The primary method of cleaning recommended is using a brush. This helps remove residual coffee grounds from the burr set and other internal components without exposing them to moisture.
There are specific instructions on what not to do during maintenance to prevent damage. Users are explicitly advised not to wash the grinder with water. This is crucial as water can damage the internal mechanisms, especially the bearings and burr set, potentially leading to rust or impaired performance. Furthermore, users should not disassemble the burr set unit or the adjustment nut. These components are designed to be integrated and are not intended for user-level disassembly. Finally, it is important not to rotate the adjustment nut when the grinder is already on the zero setting, as this could potentially over-tighten or damage the adjustment mechanism.
For more complex issues or inquiries, users can contact the manufacturer via email at hello@kingrinder.com or visit their website at www.kingrinder.com. Additional resources and community engagement can be found on their Instagram page and Linktree, both under KINGrinder.
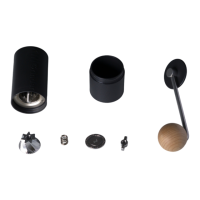
Disassembly for deeper cleaning or part replacement (beyond the burr set unit and adjustment nut) is outlined for advanced users. To disassemble the grinder, the user first rotates the adjustment nut anti-clockwise for a coarser grind, which loosens the internal components. Then, while holding down the burr set with one hand, the circlip is removed with the other. After the circlip is removed, the components can be taken out in order: the burr set (which is attached to the central shaft), the bearing cover, and the spring from the burr set. Following this, the top bearing cover and the top bearing can be removed from above.
To reassemble the grinder, the process is reversed. First, the spring and the bearing cover are put back, followed by the burr set. Next, while holding down the burr set, the top bearing and the top bearing cover are placed. The manual notes that there are two shapes for the top bearing cover: a flat design and a curve design. The curve design shape of the top bearing cover should face upward. Finally, the circlip is slid onto the curve design shape of the top bearing cover with the other hand, securing all components in place. This detailed reassembly guide ensures that users can put the grinder back together correctly after necessary maintenance or inspection.
| Burr Type | Conical |
|---|---|
| Capacity | 30-35g |
| Burr Material | Stainless Steel |
| Adjustment Increment | 16 microns |
| Material | Aluminum alloy |
| Handle Length | 180mm |