!
!
!
!
!
!
!
!
!
!
!
!
!
!
!
!
!
!
!
!
!
!
!
!
!
!
!
OPERATING INSTRUCTIONS CONTINUED
• If you wish to change the temperature for a preset, press “TEMP” on
the display with a light touch and the time display will turn off. Only
the temperature will be shown, and you may rotate the dial to adjust
the temperature from 400ºF to 1550ºF. Press TEMP again to confirm
the setting.
• To change the TIME, press “TIME” and the temperature display will
turn off. Only the time will be shown, and you may rotate the dial to
adjust the time from 30 seconds to 9 minutes and 50 seconds. Press
TIME again to confirm the setting.
• To begin cooking at your selected time and temperature, push the
knob in and the unit will begin preheating.
• The temperature reading will climb until it reaches the set value. The
unit will beep twice when fully preheated and the timer will begin to
countdown.
• To stop the preheating or cooking process, push the knob in. You
will have to reset the temperature, time, or preset to resume cooking.
• Always be sure the Drip Pan is in place at the bottom of the Searing
Oven before cooking your food.
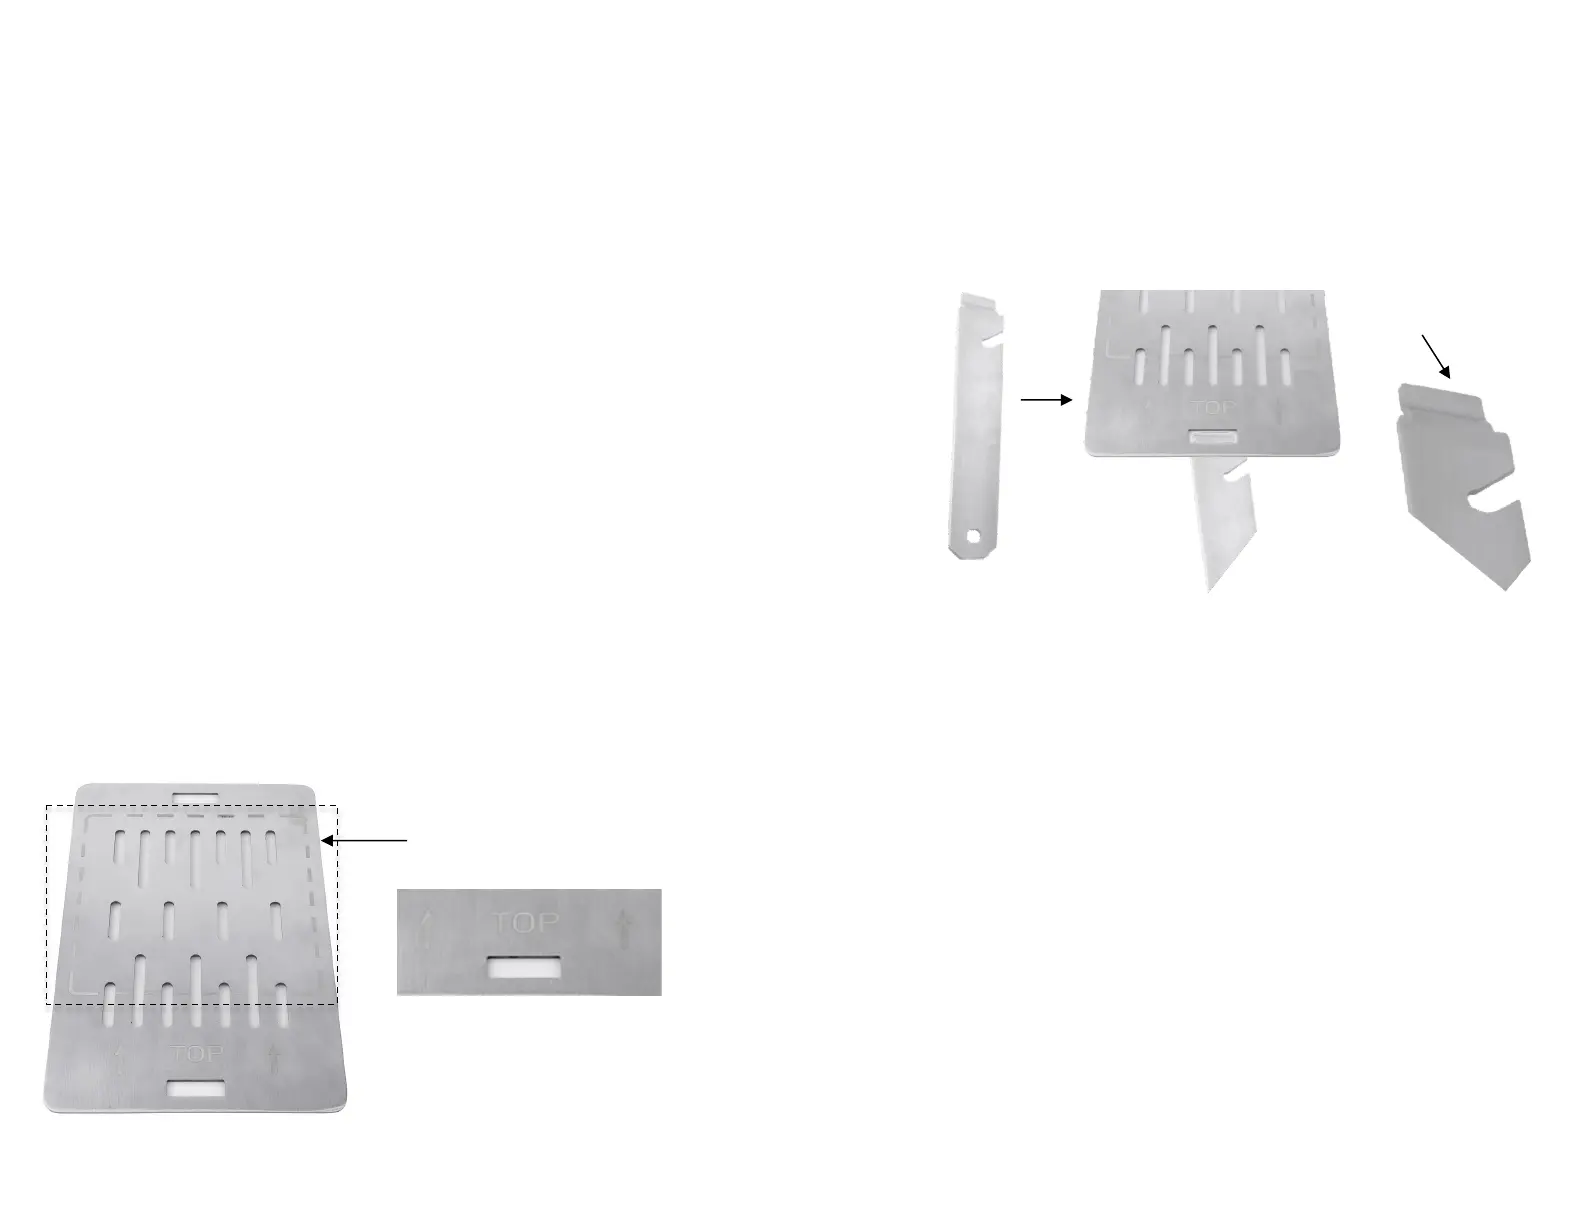
• In order to use the Sear Tray, find the side that says “TOP” with an
arrow and square diagram. This square mirrors the heating element
on the top of the oven when the pan is inserted. Please make sure
to insert the pan with the arrow pointing towards the back of the oven,
so the square is directly under the heating element. Please see
below.
• For best results and even cooking, ensure your food is placed
entirely within the square on the Sear Tray.
OPERATING INSTRUCTIONS CONTINUED
• While your food is cooking, please be sure to watch it closely. The
oven uses high heat and your food may cook very quickly.
• Pull out the Sear Tray using the Guiding Handle to check your food.
Turn or flip your food as needed and slide the Sear Tray back in.
• The notch on the end of the Guiding Handle should be inserted from
the top of the Sear Tray down into the hole. Lower the handle so it
is level and parallel to the pan and you should be able to slide the
Sear Tray out. Please see below:
• When the timer reaches the halfway point, the unit will beep once to
alert you and will continue counting down.
• You may find that your food is done cooking before the timer reaches
zero, depending on your preferences. Please watch your food and
check often.
• When the timer reaches zero, the unit will beep once and then enter
standby mode. If you do not restart the oven, the fan will continue to
run until the unit is cooled down.
• If you feel that your food is not fully done or cooked as desired when
the timer reaches zero, you may repeat the cooking process with the
exact same settings by pressing either “Temp” or “Time” and push
the dial in to restart the oven.
• Please find the chart on the following page for recommended
cooking times for various foods.
• When you are done using the Searing Oven, the unit will return to
standby mode and the fan will begin running. This signals that the
unit is cooling down.
• Cool down time can vary depending on use. On average, it could
take between 5 and 10 minutes.
• Please make sure to switch the unit off and unplug after use.
“TOP” indicates the correct side of
the pan to cook on. The arrows
should be pointed to the back of
the oven when inserting the pan
Square outline that mirrors
where the heating element
is at the top of the oven
This part should be
inserted down into the
space on the Sear Tray
 Loading...