—3
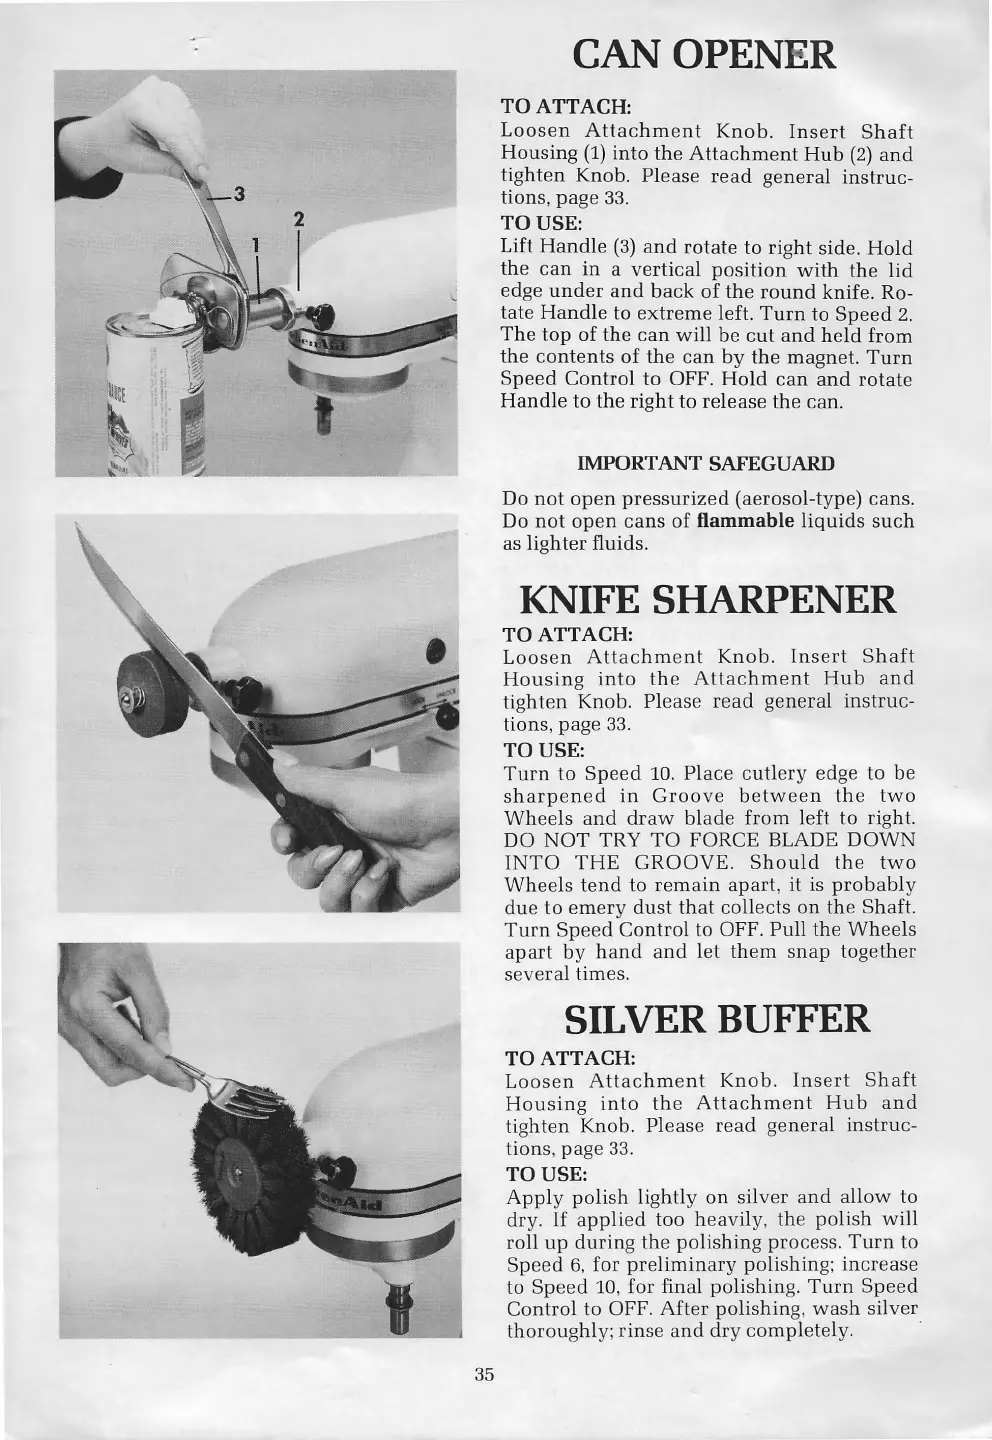
CAN OPENER
TO ATTACH:
Loosen Attachment Knob. Insert Shaft
Housing (1) into the Attachment Hub (2) and
tighten Knob. Please read general instruc-
tions, page 33.
TO USE:
Lift Handle (3) and rotate to right side. Hold
the can in a vertical position with the lid
edge under and back of the round knife. Ro-
tate Handle to extreme left. Turn to Speed 2.
The top of the can will be cut and held from
the contents of the can by the magnet. Turn
Speed Control to OFF. Hold can and rotate
Handle to the right to release the can.
IMPORTANT SAFEGUARD
Do not open pressurized (aerosol-type) cans.
Do not open cans of
flammable
liquids such
as lighter fluids.
KNIFE SHARPENER
TO ATTACH:
Loosen Attachment Knob. Insert Shaft
Housing into the Attachment Hub and
tighten Knob. Please read general instruc-
tions, page 33.
TO USE:
Turn to Speed 10. Place cutlery edge to be
sharpened in Groove between the two
Wheels and draw blade from left to right.
DO NOT TRY TO FORCE BLADE DOWN
INTO THE GROOVE. Should the two
Wheels tend to remain apart, it is probably
due to emery dust that collects on the Shaft.
Turn Speed Control to OFF. Pull the Wheels
apart by hand and let them snap together
several times.
SILVER BUFFER
TO ATTACH:
Loosen Attachment Knob. Insert Shaft
Housing into the Attachment Hub and
tighten Knob. Please read general instruc-
tions, page 33.
TO USE:
Apply polish lightly on silver and allow to
dry. If applied too heavily, the polish will
roll up during the polishing process. Turn to
Speed 6, for preliminary polishing; increase
to Speed 10, for final polishing. Turn Speed
Control to OFF. After polishing, wash silver
thoroughly; rinse and dry completely.
35