EasyManua.ls Logo

KitchenAid KCIG556JBL - User Manual

KitchenAid KCIG556JBL
28 pages
Print Icon
To Next Page IconTo Next Page
Loading...
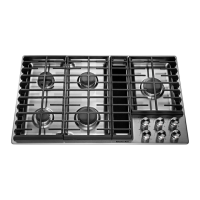
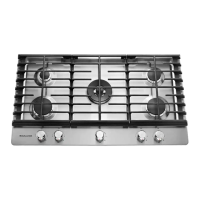
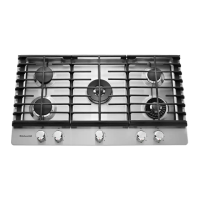
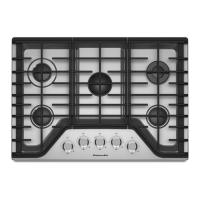
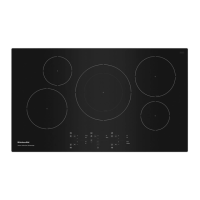
24" (65 CM), 30" (78.2 CM) AND 36" (92.2 CM)
ELECTRIC INDUCTION COOKTOP
INSTALLATION INSTRUCTIONS
INSTRUCTIONS D’INSTALLATION DE LA TABLE DE
CUISSON ÉLECTRIQUE À INDUCTION DE 24 PO
(65 CM), 30 PO (78,2 CM) ET 36 PO (92,2 CM)
INSTRUCCIONES DE INSTALACIÓN DE LA SUPERFICIE
DE COCCIÓN POR INDUCCIÓN ELÉCTRICA
DE 24" (65 CM), 30" (78,2 CM) Y 36" (92,2 CM)
W11362912A
COOKTOP SAFETY ................................... 2
INSTALLATION REQUIREMENTS ............ 3
Tools and Parts ........................................ 3
Location Requirements ........................... 3
Electrical Requirements .......................... 5
INSTALLATION INSTRUCTIONS .............. 6
Prepare Location ..................................... 6
Install Brackets ........................................ 6
Install Cooktop ........................................ 7
Make Electrical Connection .................... 8
Complete Installation .............................. 9
SÉCURITÉ DE LA TABLE DE CUISSON
.. 10
EXIGENCES D’INSTALLATION .............. 11
Outils et pièces ...................................... 11
Exigences d’emplacement .................... 11
Spécicationsélectriques ..................... 13
INSTRUCTIONS D’INSTALLATION ........ 14
Préparation de l’emplacement .............. 14
Installation des supports ....................... 14
Installation de la table de cuisson ......... 15
Raccordement électrique ...................... 16
Terminer l’installation ............................. 17
SEGURIDAD DE LA SUPERFICIE
DECOCCIÓN ........................................... 18
REQUISITOS DE INSTALACIÓN ............ 19
Herramientas y piezas ........................... 19
Requisitos de ubicación ........................ 19
Requisitos eléctricos ............................. 21
INSTRUCCIONES DE INSTALACIÓN .... 22
Preparación de la ubicación ................. 22
Instalación de los soportes ................... 22
Instalación de la supercie decocción .. 23
Cómo hacer la conexión eléctrica ........ 24
Finalización de la instalación ................ 25
IMPORTANT: READ AND SAVE THESE INSTRUCTIONS.
FOR RESIDENTIAL USE ONLY.
IMPORTANT: LIRE ET CONSERVER CES INSTRUCTIONS.
POUR UTILISATION RÉSIDENTIELLE UNIQUEMENT.
IMPORTANTE: LEA Y GUARDE ESTAS INSTRUCCIONES.
SOLO PARA USO RESIDENCIAL.
Table of Contents / Table des matières / Índice
Question and Answer IconNeed help?

Do you have a question about the KitchenAid KCIG556JBL and is the answer not in the manual?

Overview

This document provides installation instructions and safety information for an electric induction cooktop. The manual is presented in English, French, and Spanish, indicating its international applicability.

Function Description:

The device is an electric induction cooktop designed for residential use. It utilizes induction heating technology, which directly heats cookware through an electromagnetic field, offering efficient and precise cooking. The cooktop is available in various sizes: 24" (65 cm), 30" (78.2 cm), and 36" (92.2 cm), catering to different kitchen layouts and cooking needs. The installation instructions cover both standard and flush-mount installations, providing flexibility for integration into diverse countertop designs.

Important Technical Specifications:

  • Dimensions:
    • 24" Model: 21 5/16" (54.1 cm) A, 25 5/8" (65 cm) B, 3 11/16" (9.4 cm) C. Cutout dimensions: 20 3/8" (51.7 cm) F, 21 7/8" (55.6 cm) J. Flush mount: 25 13/16" (65.5 cm) X, 21 7/16" (54.5 cm) J.
    • 30" Model: 21 5/16" (54.1 cm) A, 30 3/4" (78.2 cm) B, 3 11/16" (9.4 cm) C. Cutout dimensions: 20 3/8" (51.7 cm) F, 29 9/16" (75.1 cm) J. Flush mount: 31" (78.7 cm) X, 21 7/16" (54.5 cm) J.
    • 36" Model: 21 5/16" (54.1 cm) A, 36 5/16" (92.2 cm) B, 3 11/16" (9.4 cm) C. Cutout dimensions: 20 3/8" (51.7 cm) F, 35 9/16" (90.3 cm) J. Flush mount: 36 1/2" (92.7 cm) X, 21 7/16" (54.5 cm) J.
    • Framed Models (KitchenAid/Whirlpool): Specific dimensions are provided for framed models, including A (depth), B (width), and C (height) for 30" and 36" sizes. For example, a 30" KitchenAid framed model has A: 21 11/16" (55.1 cm), B: 31 1/8" (79.1 cm), C: 3 9/16" (9.0 cm).
  • Electrical Requirements:
    • Voltage: 240 V AC at 60 Hz, or 208 V AC at 60 Hz.
    • Circuit Breaker: A separate 50 A circuit for 24" (65 cm) and 30" (78.2 cm) models, and a 40 A circuit for 36" (92.2 cm) models.
    • Wiring: Copper wire, minimum 8-gauge. The cooktop must be grounded.
    • Connection: Direct connection to a fused, metallic, sheathed, flexible conduit. A UL listed or CSA approved conduit connector must be used.
    • Junction Box: Must be located within 12" (30.5 cm) from the bottom of the cabinet and 10" (25.4 cm) from the right side of the cabinet.
  • Clearances:
    • Minimum 30" (78.2 cm) clearance between the cooktop surface and the bottom of an uncovered metal or wood cabinet above. This can be reduced to 24" (61 cm) if the bottom of the cabinet is covered with at least 1/4" (6.4 mm) flame retardant millboard covered with no less than 28-gauge sheet metal.
    • Minimum 18" (45.7 cm) horizontal clearance from upper cabinet to countertop.
    • Minimum 1" (2.5 cm) clearance from the nearest combustible surface to the left or right above the cooktop.
    • Minimum 1" (2.5 cm) clearance from the back wall to the countertop.
    • For proper ventilation, a cutout in the rear cabinet wall is required.

Usage Features:

  • Safety First: The manual emphasizes safety with prominent "DANGER" and "WARNING" alerts. Users are instructed to read and obey all safety messages to prevent serious injury or death.
  • Installation Flexibility: The cooktop can be installed over a built-in oven or in a countertop. Specific instructions are provided for both scenarios, including details on bracket installation for marble, wood, and other countertop materials.
  • Tools Required: Basic tools like a tape measure, marker or pencil, flat-blade screwdriver, Phillips head screwdriver, pliers, 1/4" drill bit, hand or electric drill, jigsaw, and a level are needed for installation.
  • Parts Supplied: The cooktop comes with brackets (#6 x 3/4" (1.9 cm) clamping screws), #8 x 3/8" (9.5 mm) sheet metal screws (6 screws for 24" (65 cm) models, and 7 screws for 30" (78.2 cm) and 36" (92.2 cm) models), UL listed or CSA approved strain relief, UL listed wire connectors, and a UL approved junction box or 240 V outlet. A Cooktop Bracket Adhesive Kit (Part Number W11279478) is required for installation into a marble countertop.
  • Electrical Connection Options: Detailed instructions are provided for connecting the cooktop to a 3-wire or 4-wire cable from the home power supply, ensuring compliance with local codes. Diagrams illustrate the wiring connections for both scenarios.
  • Post-Installation Check: After installation, users are advised to check that all parts are installed, all tools are removed, packaging materials are disposed of, and the cooktop is clean. It's also important to reconnect power and verify proper operation.

Maintenance Features:

  • Troubleshooting: The manual suggests checking the "Troubleshooting" section in the Use and Care Guide if the cooktop does not work after turning on the power or if a circuit breaker has tripped.
  • Assistance and Service: For assistance or service, users are directed to refer to the "Assistance or Service" section of the Use and Care Guide or contact the dealer from whom the cooktop was purchased.
  • Future Servicing: The design allows for easy removal of the cooktop from the countertop for future servicing by not permanently fixing it with brackets or sealing it to the countertop.
  • Cleaning: After installation, the cooktop surface should be cleaned with a soft cloth and a mild liquid household cleaner to remove any residue.

KitchenAid KCIG556JBL Specifications

General IconGeneral
BrandKitchenAid
ModelKCIG556JBL
CategoryCooktop
LanguageEnglish

Related product manuals