Do you have a question about the KitchenAid KDFX 6050 and is the answer not in the manual?
This document is a product sheet for the KitchenAid KDFX 6050 dishwasher, providing brief instructions, an overview, a quick reference guide, details on how to use the appliance, precautions, general recommendations, and troubleshooting information.
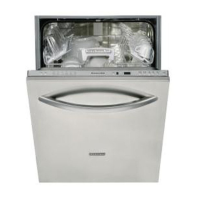
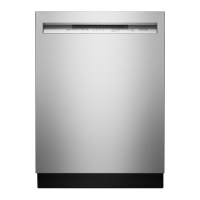
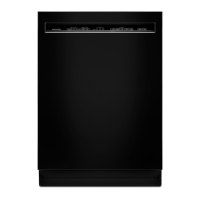
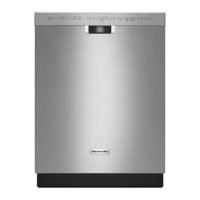
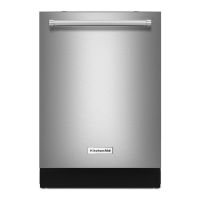
The KitchenAid KDFX 6050 is a dishwasher designed to clean crockery and cutlery efficiently. It offers various wash programmes and features to optimize cleaning and drying results while ensuring energy and water savings. The appliance is equipped with indicators and controls to guide users through its operation, from programme selection to maintenance.
Programme Selection and Start:
The dishwasher features a Programme selection button (P) which, when pressed repeatedly, cycles through available programmes. The selected programme's indicator light illuminates. The last selected programme is saved at the end of a wash cycle. To start a programme, after selecting it, the Start/Resume button (▷) must be pressed. The dishwasher will automatically switch on when any button is pressed, except for the Stop/Off button (S). If no button is pressed within 30 seconds, the appliance enters Energy Saving mode.
Time and Malfunction Display:
An 8:88 display shows the remaining time in h:mm during normal operation. If Delayed start is active, it shows the time remaining until the programme starts (e.g., h 01). For sensor programmes, a dotted line indicates a calibration process (up to 20 minutes). Malfunction codes like "F../E.." are displayed if a fault occurs, prompting users to consult the troubleshooting section.
Half Load/Multi-zone Function:
The Half load/multi-zone button (Z) allows users to wash dishes in only the upper or lower rack, saving resources. By default, both racks are washed. Pressing the button once selects the lower rack, and pressing it twice selects the upper rack. The "Wash bottom rack" indicator lamp lights up if the top rack is not being washed. The most recently selected setting is saved.
Dynamic Clean:
The Dynamic Clean button (※) activates a function that provides higher pressure with an additional jet for improved cleaning results and greater flexibility in loading the bottom rack. The indicator lamp lights up when this function is active. This setting is also saved at the end of the programme.
Detergent Setting:
The dishwasher allows for different detergent types. The Detergent setting button (3 sec.) is used to switch between powder/gel detergent (indicator light off, factory setting) and combined detergents (indicator light on). When using combined detergents, the salt and rinse aid indicators will go out, except for water hardness level 5 and above, where the salt indicator remains on. This setting is saved.
Delayed Start:
The Delayed start button (Q) allows users to postpone the start of a programme by 1 to 24 hours, in hourly steps. After setting the desired delay, the Start button must be pressed.
Stop/Off Function:
The Stop/Off button (S) switches the dishwasher off or interrupts a running programme. If this indicator light flashes repeatedly, it signals a fault.
Salt and Rinse Aid Level Indicators:
The Salt level indicator (S) and Rinse aid level indicator (亡) light up at the end of a programme if these consumables need topping up. They should be refilled before starting a new wash cycle.
Running Programme Indicator: An LED light projected on the floor indicates that the dishwasher is currently operating.
Loading Racks:
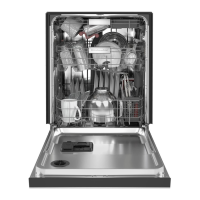
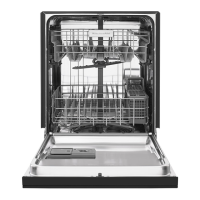
The dishwasher features a Cutlery rack that can be used in two positions. For optimal washing, cutlery should be placed with spoon handles facing inwards. Sharp items should be handled with care. The Upper rack includes an Adjustable glass holder (B) for small glasses or stemware. The upper rack height can be adjusted even when loaded by pulling out the two side handles (C) to lower it, or pulling them up until it clicks into place to raise it. The two handles must be level. The upper rack/cutlery rack can be removed if the appliance has adjustable retainers (D) to accommodate larger items like cake pans. The Lower rack has Plate holders (E) that can be partially folded for loading flexibility. The Dynamic Clean feature utilizes special nozzles at the rear of the dishwasher, requiring pots to be positioned with their insides facing these nozzles. For Half load/Multizone option, the lower rack is used by pressing the Half load/Multizone button once. Crockery should be arranged to prevent water collection in cavities and ensure free rotation of spray arms. Only dishwasher-proof dishes should be used.
Detergent Dispenser: The detergent dispenser should be filled just before starting a wash programme. Only detergents specifically recommended for dishwashers should be used, following manufacturer's dosage instructions. The dispenser has two compartments: a large one (A) and a small one (B). For programmes without pre-wash, the entire dosage goes into compartment A. For programmes with pre-wash, 2/3 goes into A and 1/3 into B. Dishwasher tabs go into compartment A. If the "Half load" option is selected, detergent dosage should be reduced by approximately 1/3. The lid must be firmly pressed shut after filling.
Rinse Aid Dispenser: The rinse aid level can be checked visually via indicator C on the dispenser (dark = sufficient, clear = needs refilling). Appliances with an electric indicator on the control panel will light up the rinse aid indicator at the end of the wash cycle when a refill is needed. To fill, press the right button (button 2) to open the compartment, fill up to the "max" line (approx. 150 ml), and then close the lid. The rinse aid dosage can be adjusted using a regulator (factory setting: position 4). Turning the dial to a lower setting (1-3) reduces dosage, while a higher setting (5-6) increases it. This adjustment helps prevent whitish streaks or improve drying.
Salt Container: Regeneration salt, specifically for dishwashers, is required. The salt level can be checked visually through the salt reservoir cap (clear = needs refilling, coloured = sufficient). Appliances with an electric indicator will light up the salt indicator (S) at the end of the wash cycle when a refill is needed. To fill, remove the lower rack, turn the salt container cap anti-clockwise, and fill the container to the rim with water (first use) or salt using a funnel (min. 0.8 kg, max. 1 kg). Stir with a wooden spoon to dissolve the salt, then close the cap clockwise and refit the lower rack. A wash programme (not just pre-wash) must be started immediately after adding salt to prevent corrosion.
Water Hardness Level Setting: The water hardness level can be set by pressing and holding the programme selection button and the Cancel/Off button for at least three seconds. The display or LEDs for programmes 1-3 indicate the current hardness setting (1-7). Each successive press of the programme selection button increases the setting, returning to 1 after 7. The setting is saved by pressing and holding the START button or waiting 30 seconds. The factory setting is 4 (medium-hard water).
Changing a Programme in Progress:
To change a programme, press the Cancel/Off button. The dishwasher will drain water for up to 60 seconds with the door closed. Then, open the door, select a new programme, and press the START button.
Interrupting a Wash Cycle:
The wash cycle can be interrupted at any time by pressing the Cancel/Off button. The appliance will drain water for about 60 seconds (with the door closed) and then switch off automatically.
End of Programme: At the end of a programme, all lights switch off and a beep sounds. The door should be opened carefully to avoid hot steam. Unload the lower rack first to prevent water drips onto clean crockery. For better drying, leaving the door slightly ajar allows steam to dissipate.
Troubleshooting Guide: The manual provides a comprehensive troubleshooting guide for common issues. It lists possible causes and solutions for problems such as the appliance not starting, error codes (e.g., "F6/E2", "F6/E7", "F6/E3", "F8/E1"), crockery not being clean, deposits, rust marks, streaks, suds, opaque glasses, discoloured plastic parts, and dishes not drying properly.
Resetting the Appliance:
In case of a fault, after attempting the suggested solutions, the appliance can be reset by pressing the Cancel/Off button. The dishwasher will drain water for up to 60 seconds with the door closed and then be ready to restart.
Filter Cleaning: The troubleshooting guide mentions that filters must not be dirty or clogged, implying that regular cleaning of the filters is a necessary maintenance task.
Spray Arm Check: The guide also advises ensuring that spray arms are not clogged and can turn freely, indicating that periodic inspection and cleaning of the spray arms are part of maintenance.
Water Inlet Hose and Filter Check: For water supply issues, the manual suggests checking that the water inlet hose is not kinked and that the relative inlet filter in the water tap connector is not dirty or clogged.
Drain Hose Check: For drainage problems, it is recommended to check that the drain hose is fitted correctly and not kinked, and that the retaining washer of the syphon hose connection is removed if applicable.
Detergent Storage: Users are advised to store detergent in a dry place and not for excessively long periods to maintain its effectiveness.
Frost Protection: If the appliance is in an area exposed to frost, it must be completely drained. This involves turning off the water tap, removing inlet and outlet hoses, and letting all water run out. At least 1 kg of dissolved regeneration salt should be in the salt reservoir to protect the appliance down to -20°C. If an error message appears after resuming operation, the appliance must remain at an ambient temperature of at least 5°C for 24 hours before resetting.
Disposal: The appliance is manufactured with recyclable materials. For disposal, it must be rendered unusable by cutting the power cord and breaking the door lock. It should be delivered to a collection centre for recycling electrical and electronic appliances, in compliance with local environmental regulations.
| Type | Built-In |
|---|---|
| Number of Wash Cycles | 6 |
| Number of Racks | 2 |
| Place Settings | 14 |
| Energy Star Certified | Yes |
| Delay Start | Yes |
| Soil Sensor | Yes |
| Third Rack | No |
| Stainless Steel Tub | Yes |
| Control Type | Electronic |