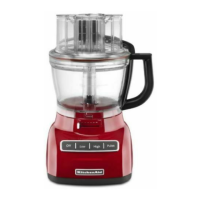
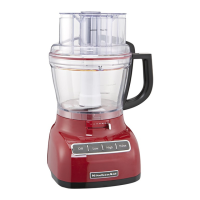
This document describes the KitchenAid KFP1333 and KFP1344 Food Processors, versatile kitchen appliances designed for a wide range of food preparation tasks.
Function Description:
The KitchenAid Food Processor is engineered to simplify and speed up various cooking processes, from chopping and slicing to shredding, mixing, and kneading. It is designed for household use, making it suitable for everyday meal preparation and more elaborate culinary projects. The appliance's core function is to process food efficiently and precisely, reducing manual effort and preparation time. It features multiple blades and discs to handle different food types and desired textures.
Important Technical Specifications:
- Models: KFP1333 and KFP1344
- Voltage: 120 V.A.C.
- Hertz: 60 Hz
- Work Bowl Capacity: 13-Cup (3.0 L)
- Mini-Bowl Capacity: 4-Cup (945 ml)
- Power Cord:
- KFP1333: Equipped with a polarized plug. No extension cord recommended.
- KFP1344: Equipped with a 3-prong grounded plug. No extension cord recommended. A short power supply cord is used to reduce entanglement risk. If a longer cord is used, it must be a grounding-type 3-wire cord with an electrical rating at least as great as the appliance, and arranged to prevent draping or tripping hazards.
- Control: Low/High speed control and Pulse control for precise processing.
- Safety Features:
- Work bowl and cover must be securely locked in place for operation.
- Large pusher must be inserted to the maximum fill line in the feed tube.
- Interlock mechanism prevents operation if components are not correctly assembled.
- Food pusher must always be used to keep hands away from moving blades.
- Blades are sharp and require careful handling.
Usage Features:
The food processor offers a variety of features to enhance usability and versatility:
- Externally Adjustable Slicing Control: This exclusive KitchenAid feature allows users to adjust slicing thickness from 1/16 inch (1 mm) to 1/4 inch (6 mm) without removing the blade assembly or turning off the processor. The lever on the base controls the thickness for the adjustable slicing disc.
- 3-in-1 Feed Tube: One of the industry's largest feed tubes, it accommodates large items like tomatoes, cucumbers, and potatoes with minimal pre-cutting. It includes a 3-piece food pusher system:
- Large Pusher: For processing large items.
- Medium Pusher: Revealed by removing the large pusher, for continuous processing of medium-sized items.
- Narrow Pusher: For smaller items like herbs, nuts, single carrots, or celery. It also features a small hole at the bottom for drizzling oil or other liquids into ingredients at a constant rate during processing.
- High/Low/Pulse Control:
- Low/High Speeds: Provide continuous processing for most foods. Indicator light glows when active.
- Pulse Control: Offers precise, short bursts of high-speed processing, ideal for tasks requiring a light touch or controlled chopping.
- Heavy-Duty Base: A slip-resistant base provides stability and reduces vibration during demanding processing tasks.
- Included Accessories (All Models):
- 13-Cup (3.0 L) Work Bowl: Durable and large capacity for big jobs.
- 4-Cup (945 ml) Mini-Bowl and Mini-Blade: Perfect for small chopping and mixing tasks. The mini-bowl nests inside the work bowl for storage.
- Externally Adjustable Slicing Disc: Slices most foods from thin to thick.
- Reversible Shredding Disc: Allows for coarse or finely shredded cheese or vegetables (2 mm and 4 mm).
- Stainless Steel Multipurpose Blade: Chops, minces, blends, mixes, and emulsifies. Features an internal seal for tight fit.
- Dough Blade: Specifically designed for mixing and kneading yeast dough (for recipes using up to 2-3 cups of flour).
- Drive Adapter, Disc Adapter, Slicing Adapter: Components for connecting blades and discs to the power shaft.
- Chef's Accessory Case: Organizes and protects blades, discs, and accessories.
- Spatula/Cleaning Tool: Facilitates food removal from bowls, discs, and blades.
- Optional Accessories (On Select Models):
- Julienne Disc: Creates matchstick strips of vegetables and fruits.
- Grate/Shave Disc: Grates hard cheeses and shaves ice.
- Egg Whip: For whipping cream and egg whites.
- 10-cup (2.4 L) Chef's Bowl: Allows for processing a second food item while keeping the work bowl clean for another ingredient.
- Assembly: Components are designed for easy assembly and disassembly. The work bowl locks onto the base, and the work bowl cover locks onto the work bowl. Blades and discs fit onto the power shaft via adapters.
- Food Processing Tips:
- Chopping: Peel, core, and cut food into 1 to 1.5-inch pieces. Use LOW speed for desired size. For nuts, use short pulses.
- Pureeing: Add 1/4 cup (60 ml) liquid per cup (235 ml) of food. Process with short pulses then continuously.
- Mashed Potatoes: Shred hot cooked potatoes, then exchange to multipurpose blade, add ingredients, and pulse.
- Dried/Sticky Fruits: Use cold fruit, add flour, process with short pulses.
- Citrus Peel: Finely chop peeled, de-membraned peel.
- Mincing/Small Quantities: Add food through feed tube with processor running. Ensure dry ingredients for herbs.
- Meat/Poultry/Seafood: Use very cold, 1-inch pieces. Process with short pulses.
- Crumbs: Break food into 1/2 to 2-inch pieces. Process until fine, using pulses for larger pieces.
- Melting Chocolate: Combine chocolate and sugar, process until finely chopped. Pour hot liquid through feed tube with processor running.
- Grating Hard Cheeses: Use multipurpose blade for 1-inch pieces, process with short pulses then continuously.
- Slicing/Shredding:
- Long/Small Diameter Foods (celery, carrots, bananas): Cut to fit feed tube vertically or horizontally, pack securely, use even pressure. Small feed tube can be used.
- Round Foods (onions, apples, peppers): Peel, core, remove seeds, cut to fit, position in feed tube, use even pressure.
- Small Foods (strawberries, mushrooms, radishes): Position vertically or horizontally in layers, fill feed tube, use even pressure. Small feed tube can be used.
- Uncooked Meat/Poultry (stir-fry): Cut/roll to fit, wrap and freeze until hard (30 min-2 hrs), process with even pressure.
- Cooked Meat/Poultry (salami, pepperoni): Use very cold, cut to fit, process with firm, even pressure.
- Spinach/Leaves: Stack, roll up, stand in feed tube, process with even pressure.
- Firm/Soft Cheeses: Use very cold firm cheese. For soft cheeses (mozzarella), freeze 10-15 minutes. Cut to fit, process with even pressure.
- Julienne Disc: Cut food to fit horizontally for longer pieces or vertically for smaller pieces. Position food to guide, use even pressure.
- Dough Blade: Mixes and kneads yeast dough quickly and thoroughly. Do not knead recipes with more than 2-3 cups of flour.
- Helpful Hints:
- Avoid processing excessively hard or frozen foods.
- Do not overfill bowls; 1/2 to 2/3 full for thin mixtures, 3/4 full for thick mixtures. Max liquid level indicated on bowl. 1/3 to 1/2 full for chopping. Mini-bowl for up to 1 cup liquid or 1/2 cup solids.
- Position slicing discs with cutting surface to the right of the feed tube for full rotation.
- Drop ingredients through feed tube while processor is running for speed.
- Vary pressure for slicing/shredding: light for soft foods, moderate for medium foods, firm for hard foods.
- Shred well-chilled cheese to prevent spreading/rolling.
- Cut slender foods into pieces and pack feed tube to minimize uneven slices.
- Cream fat and sugar first for batters, add dry ingredients last, nuts/fruit on top of flour to prevent overchopping.
- Redistribute food with a spatula if it piles up on one side.
- Remove food when it reaches the bottom of slicing/shredding disc.
- Not designed for grinding coffee beans, grains, hard spices, bones, inedible parts, liquefying raw fruits/vegetables, slicing hard-cooked eggs or unchilled meats.
Maintenance Features:
- Cleaning:
- Always press OFF button and unplug before cleaning.
- Base and cord: Wipe with a warm, sudsy cloth, then clean with a damp cloth and dry with a soft cloth. Do not use abrasive cleansers or scouring pads.
- All other parts (work bowl, cover, mini-bowl, pushers, discs, blades) are dishwasher safe.
- Dishwasher Tips: Load parts away from exposed heating elements. Load bowls upside down, not on sides. Avoid high temperature settings (sani-rinse, steam).
- Hand Washing: Avoid abrasive cleansers or scouring pads to prevent scratching/clouding. Thoroughly dry all parts.
- Blade Cleaning: To clean multipurpose blade easily, empty work bowl, replace lid, and pulse 1-2 seconds to spin blade clean.
- Counter Cleanliness: After removing work bowl cover, place it upside down on the counter.
- Discoloration: If plastic parts discolor, clean with lemon juice.
- Storage:
- Disassembled discs, shafts, and blades should be stored in the provided storage case, out of reach of children.
- Mini-bowl and optional chef's bowl can nest inside the work bowl for convenient storage.
- Always store the work bowl and work bowl cover in the unlocked position when not in use to prevent damage to the locking system.
- Wrap power cord around the work bowl and secure the plug by clipping it to the cord.
- Troubleshooting: The manual provides guidance for common issues like the processor not running, not shredding/slicing properly, or the work bowl cover not closing. It advises checking alignment, pusher insertion, disc installation, and power supply.
- Warranty: KitchenAid offers a One Year Full Warranty from the date of purchase, including Hassle-Free Replacement or repair/replacement of defective parts. It does not cover damage from misuse, abuse, or use outside normal single-family home use.