Outdoor grill use
19
Prepare the Gas Supply
1. Open the hood completely. Do not light burners with the hood closed.
2. Make sure the control knobs are all turned to OFF. The drip pan must be in place and pushed all the
way to the back.
Turn the Gas Supply On
1. For freestanding outdoor grills using a 10 kg (cylinder not more than 50cm) LP gas fuel tank: slowly
open the tank valve.
NOTE: If the flow limiting device activates, your grill may not light. If your grill does light, the flames will
be low and will not heat properly. Turn 20 lb LP gas fuel tank valve and all control knobs off and wait 30
seconds. After shutting off the tank, open tank valve very slowly and wait 5 seconds before lighting.
2. For outdoor grills using gas supply source other than a 10 kg (cylinder not more than 50cm) LP gas fuel
tank. Open the manual shut-off valve in the gas supply line. The valve is open when the handle is
parallel to the gas pipe.
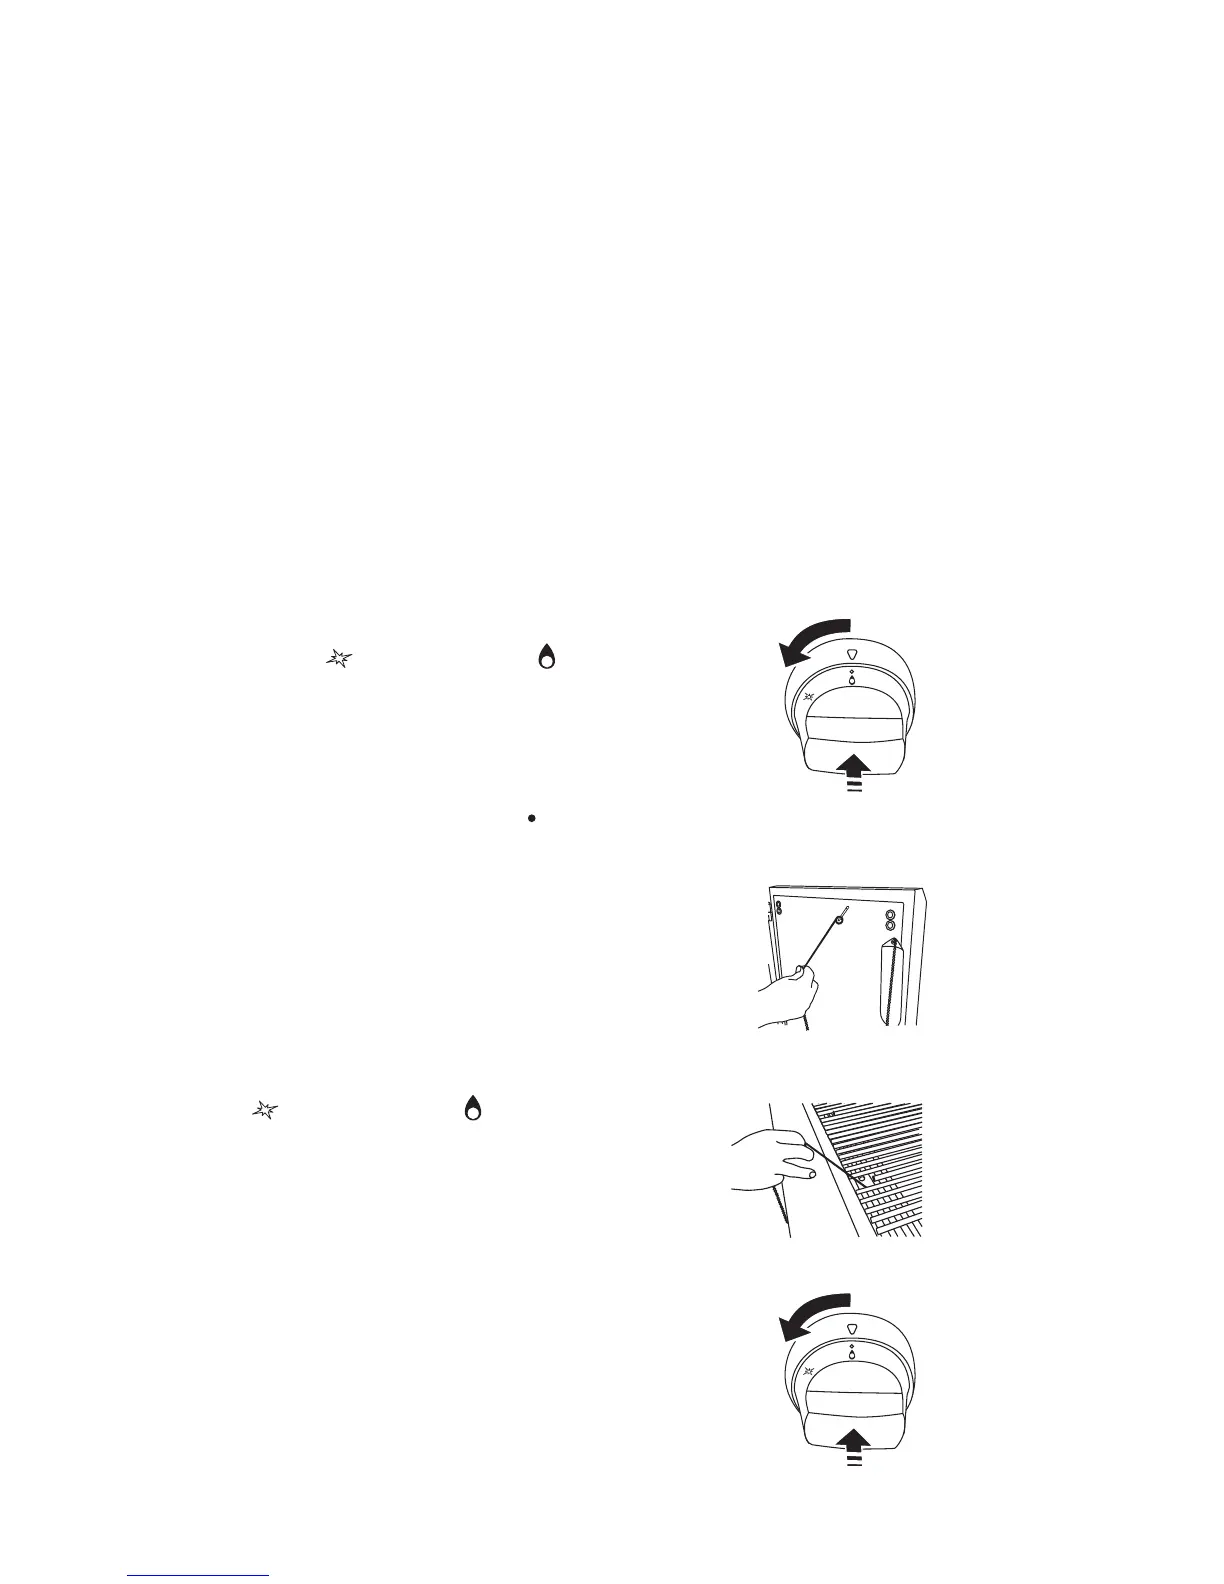
Lighting the main burner
Each control knob relates to the associated burners (see "control panel")
1. Do not lean over the grill. Select the burner you
want to light.
2. Push in and turn the grill burner control knob to
"electric ignition " & "maximum flame " while
continuing to hold it in.
3. You will see the igniter glow. When the burner is lit,
release the knob. Turn the knob to desired setting.
4. Repeat for each of the other burners as needed.
IMPORTANT: If the burner does not light
immediately, turn the burner knob to OFF and wait
5 minutes before relighting.
Manually Lighting Main Grill and Infrared
Rotisserie Burners
1. Do not lean over the grill.
2. Remove the manual lighting extension (see following
illustration) and attach a match to the split ring.
3. Strike the match to light it.
4. Guide the lit match between the grill grate and one
of the slots in the sear plate.
5. Push in and turn the burner knob to "electric
ignition " & "Maximum flame " for the burner
closest to the lit match. The burner will light
immediately. When the burner is lit, turn the knob
to the desired setting.
6. Repeat steps 2 through 5 for each main burner.
7. Remove the match and replace the manual lighting
extension inside the cabinet drawer.
IMPORTANT: If the burner does not light
immediately, turn the burner knob to OFF and wait 5
minutes before re-lighting.
If any burners do not light after attempting to light
them manually, contact the KitchenAid Customer
Service Center.
See the "After sales-service" section.
Freestanding grills - right - hand cabinet door
 Loading...