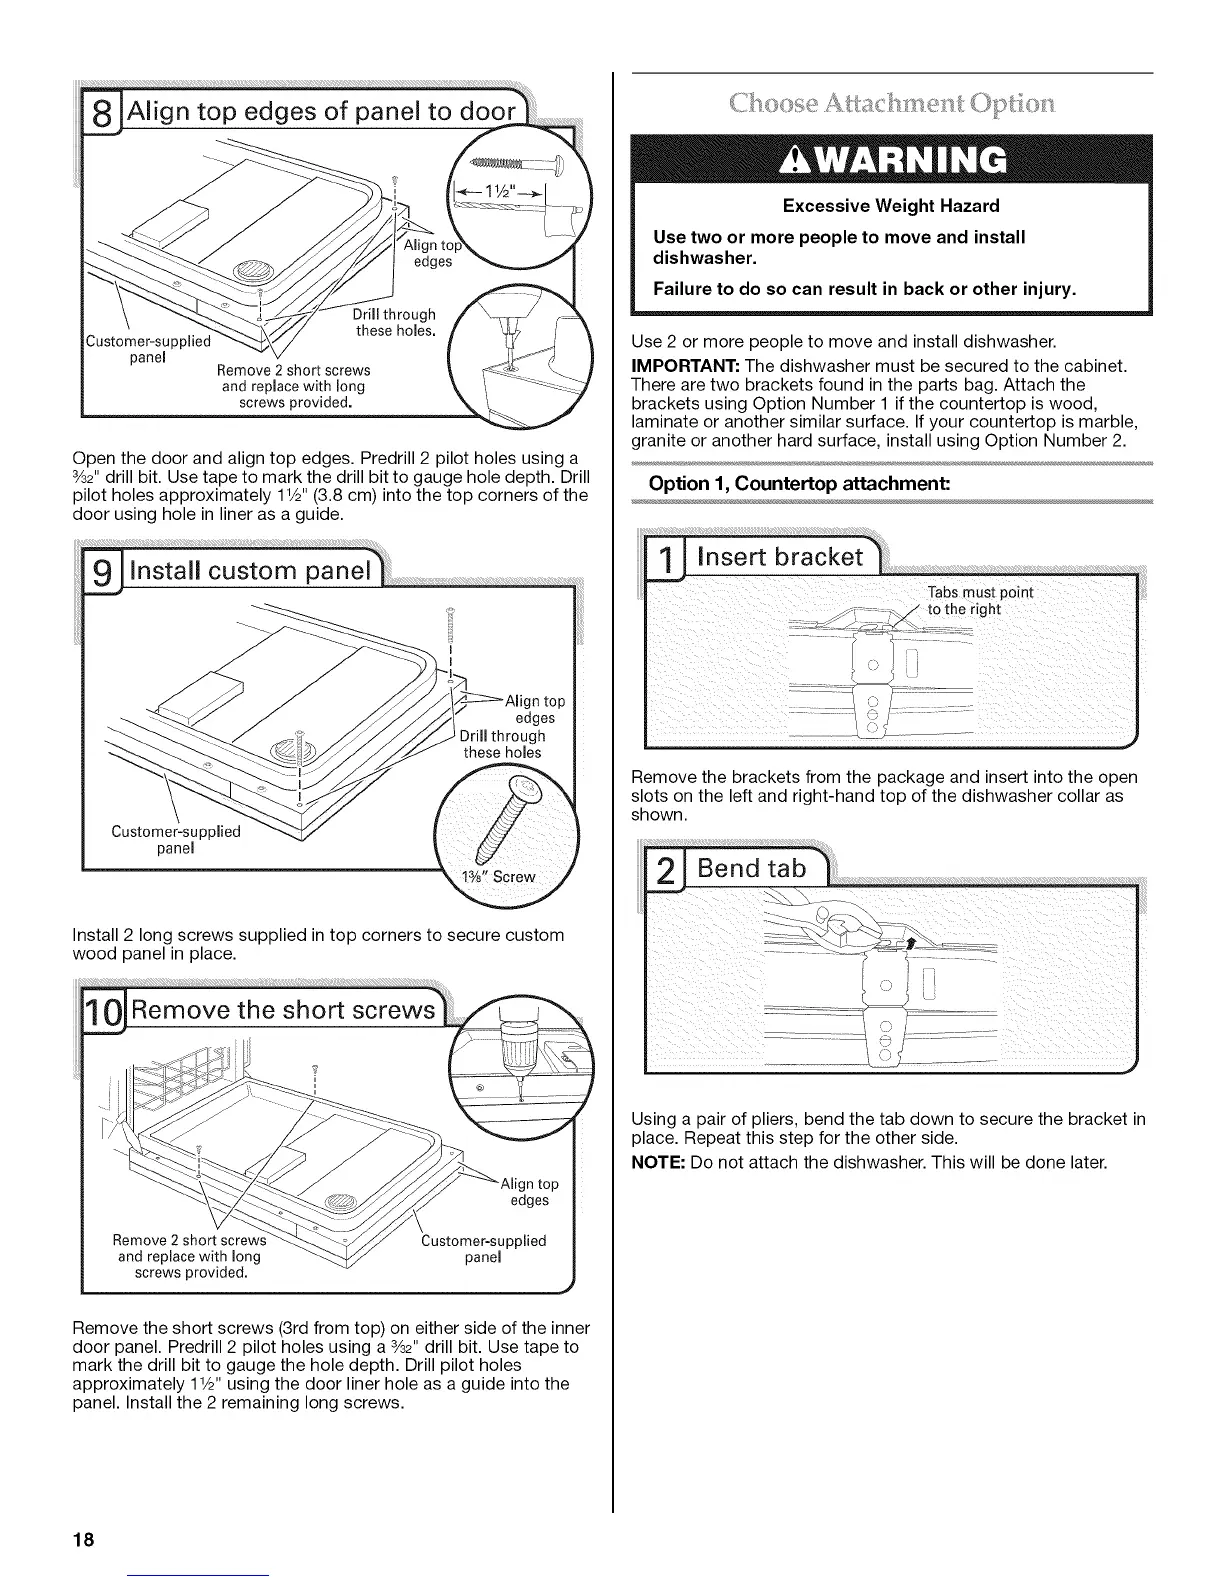
8 Align top edges of panel to
Customer-supplied
panel
Drill through
these holes.
Remove 2 short screws
and replace with long
screws provided.
Open the door and align top edges. Predrill 2 pilot holes using a
3/32"drill bit. Use tape to mark the drill bit to gauge hole depth. Drill
pilot holes approximately 11/2"(3.8 cm) into the top corners of the
door using hole in liner as a guide.
edges
)rill through
these holes
Customer-supplied
panel
Install 2 long screws supplied in top corners to secure custom
wood panel in place.
edges
Remove 2 short screws Customer-supplied
and replace with long panel
screws provided.
Remove the short screws (3rd from top) on either side of the inner
door panel. Predrill 2 pilot holes using a 3/32"drill bit. Use tape to
mark the drill bit to gauge the hole depth. Drill pilot holes
approximately 11/2"using the door liner hole as a guide into the
panel. Install the 2 remaining long screws.
Excessive Weight Hazard
Use two or more people to move and install
dishwasher.
Failure to do so can result in back or other injury.
Use 2 or more people to move and install dishwasher.
IMPORTANT: The dishwasher must be secured to the cabinet.
There are two brackets found in the parts bag. Attach the
brackets using Option Number 1 if the countertop is wood,
laminate or another similar surface. If your countertop is marble,
granite or another hard surface, install using Option Number 2.
Option 1, Countertop attachment:
Tabs must point
_ : _ tothe right
_ : _ _ _/__ \_............
f
Remove the brackets from the package and insert into the open
slots on the left and right-hand top of the dishwasher collar as
shown.
II !I iii i ii!!il
Using a pair of pliers, bend the tab down to secure the bracket in
place. Repeat this step for the other side.
NOTE: Do not attach the dishwasher. This will be done later.
18