14
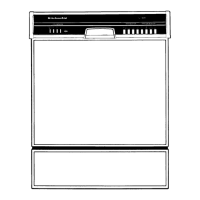
Convertible Portables
to hidea\',a\ compartment. Do not remove cou
pier frum sink area if you run a Cancel Cycle as
water \',ill drain again at the end of this cycle. DO
NOT DISCONNECT POVVER CORD UNTIL CYCLE
IS COMPLETED.
CARE OF DISHWASHER TOP
The wood top is prefinished with a protective
lacquer seal. For daily care, wipe with a damp
cloth after using. To remove stubborn stains, let
dampened '-touring powder remain in contact
with the wood for three to five hours. Then wipe
away with a damp cloth.
After an extended period of use it may be neces-
sary to recondition the top. To recondition, lightly
sand off all remaining lacquer; saturate a clean
cloth with mineral oil and wipe on. Allow over-
night absorption. Repeat oil treatment the follow-
ing day and allow to stand four to six hours before
removing excess oil with soft, dry cloth. The top
is then ready for use. Repeat this treatment every
six to eight months as necessary.
CONVERTING TO A BUILT-IN
There are no additional parts needed to convert
your portable to a built-in dishwasher. Instruc-
tions were packaged with your dishwasher. If you
have misplaced these instructions, a new set may
be obtained by writing Customer Relations Dept.,
KitchenAid Division, Hobart Corporation, Troy,
OH, 45374.
Seasonal Storage
CAUTION: To protect against possible rupture of fill
valve, BE SURE water lines leading to the dishwasher
as well as water lines in dishwasher are protected
against freezing. Such ruptures are not covered by
the warranty.
WINTER: To safeguard your KitchenAid dish-
washer when it is exposed to freezing tempera
tures in a seasonal dwelling, have your local
KitchenAid _(,rvice person follow this procedure.
1. (:lose and latch dishwasher door. Push Cancel
Cycle button to drain dishwasher.
2. Turn off the electricity.
3. Shut off water supply. Place pan under fill vaJw2
and di',conne(t fill vaive at both inlet and outlet
side_. Drain water into pan.
4. Place a pan under the drain valve outlet. Dis-
(onrw(t ttm flexible tubing at the drain valve
outlet. Drain machine water into pan by manu-
ally opening drain valve. Leave both fill and
drain valve disconnected
5. To put dishwasher back in service, reconnect
fill valve. Reconnect drain outlet. Turn on water
supply and e_ectricity. Close and latch door.
Select Low Energy Wash Cycle and let machine
complete cycle. Check connections to be sure
they are water tight.
SUMMER:
1. Turn off water supply.
2. Turn off electricity.