GL0014K Owners Handbook BioDisc BD, BE, BF, BG, ND, NE, NF, NG
Page 9
(4) BIODISC
Check that the BioDisc is in order, with no obvious damage or misalignment of parts. If any
possible problems are discovered, contact Klargester.
Check that all electrical components: Drive Motor, Sludge Return Pump and LOR Alarm
sensor, (where applicable) are connected to the Control Panel.
Units with FST Sludge Return System only: Check that the Sludge Return Timer in the
BioDisc Control Panel is set correctly, as indicated on the wiring diagram.
(5) AUTOMATIC GREASE CARTRIDGES
Where pressurised grease cartridges are fitted (to chain drives and/or roller bearings)
these must be activated before the unit
is started.
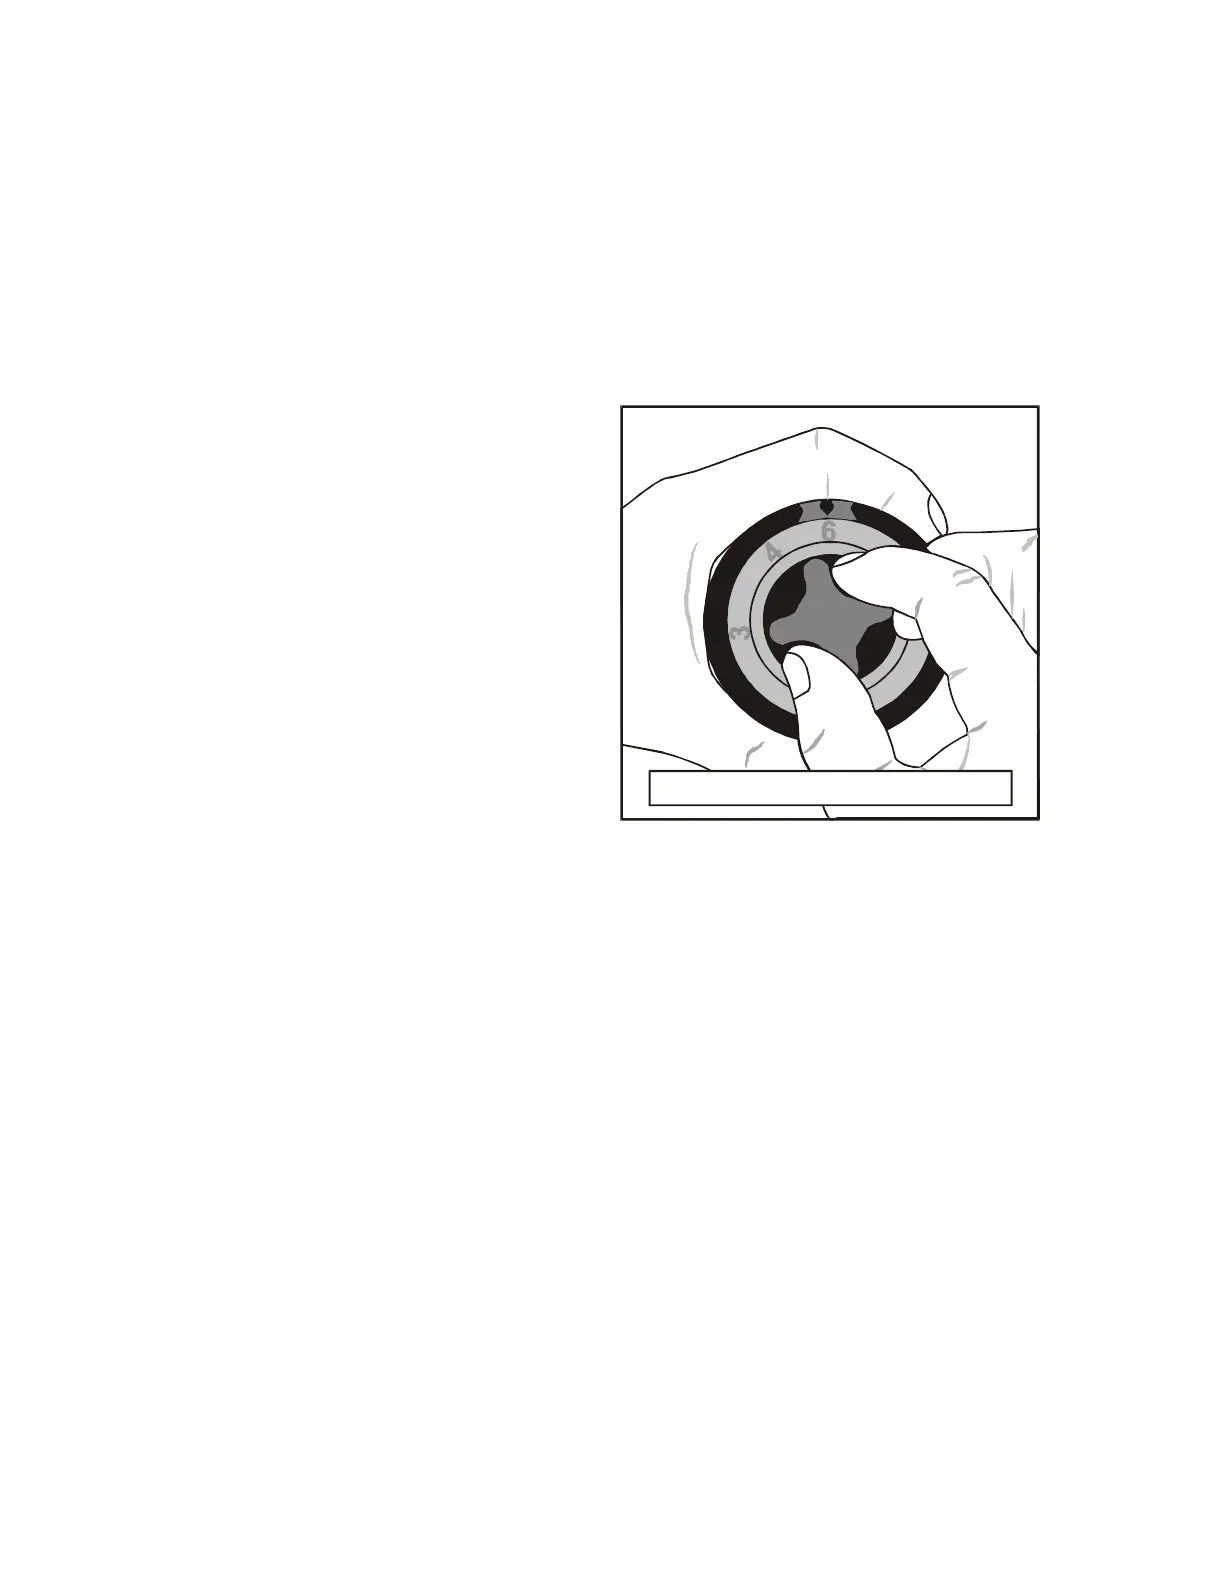
a) Turn the control knob and its linked dial
until the figure 6 is against the arrow on
the casing, as in Figure 3 (this should
give a lubrication period of 12 months at
the temperature in the BioDisc).
b) Depress the red button. This secures the
setting and releases the control knob
from dial.
Rotate the knob clockwise to activate the
unit.
(6) SWITCH ON
Open the Panel. Put the isolating switch and/or circuit breaker(s) into the “on” position.
Close the panel and lock it, if applicable. Note: If the unit is fitted with a the sludge return
pump, this should start and run for the set time when the unit is switched on.
(7) RUNNING CHECKS
Check that the rotor is running smoothly in the correct direction of rotation and is not
contacting any part of the fixed structure.
Check that the forward feed buckets are discharging correctly from the first to second stage
Biozone.
(8) OPTIONAL LOSS OF ROTATION ALARM
Where fitted, check operation of the Loss of Rotation (LOR) Alarm as follows:
a) Open the Control Panel and isolate the drive motor whilst maintaining power supply to
the alarm circuit. For units with a combined Alarm Control Panel this can be done either
by removing the motor fuse or by operating the motor overload trip (refer to wiring
diagram). Where a remote independent alarm is fitted, simply isolate power supply at
the BioDisc control panel. After a delay of 2-3 minutes the alarm should activate.
b) Push the reset button on the front of the Panel. The alarm beacon or sounder should
cease and the red indicator light on the panel front should remain illuminated.
c) Re-connect power to the drive motor and close the Control Panel. The alarm should
cease after approximately one minute.
d) Depress and release the “Beacon Off” button to reset it.
Malfunctioning of the LOR Alarm does not prevent operation of the BioDisc System, but it
should be reported to your maintenance engineer for early rectification.
Setting a discharge duration of 12 months
Fig. 3