366
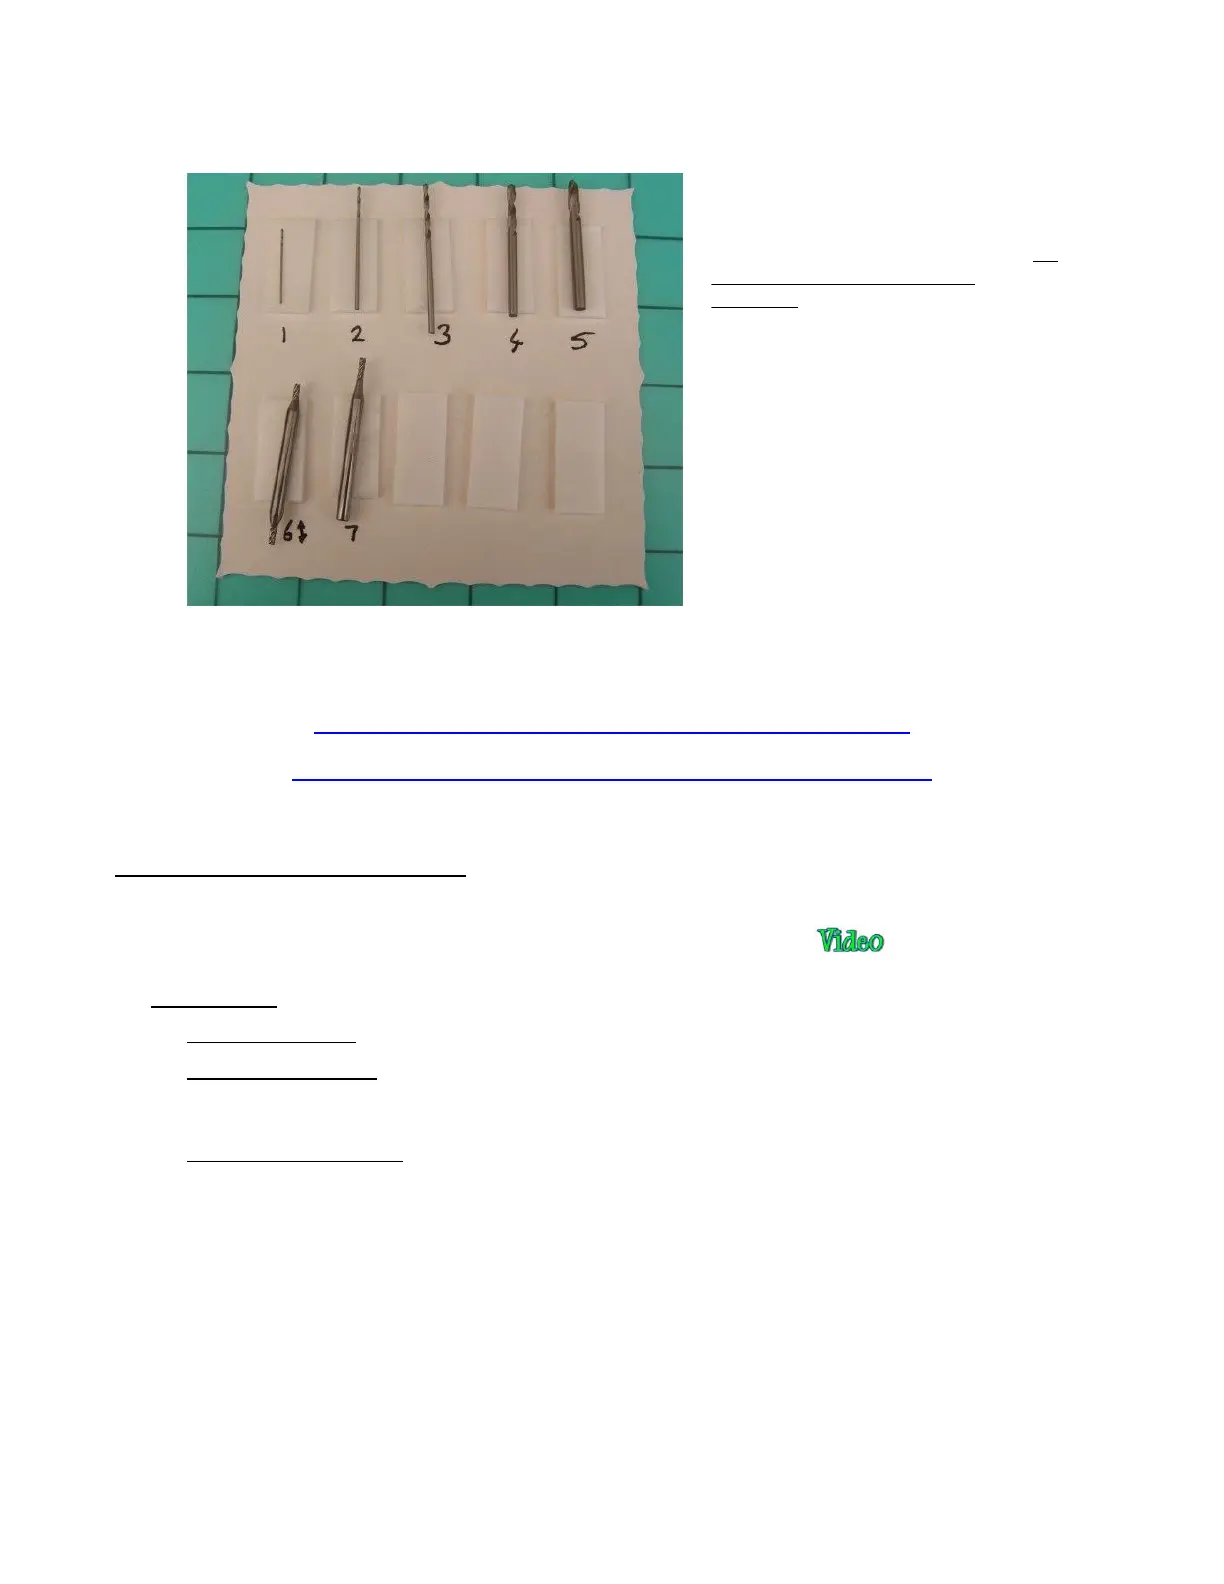
• The included bits may vary. The following photo shows a typical kit with an explanation of how the bits
should be used:
• The following links shows different kinds of bits that can be used in rotary tools and appropriate applications
for those bits:
http://woodcarvingillustrated.com/blog/choosing-power-carving-bits/
http://krcims.com/wp-content/uploads/2014/03/2012AccessoryPoster.jpg
13.03 Settings for the Rotary Tool
• Before getting started on the details, here is a demo video of a rotary tool project from start to finish. This
will provide you an overview of what is involved when using the rotary tool:
• IMPORTANT! Be conservative with settings:
Use slower speeds as recommended in the table which follows.
Use multiple Passes, thus allowing the tool to work its way through the material. Set the SD by dividing
the ED by the number of Passes.
When performing the initial test, examine the results and, if you need to increase CD/ED, do so in
conservative increments.
• The following table is a summary of the settings used for the Force rotary tool. This is for your convenience
and should not preclude you from reviewing Section 2.03 for details regarding each setting.
1, 2: These two thin and fragile bits are
included for working with PCBs (drilling
tiny holes for housing components). Do
not use them with thick dense
materials.
3, 4, 5: Use these for drilling holes.
6, 7: Use these for engraving and cutting.