KneeRover
®
Set Up Instructions:
Please follow the step by step instructions on the following pages to
properly assemble your KneeRover
®
scooter. The diagram below
identifies the key components of the scooter to aid with assembly.
Setup Instructions:
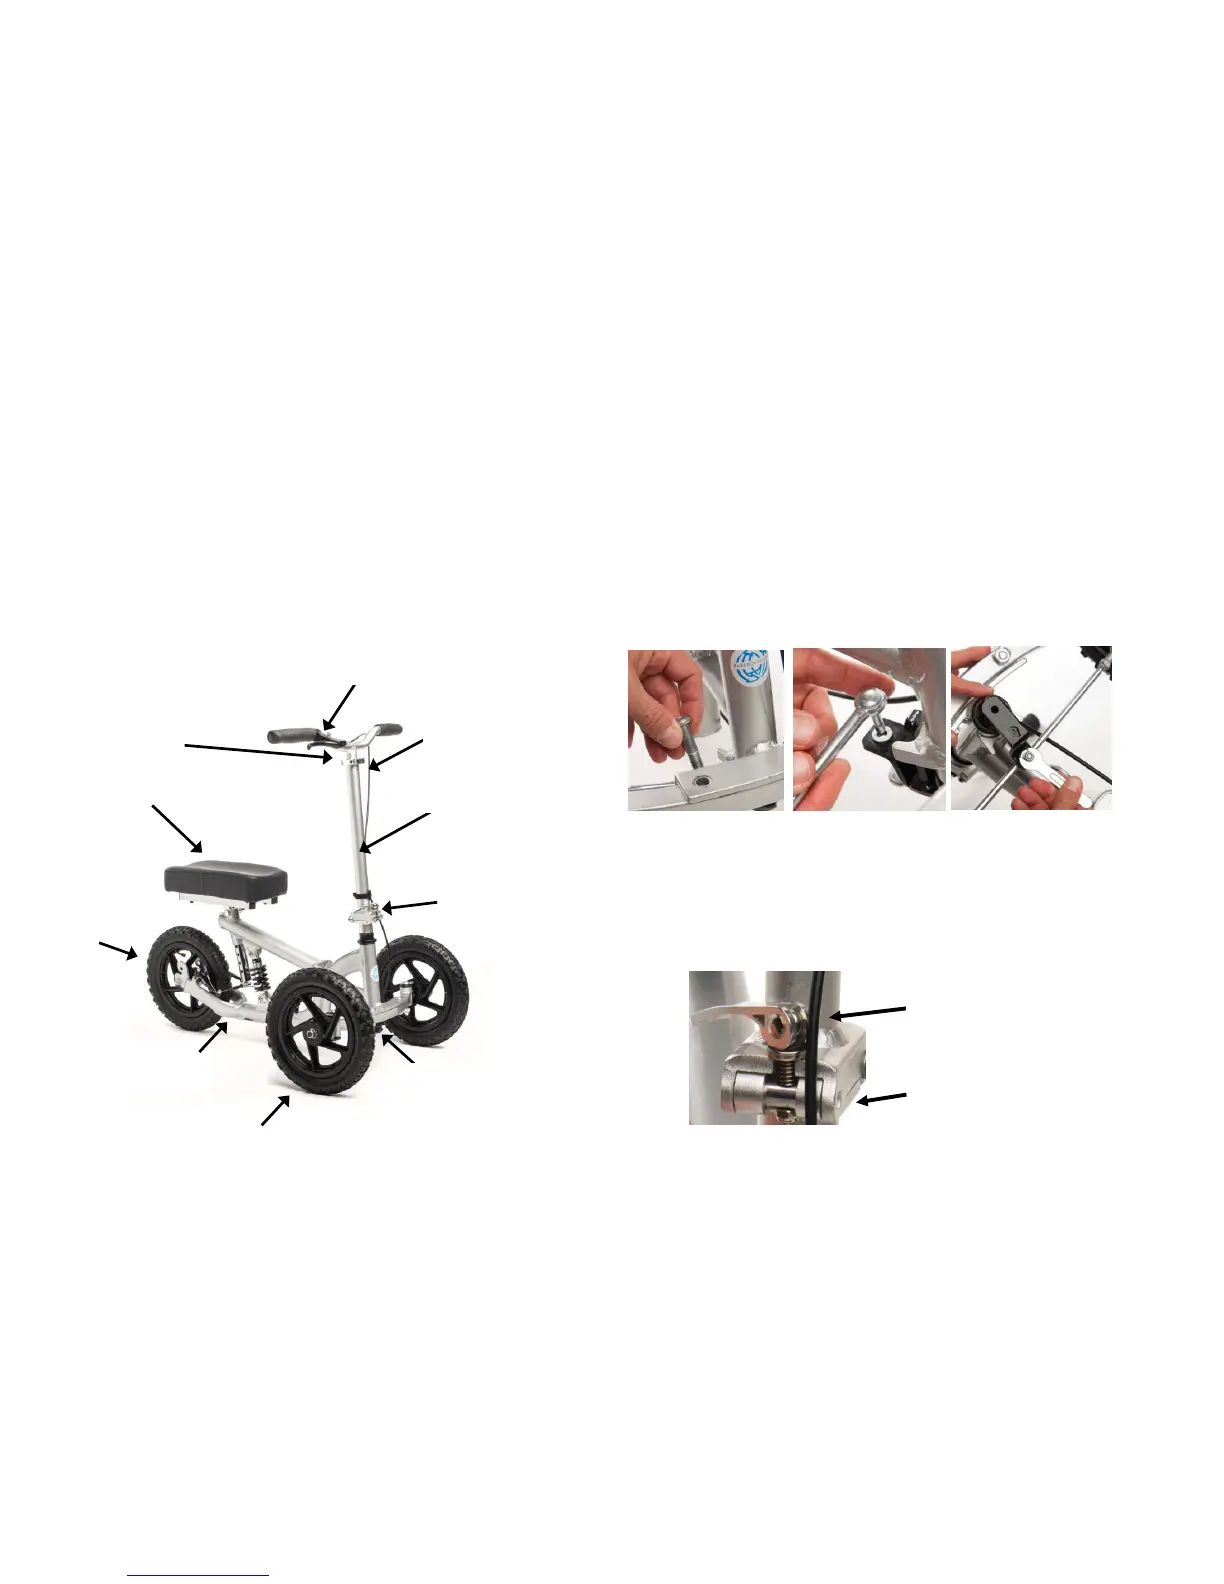
Step 1: Install Front Axle
Please take your time to carefully complete all steps before operating your
KneeRover
®
scooter. Once the packing material is removed, install the front axle
using the 2 bolts and allen wrench provided. Place the front axle under the frame,
align the holes, insert the bolts, and tighten using the allen wrench provided. The
tie rods should be assembled with one tie rod on top of the black guide, and one
below, with the nut tightened firmly at the bottom. Ensure that the bolt goes into
the top tie rod so that head of the bolt is sitting flush with the top tie rod. . Insert
the lower tie rod into the bolt from the bottom and then flip scooter over to firmly
tighten the nut onto the bolt with the wrench provided (as shown below).
Step 2: Install Steering Column
The steering column will be in a folded position when unpacking. When facing the
front of the KneeRover
®
scooter, raise the steering column and push the security
pin in the clamp to the left to allow the column to lock into place. Raise the clamp
lever upward and tighten by turning it clockwise. Finally, push clamp lever down
firmly to secure the steering column. Reverse these steps when needing to lower
steering column for transport.
 Loading...