Set Up Instructions Continued
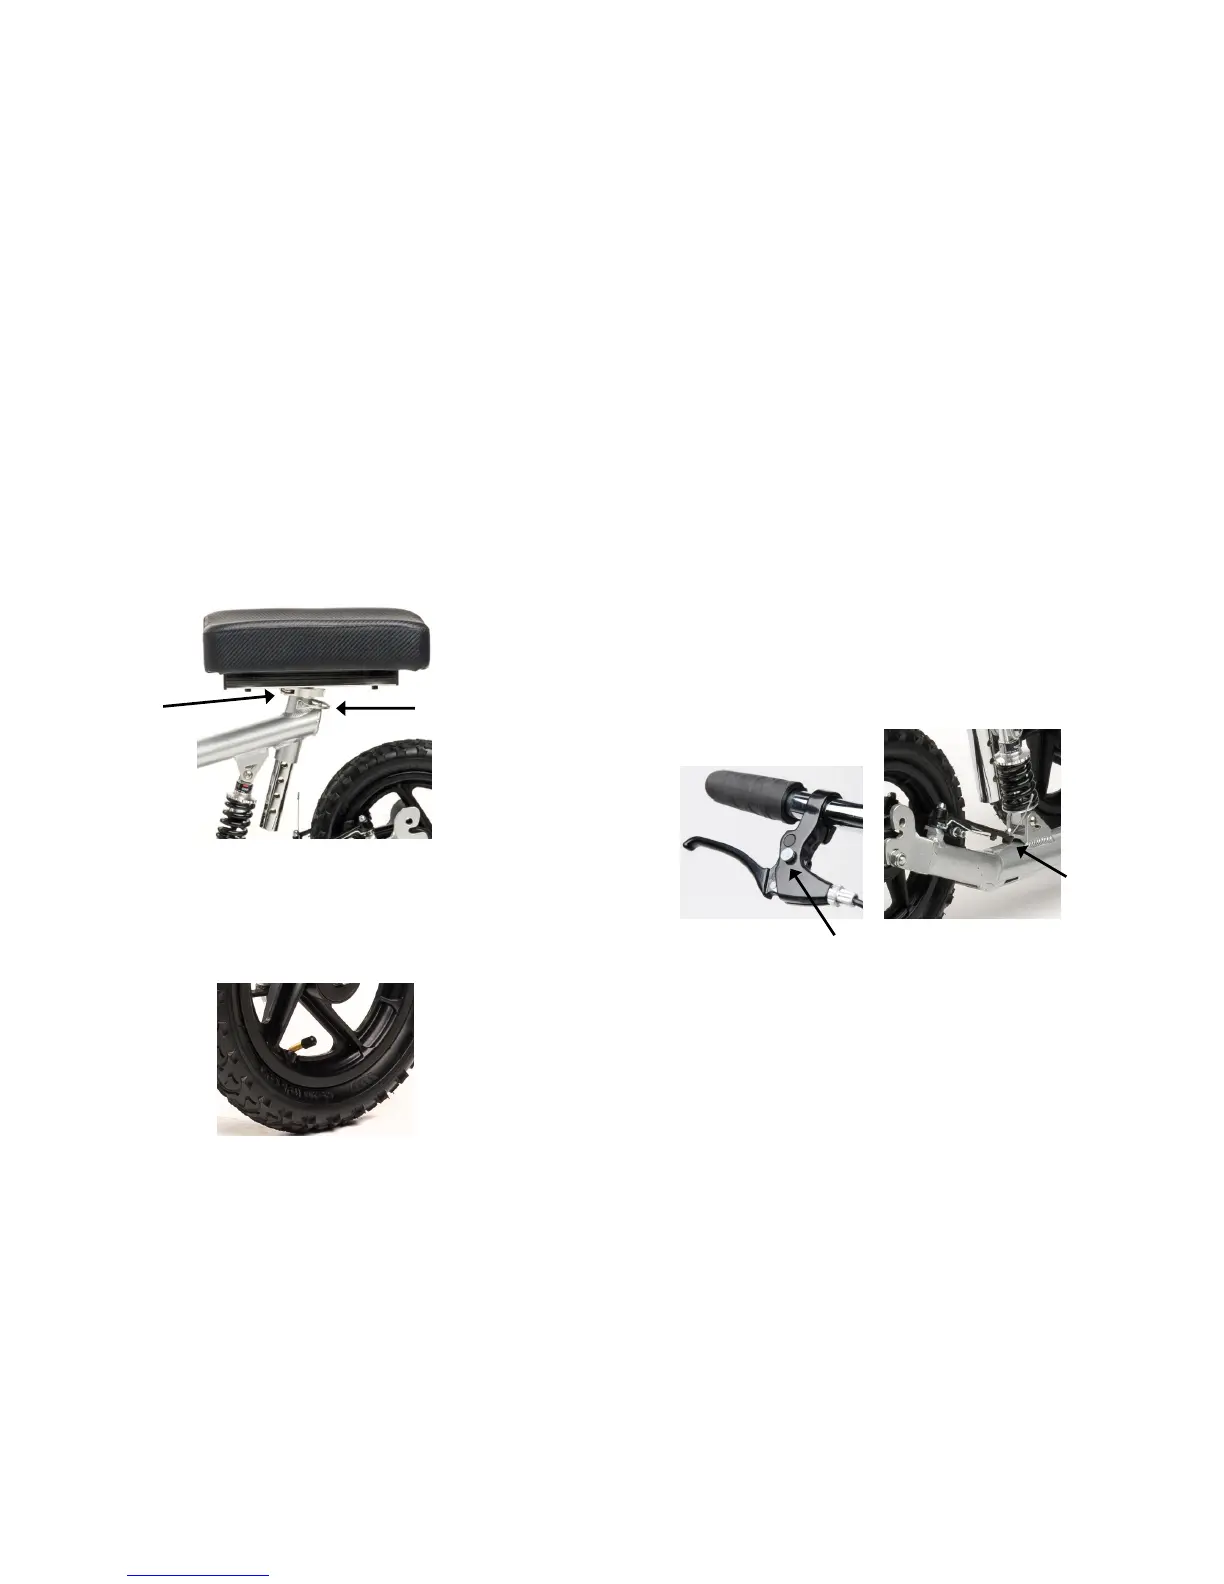
Step 3: Install Knee Platform
The knee platform is designed to be used with either the right or left leg.
Remove the knee platform from the bottom of the KneeRover
®
scooter by
removing the locking pin and loosening the clamp. Next insert the knee
platform post into the receptacle tube and set the knee platform at your
desired height for use by inserting the locking pin through the aligned
holes. Finally, tighten the clamp to secure the knee platform in place.
Step 4: Inflate Tires
The pneumatic tires come partially inflated. It is important to inflate all
three tires to the correct pressure (a maximum of 40 psi) the same way
you inflate a bike tire. Be careful not to over inflate the tires.
Step 5: Brake Operation & Adjustment
To engage the brake, squeeze the brake lever on handle bar. Your
KneeRover
®
scooter comes equipped with a brake lock / parking
brake. Simply squeeze brake handle firmly and press the button to
engage the lock. To release the lock, squeeze the brake handle again.
If needed, the brake can be adjusted to avoid brake pad(s) from
rubbing a spinning back wheel with a disengaged brake. Use the
provided smaller allen wrench to make adjustments. Approaching the
scooter from behind you can loosen or tighten the brake cable by
loosening the top right bolt, adjusting brake cable, and re-tightening
bolt.
Ongoing Maintenance
With routine use, nuts and bolts on the steering column, tie rod
steering mechanism, and brake assembly can become loose. To
ensure safe continuous operation of this KneeRover
®
scooter, it is
important to periodically inspect the scooter for loose nuts and bolts
and re-tighten as appropriate. Also, check the tire pressure routinely
to ensure that tires are properly inflated up to 40 psi maximum. Be
careful not to over inflate the tires.
 Loading...