• When installing into decking, ensure there is enough clearance below so the fitting, cable, and
driver are not sitting in standing water
• Connect the cable from the secondary side of the driver to the first light in the installation with the
male and female plugs and sockets then connect remainder of the fittings in sequence
• Connect the cable from the primary side of the driver to a suitable power source ensuring correct
polarity is observed (Live (brown), Neutral (blue))
• Switch on power supply and check for correct operation
3
Fig. 2
INSTALLATION
Note: If this luminaire is being used in conjunction with external PIR or sensors, please confirm with
the manufacturer of the sensors that they are compatible with the lamp source
• Cut suitable 25mm holes in the mounting surface ensuring that they do not infringe with
electrical cables or water/gas pipes
• Provide power to the required point of installation (refer to BS7671 for correct cabling methods).
Suitable IP rated junction boxes should be used where required ensuring the power source is via
an RCD or an RCBO
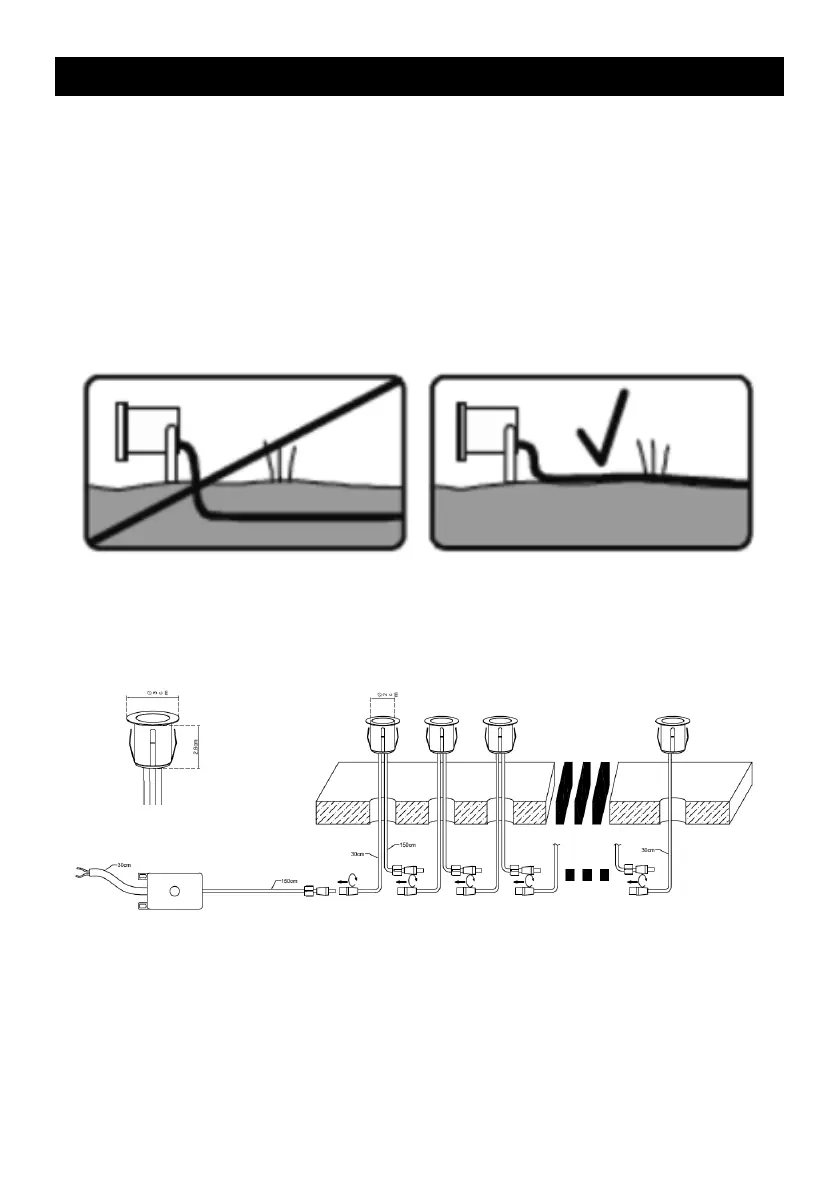
• The pre-installed cable supplied is for above-ground use only. Cables that are to be routed
within walls or below ground must be protected by means of suitable conduit or trunking
(see Fig. 1)
Fig. 1
• Feed the pre-installed cables through the holes and connect with the pre-installed
plugs and sockets (see Fig. 2)
 Loading...