United States
[change]
Join /
Login
Digital Camera Support
EASYSHARE-ONE Cameras
C Cameras
CD Cameras
CW330
CX Cameras
DC Cameras
DX Cameras
LS Cameras
P Cameras
V Cameras
V1003
V803
Downloads and Upgrades
Getting Started Guide
Manual
Frequently Asked
Questions
Interactive Tutorials
Dock Compatibility Chart
Battery Compatibility
Interactive Troubleshooting
and Repair
EASYSHARE Product
Warranty
Register Online
V705
V610
V603
V570
V550
V530
Z Cameras
Other Digital Cameras
EASYSHARE Software Support
EASYSHARE Gallery Support
Printer Support
Camera Dock Support
Accessories Support
Film Camera Support
Film Support
Inkjet Paper Support
Projector Support
Picture Kiosk Support
Other Product Support
Wireless Support
Product Manuals
Downloads and Software
Upgrades
KODAK EASYSHARE V803/V1003 Zoom Digital
Camera Manual
Table of Contents > Taking pictures/videos > Taking panoramic pictures
Print
Print This Page
Print This Chapter
2 Taking pictures/videos
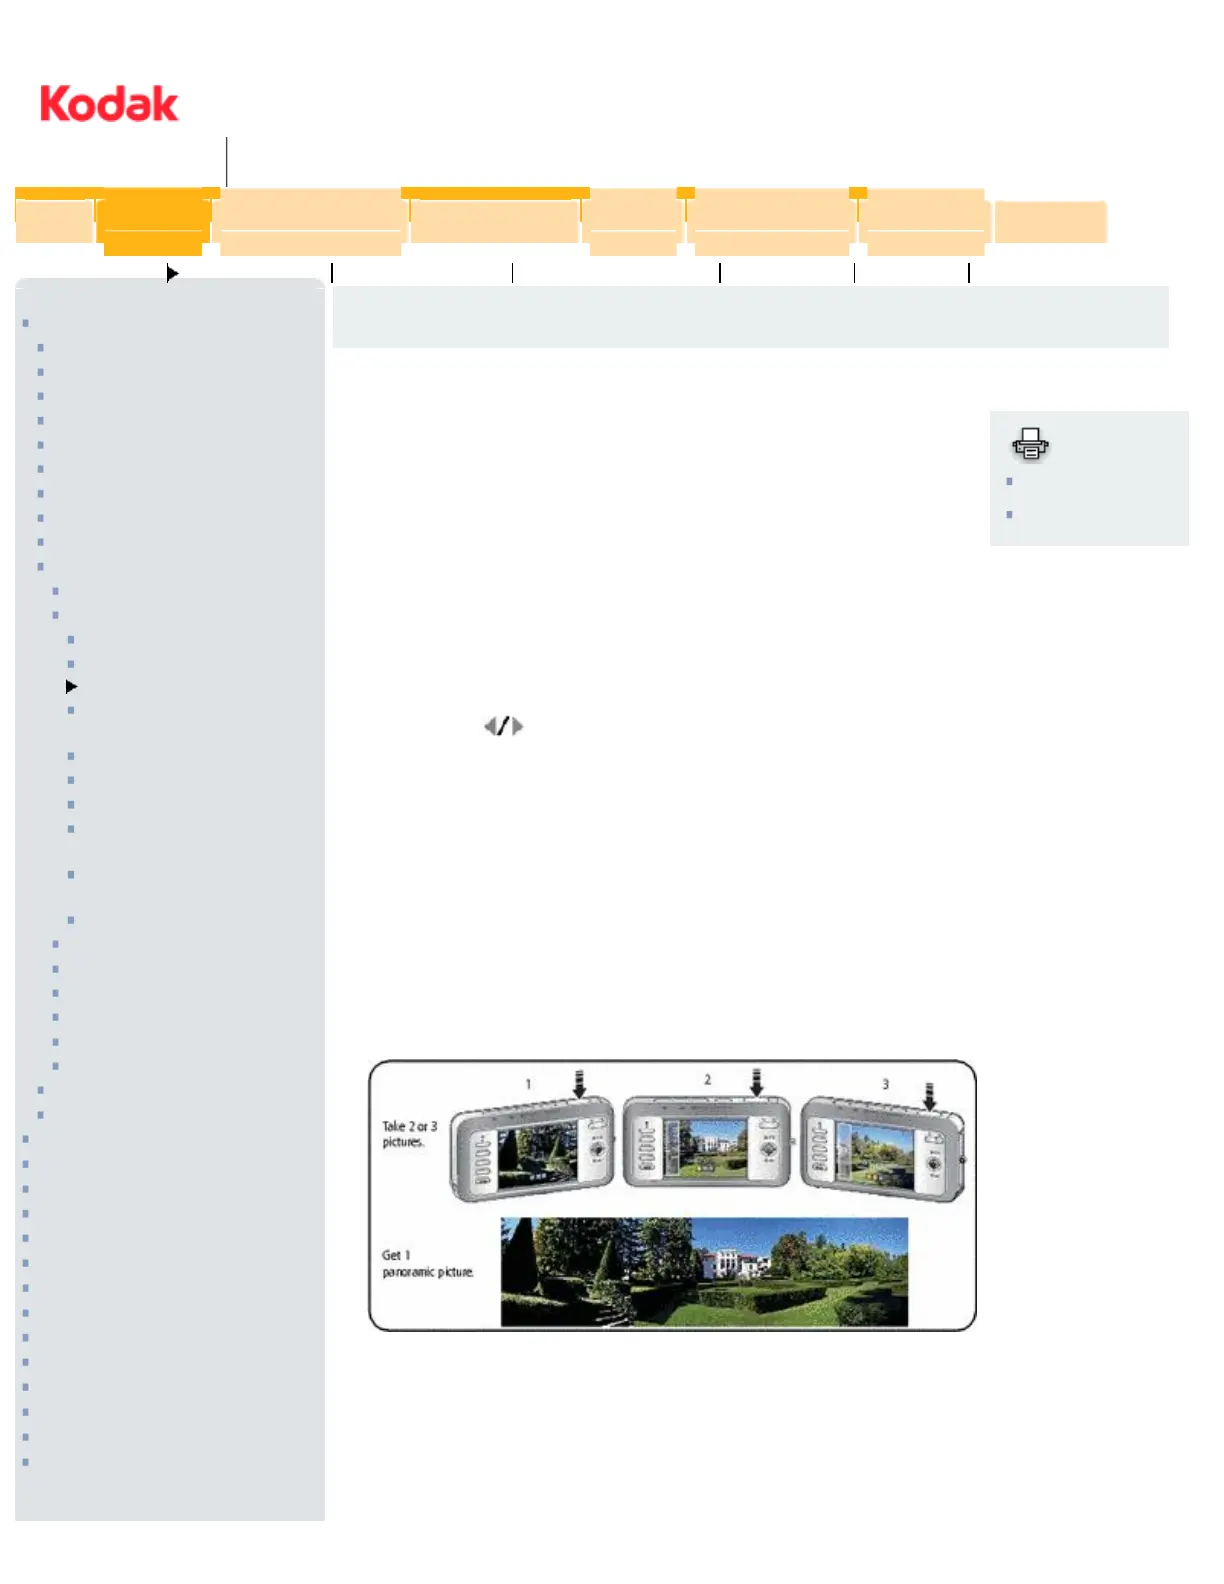
Taking panoramic pictures
Use panorama to "stitch" up to 3 pictures into a panoramic scene.
NOTE: For best results, use a tripod. Only the panoramic picture is saved; individual pictures are not.
(Picture size is set to 4.9 MP. Exposure and white balance are set with the first picture. The
flash is set to Off.)
1. Press the Auto/SCN button until the Scene icons appear on the LCD.
2. Press
to highlight Panorama Left-Right or Panorama Right-Left (depending on the
direction you want to pan), then press the OK button.
3. Take the first picture.
After a quickview, the LCD displays the liveview and an "overlay" from the first picture.
4. Compose the second picture. Make the overlay from the first picture cover the same portion in
the new picture. (You can press the Delete button to re-take a picture.)
5. If you are taking only 2 pictures, press the OK button to stitch them together.
After you take 3 pictures, the pictures are automatically stitched together.
NOTE: To use the self-timer 10-second or 2-second setting, see Using
the self-timer.
Previous Next
Home
Consumer
Products
Pro
Photographer / Lab
Cinematography
Health &
Dental
Graphic
Communications
Business &
Government
Corporate
Products Support Center Printing & Sharing Taking Great Pictures KODAK Store Contact Us
http://www.kodak.com/global/en/service/publications/urg0...ml?chapsec=urg00665c2s8&pq-path=10/3905/7168/10510/10540 (1 of 2)19/01/2007 16:03:23
 Loading...