EasyManua.ls Logo

Kohler ANTIQUE Series User Manual

Kohler ANTIQUE Series
4 pages
To Next Page IconTo Next Page
Page #1 background imageLoading...
Page #1 background image
116585-2-BA (-)
1999 Kohler Co.
BEFORE YOU BEGIN
NOTES
This faucet is for use on a single-hole lavatory.
For three-hole lavatories, use the optional
escutcheon plate.
For proper lift rod operability, allow a 2-3/4”
clearance between the faucet center and the
wall or lavatory.
2-3/4” Minimum
Clearance
Shut off the main water supply.
Observe local plumbing codes.
If possible, install this faucet before
installing the lavatory.
Inspect the supply tubing for damage.
Replace as necessary.
Kohler Co. reserves the right to make
revisions in the design of faucets
without notice, as specified in the Price
Book.
TOOLS AND MATERIALS RECOMMENDED
Adjustable wrench
Thread sealant
Plumbers putty
Hacksaw or tubing cutter
Shut-off valves
INSTALLATION
FOR THREE-HOLE LAVATORIES
Installation to marble or plastic: Do not use
plumbers putty. Remove the adhesive backing
from the gaskets, and firmly press them over the
two outside lavatory holes. Position the spacer
over the center lavatory hole so the gasket
surface is down. Position the escutcheon over
the three lavatory holes.
Installation to any other materials: Apply a
ring of plumbers putty or other sealant to the
bottom edges of the escutcheon according to the
putty manufacturer’s instructions. Position the
spacer over the center lavatory hole so the
gasket surface is down. Position the escutcheon
over the three lavatory holes.
Escutcheon
Apply
Plumbers
Putty
Spacer
Gasket
ANTIQUE
SINGLE-CONTROL
LAVATORY FAUCETS
INSTALLATION
INSTRUCTIONS
Question and Answer IconNeed help?

Do you have a question about the Kohler ANTIQUE Series and is the answer not in the manual?

Kohler ANTIQUE Series Specifications

General IconGeneral
StyleTraditional
Valve TypeCeramic Disc
MaterialBrass
ADA CompliantYes
WarrantyLifetime Limited Warranty
Product TypeFaucet
CollectionANTIQUE
Number of Handles2
Faucet Centers8 inches
Spout Reach5.5 inches
Flow Rate1.2 GPM
Available FinishesPolished Brass, Vibrant Polished Nickel, Oil-Rubbed Bronze, Brushed Nickel
FinishVaries by model

Summary

Before You Begin Installation

General Notes and Requirements

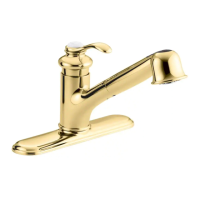
Covers faucet compatibility, installation clearance, and general notes for proper setup.

Tools and Materials Required

Lists necessary tools and materials such as wrenches, sealants, and putty for installation.

Three-Hole Lavatory Installation

Specific steps for installing the faucet on three-hole lavatories using an escutcheon.

All Lavatory Faucet Body Installation

Faucets With Escutcheon

Steps for installing the faucet using an escutcheon plate on the lavatory.

Faucets Without Escutcheon

Instructions for installing the faucet directly onto the lavatory without an escutcheon.

Mounting Stud and Nut Tightening

Details on attaching the mounting stud, bracket, spacer, and nut for secure faucet installation.

Drain Installation (CP and PB Finishes)

Flange and Gasket Assembly

Steps for preparing and installing the drain flange, gasket, and washer.

Body and Nut Assembly

Instructions for attaching the drain body, body washer, and nut, and positioning the seal hole.

Drain Installation (Other Finishes)

Drain Body and Flange Assembly

Steps for assembling the drain body, flange, and nut for other finishes.

Rod and Stopper Assembly

Instructions for assembling the lift rod, washers, stopper, and securing the stopper nut.

All Drains Stopper and Tailpiece Installation

Stopper and Rod Connection

Steps for connecting the stopper to the drain body and adjusting the lift rod.

Tailpiece Installation

Instructions for applying thread sealant and attaching the tailpiece to the drain body.

Final Faucet Assembly and Connections

Lift Rod Assembly

Connecting the lift rod to the faucet body and securing it with a thumb screw.

Supply Tube Connections

Connecting hot and cold water supply tubes to the faucet inlets and stops.

Installation Checkout and Support

Final Installation Checks

Steps for connecting the P-trap, checking for leaks, and flushing the faucet.

Requesting Service

Guidance on troubleshooting and contacting Kohler Customer Service for assistance.

Related product manuals