EasyManua.ls Logo

Kohler Veil User Manual

Kohler Veil
2 pages
To Next Page IconTo Next Page
Page #1 background imageLoading...
Page #1 background image
478±3
438±3
230±3
43.5
180±3
19mm ring spanner for pan fixing
Coach screws (not supplied) & wrench to affix frame
300mm braided hose with 90º bend (supplied)
M&F fitting between hose & DCV (supplied)
Ensure power supply for bidet is switched off at the
switchboard and locked/tagged out
Set up cistern water supply with suitable high hazard
backflow prevention compliant with AS/NZS 3500.1
Keep power and data cable ends in front of wall and
are protected against crushing or other damage
Ensure the wall cut-out for faceplace is a tight fit
Lubricate pan connector to vario waste connector
Do not lubricate pan connector to spigot connection
Pan with faceplate ....................... 76395A-NA
Hydro-Tower 500 in-wall tank ..... 18647A-NA
Veil
K-5402A-0
Wall Hung
Intelligent Toilet
Plumber Installation Checklist
1283804-A02-B ©Kohler Co. June 2016
1
2
3
4
5
Component information
Please note
Special tools and materials required
Special attention required
Remove cardboard protectors from in-wall cistern.
Loosen and move the feet on the cistern frame so
that the 1m mark measures 1020mm from the
finished floor. This will put the top of the pan at
398mm from the finished floor. Adjust this
higher/lower as per the customer’s preference.
Check mounting frame and ensure there is a
gap in bottom plate for the waste connector.
Install and secure the cistern.
Insert and secure the waste connector
(P or S trap installation available).
Washer
Coach
screw
Bottom plate
1metre mark
Gap for
discharge elbow
(S-trap install)
Coach screw
Adjustable bracket
Stud
Stud
Nog
Waste
connector
This document is intended as a guide only.
Please refer to supplied manual #1266554-A02
for full installation instructions.
Before proceeding, carefully remove toilet from
packaging and inspect for damage.
Use pan cradle from supplied packaging or similar
to support the pan during installation.
Washer
Question and Answer IconNeed help?

Do you have a question about the Kohler Veil and is the answer not in the manual?

Kohler Veil Specifications

General IconGeneral
MaterialVitreous China
Bowl ShapeElongated
Remote ControlYes
ADA CompliantYes
WaterSense CertifiedYes
Flush TypeDual-Flush
FeaturesHeated Seat
Water Supply Connection3/8 inches
Electrical Requirements120V
Rough-In12 inches
Color OptionsWhite
Bowl HeightComfort Height

Summary

Pre-Installation Guidance

Important Notes and Warnings

Key precautions before installation, including manual reference, handling, and packaging inspection.

Component Identification

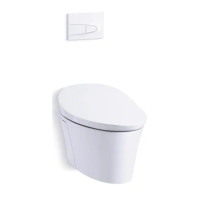
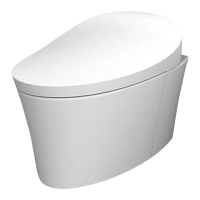
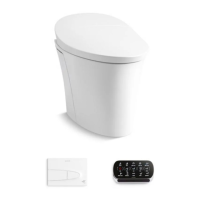
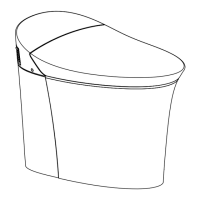
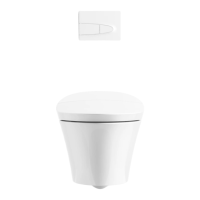
Lists the main components of the toilet system, including the pan and in-wall tank.

Special Tools and Materials

Lists specific tools and materials required for installation, such as spanners and hoses.

Special Attention Required

Highlights critical installation aspects like electrical safety, water supply, and cable management.

Installation Steps

Step 1: Prepare Cistern Frame

Remove protectors, adjust cistern frame feet to the correct height for pan installation.

Step 2: Check Mounting Frame

Verify the mounting frame has a gap for the waste connector at the bottom plate.

Step 3: Install Cistern and Waste

Secure the cistern and install the waste connector, noting P or S trap options.

Step 4: Connect Water and Faceplate

Connect water supply, insert faceplate surround, and add bungs to protect components.

Step 5: Wall Preparation and Trimming

Use template for wall preparation, trim faceplate surround flush with the finished wall.

Step 6: Install Pan Fixing Bolts

Insert pan fixing bolts ensuring the washer is tight against the finished wall.

Step 7: Mark and Cut Pipes

Mark and cut water inlet and discharge pipes, filing pipe ends for a clean finish.

Step 8: Affix Seals and Install Pipes

Apply seals and install pipes into the back of the pan.

Step 9: Route Cables and Connect Supply

Feed power cable, connect data cable and water supply to the bidet, checking for leaks.

Step 10: Mount Toilet Pan

Lift and install the toilet pan onto the wall, requiring a two-person lift due to weight.

Step 11: Ensure Pan Plumbness

Use a level to ensure the top of the toilet pan is plumb before securing.

Step 12: Seal and Attach Panels

Apply silicone sealant around the pan and install the side panels.

Step 13: Install Faceplate and Remote

Install the flush panel faceplate and remote control bracket, following pairing instructions.

Related product manuals