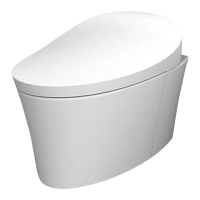
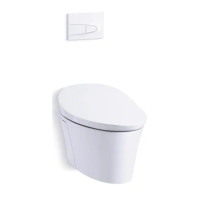
EasyManua.ls Logo

Kohler VEIL K-5402A-0 User Manual

Kohler VEIL K-5402A-0
26 pages
To Next Page IconTo Next Page
Page #1 background imageLoading...
Page #1 background image
VEIL WALL HUNG
10A power supply is required.
We appreciate your commitment to Kohler quality. Please take a few minutes before you begin installation to
review this manual to become familiar with tools, materials and installation methods. If you encounter any
installation or performance problems, please don't hesitate to contact us. Thanks again for choosing Kohler Co.
Please follow instructions closely to avoid costly mistakes caused by improper installation. Cover and protect
the components and fittings at all times during installation. Flush the plumbing lines before initial use.
All information in this manual is based upon the latest product information available at the time of publication.
Kohler Co. reserves the rights to make changes in product characteristics, packaging or availability at any time
without notice.
Before continuing, please ensure there is no existing damage to the toilet and that there is suitable space for
installation with no interference with other bathroom fixtures such as shower door openings. Before proceeding
with installation, ensure there is ample room (approx 600mm) down each side of the pan to allow for servicing.
To prevent serious damage, do not use corrosive solutions (see back page for care and cleaning information).
Any use of non-recommended products could void the Kohler warranty.
This manual includes important care and cleaning information - please save these instructions.
The Kohler Veil Intelligent Toilet - Wall Hung (K-5402A-0) is WaterMark certified according to ATS 5200.051
Technical Specification for Plumbing and Drainage Products - Bidet Douche Seats.
Installation must comply with AS/NZS 3500.1 Plumbing and Drainage - Water Services and AS/NZS 6400 Water
Efficient Products - Rating and Labelling.
The supplied Dual Check Valve is WaterMark certified according to AS 2845.1 Water Supply - Backflow Preven-
tion Devices - Materials, Design and Performance Requirements.
Each site must have High Hazard Backflow Prevention installed upstream of the installation.
For domestic installations, consult with a Licensed Practitioner (Plumber) before installation.
For commercial applications, refer to a Hydraulic Consultant before specification or installation.
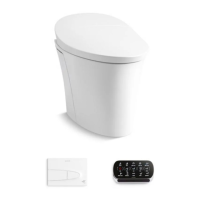
Hands-free flushing
Manual dual-flush option
Backflow prevention
Anti-impact, rust-proof, macromolecule water tank reduces the possibility of leakages.
Advanced water tank system is able to adjust 4.5/3 litre water discharge. To maintain the 4-star WELS rating,
switch off the Auto-flush option.
No influence on wall structure, superb sound-proof effectiveness.
Easy and quick installation saves time and labour.
Easy servicing, wall reconstruction is not required.
Sanitary system with no residual waste.
Super thin tank body saves installation space and is applicable for all thin mounting walls.
Kohler Co. March 2016 1266554-A02-A1
Preset water inlet level & flush volume
Suitable for either S-trap or P-trap installations
Adjustable toilet installation height
COMPLIANCE: Ensure installation adheres to local building code & applicable plumbing/electrical standards.
Backflow Prevention
Product Functions
Advantages for the In-wall Water Tank

Questions and Answers:

Kohler VEIL K-5402A-0 Specifications

General IconGeneral
Product NameKohler VEIL K-5402A-0
CategoryToilets
TypeOne-Piece
Bowl ShapeElongated
Depth28.5 inches
MaterialVitreous China
ColorWhite
Flush TypeGravity Flush
Trapway Size2-1/8 inches
Rough-In Size12 inches
ADA CompliantYes
Seat IncludedNo
Seat TypeNot Included
Bowl Height16.5 inches
Water Consumption1.28 gallons per flush
Flush Volume1.28 gallons
Seat Height16.5 inches
Warranty1-Year Limited Warranty

Summary

Before Installation

Compliance and Standards

Adherence to local building codes and plumbing/electrical standards.

Backflow Prevention Requirements

Mandates for backflow prevention devices and professional consultation.

Electrical Safety Warnings

Critical warnings about electrical shock, grounding, and power supply requirements.

In-Wall Tank Design and Installation Concept

Component Identification

Lists essential components for the in-wall tank system.

Required Tools and Materials

Lists all necessary tools and materials for installation.

Dimension Drawing and Specifications

Provides detailed technical dimensions for installation planning.

Product Specifications Overview

Technical Dimensions and Performance

Details dimensions and technical specifications of the toilet.

Installation Preparation and Handling

Product Overview and Diagram

Provides an overall diagram and identifies key toilet components.

Safe Handling and Initial Precautions

Instructions for safely handling the toilet and initial precautions.

Installation Process Commencement

Removing the Old Toilet

Steps for removing the existing toilet fixture before new installation.

Installation Safety Guidelines

Emphasizes essential safety warnings for the installation phase.

In-Wall Tank Installation Procedures

Tank Removal and Support Adjustment

Steps for removing the in-wall tank and setting support feet height.

Frame Construction and Securing

Guidance on building a mounting frame and securing it with bolts.

S-Trap Installation Method

Discharge Elbow Assembly

Instructions for assembling the discharge elbow and securing it with the bracket.

Securing Discharge Elbow with Bung

Steps for placing the bung into the discharge elbow for proper function.

P-Trap Installation Method

Waste Connector Installation

Instructions for installing the waste connector and securing it to the bracket.

Wall Preparation and Finishing

Precise Wall Cut-out and Protection

Details precise wall cut-out requirements and dust protection measures.

Toilet Bowl Installation Steps

Side Panel Removal

Steps for removing the side panels of the toilet bowl.

Discharge and Inlet Pipe Installation

Guidance on installing the discharge and water inlet pipes correctly.

Control Panel Installation

Splash Plate and Locator Alignment

Installing the water splash plate into the control panel's designated slots.

Electrical Connections and Sealing

Verifying wiring, power, and water connections before final sealing.

Top Button Installation

Locknut Adjustment for Supporting Board

Adjusting locknuts on the supporting board to the "OPEN" position.

Securing the Supporting Board

Tightening screws to secure the supporting board to the wall.

Installing Mounting Lag Bolts

Screwing lag bolts into the bracket, ensuring they are perpendicular to the wall.

Discharge Valve Service and Dismantle

Control Pan Dismantling

Instructions for safely removing the control pan for servicing.

Motor Assembly and Wiring Dismantle

Steps for dismantling motor assembly and signal wires.

Filter Cleaning Procedure

Discharge Valve Removal and Cleaning

Method for removing and cleaning the discharge valve.

Filter Locknut Adjustment and Cleaning

Steps to loosen the filter locknut, clean the filter, and retighten.

Valve Adjustment Procedures

Discharge Valve Flush Volume Adjustment

Instructions for adjusting flush volumes.

Water Inlet Valve Level Adjustment

Guidance on adjusting the control pole to modify water level.

Remote Control Docking Station Setup

Docking Station Mounting and Securing

Steps for positioning, drilling, and fastening the docking station.

Anti-Theft Installation Features

Instructions for installing public anti-theft features.

Troubleshooting Common Issues

Basic Operation and Flushing Problems

Addresses issues like toilet not working or flushing incompletely.

Functionality, Sensor, and User Detection

Covers problems with flush stopping, sensors, and user detection.

Night Light and Remote Functionality

Solutions for night light issues and remote control problems.

Customer Care and Support

Customer Obligations and Cleaning Advice

Outlines user responsibilities for cleaning and product care.

Warranty Information and Contact

Provides details on warranty coverage and customer support contacts.

Related product manuals