2. Release governor lever and check that throttle lever
is in idle position. Turn governed idle adjustment
screw to obtain equipment manufacturer’s
recommended idle speed (1500-1800 RPM). Some
engines have a bendable tab that is used to set this
speed. A pliers should be used to bend this tab to
achieve recommended speed. Governed idle speed
(RPM) is typically 300 RPM (approximate) higher
than low idle speed.
3. Move throttle lever to wide-open/full throttle position
and hold in this position. Turn high speed screw to
obtain intended high speed no-load RPM. Governed
idle speed must be set before making this
adjustment.
Low Idle Fuel Adjustment (Some Models)
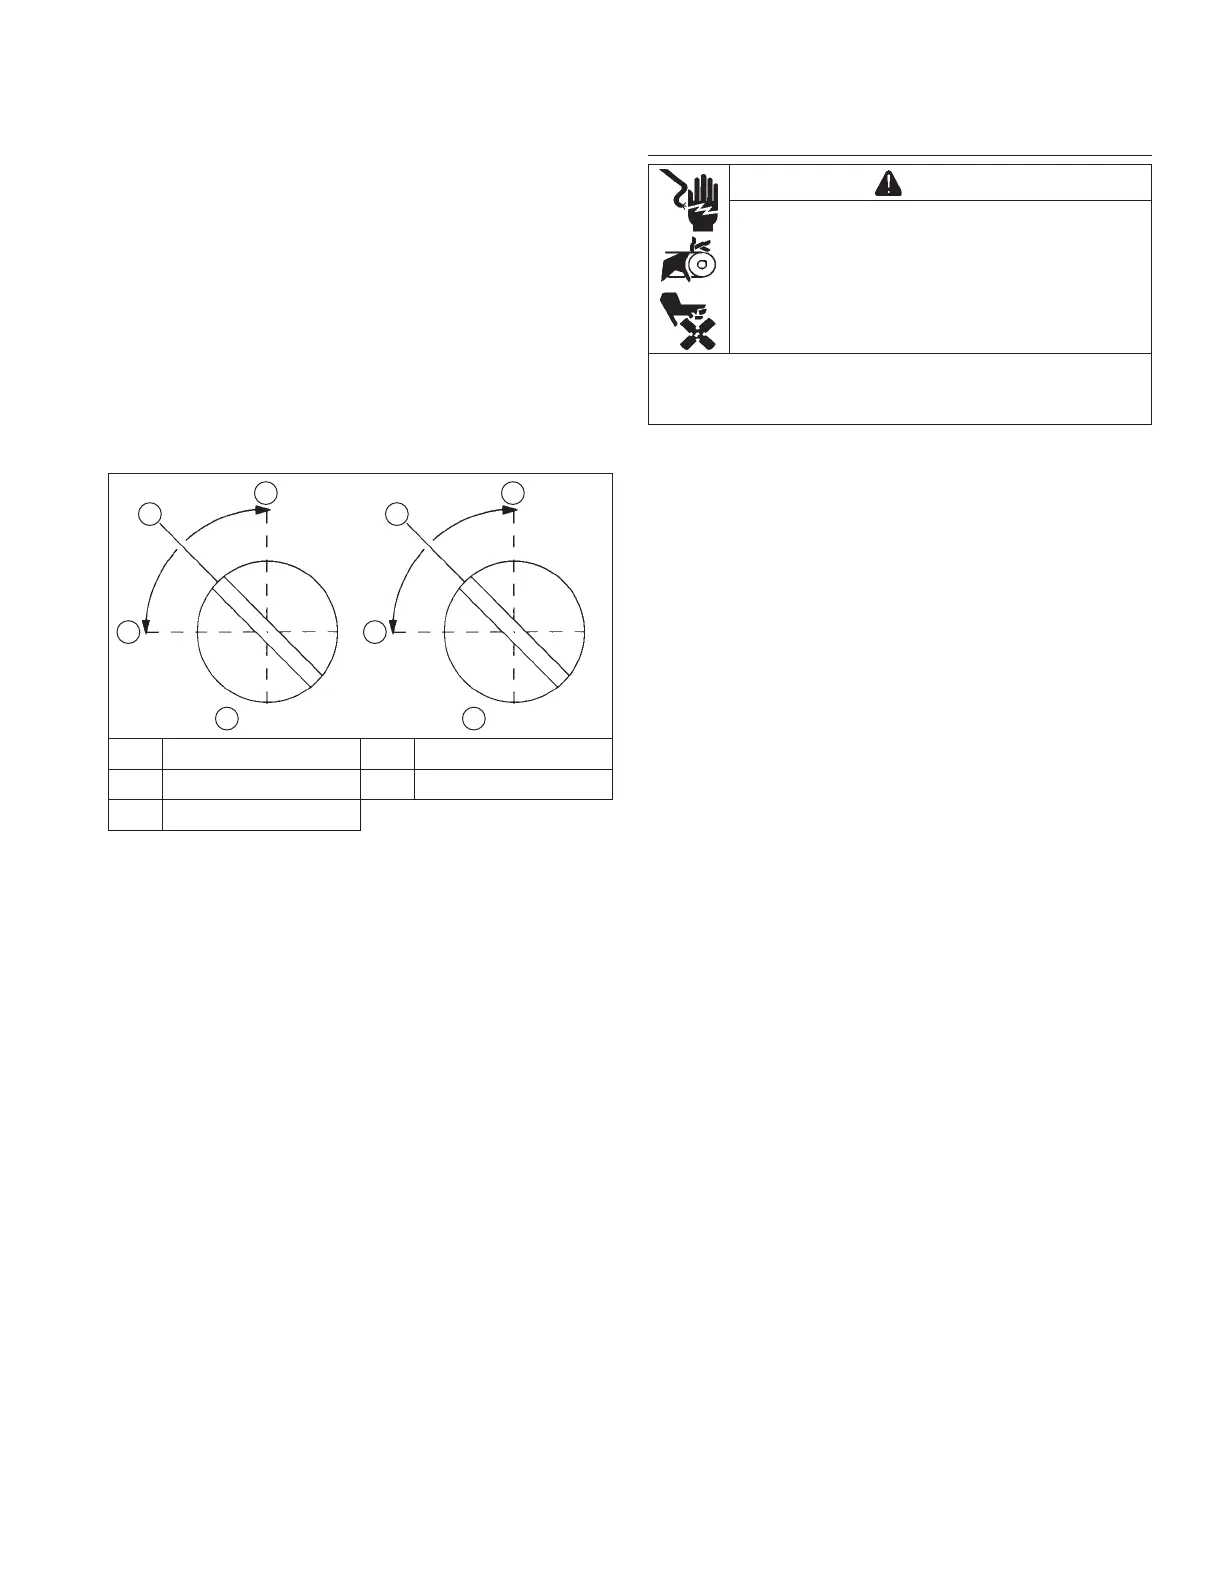
Optimum Low Idle Fuel Setting
BB
CC
ED
AA
A Rich B Lean
C Midpoint D Left Side
E Right Side
NOTE: Engines will have fi xed low idle or limiter caps
on idle fuel adjusting needles. Step 2 can only
be performed within limits allowed by cap. Do
not attempt to remove limiter caps.
1. Place throttle control into idle or slow position. Adjust
low idle speed to 1200 RPM. Follow Low Idle Speed
(RPM) Adjustment.
2. Low idle fuel needle(s) setting: place throttle into idle
or slow position.
a. Turn 1 low idle fuel adjusting needle out
(counterclockwise) from preliminary setting until
engine speed decreases (rich). Note position of
needle. Now turn adjusting needle in (clockwise).
Engine speed may increase, then it will decrease
as needle is turned in (lean). Note position of
needle. Set adjusting needle midway between
rich and lean settings.
b. Repeat procedure on other low idle adjustment
needle (two-barrel carburetor only).
3. Recheck/adjust Low Idle Speed (RPM) to specified
setting.
High Speed (RPM) Adjustment
1. With engine running, move throttle control to fast.
2. Turn inner adjustment screw outward to decrease, or
inward to increase RPM speed.
Keihin Carburetor Servicing
WARNING
Accidental Starts can cause severe injury or
death.
Disconnect and ground spark plug lead(s)
before servicing.
Before working on engine or equipment, disable
engine as follows: 1) Disconnect spark plug lead(s). 2)
Disconnect negative (–) battery cable from battery.
NOTE: Main and slow jets are fi xed and size specifi c
and can be removed if required. Fixed jets for
high altitudes are available.
● Inspect carburetor body for cracks, holes, and other
wear or damage.
● Inspect fl oat for cracks, holes, and missing or
damaged fl oat tabs. Check fl oat hinge and shaft for
wear or damage.
● Inspect fuel inlet needle and seat for wear or damage.
● Inspect spring loaded choke plate to make sure it
moves freely on shaft.
Float Replacement/Overhaul/Choke Repair
NOTE: Inlet needle center pin is spring loaded. Make
sure fl oat rests against fuel inlet needle without
depressing center pin.
If symptoms described in Troubleshooting-Carburetor
Related Causes indicate fl oat level problems, remove
carburetor from engine to check and/or replace fl oat.
Use a fl oat kit to replace fl oat, pin, fl oat valve, clip, and
screw.
1. Perform removal procedures for appropriate air
cleaner and carburetor outlined in Disassembly.
2. Clean exterior surfaces of dirt or foreign material
before disassembling carburetor. Remove bowl
retaining screws, or solenoid assembly on most
single cylinder engines, and carefully separate fuel
bowl from carburetor. Do not damage fuel bowl
O-rings. Transfer any remaining fuel into an
approved container. Save all parts. Fuel can also be
drained prior to bowl removal by loosening/removing
bowl drain screw.
3. For two-barrel carburetor, remove fl oat pin screw,
fl oat, pin, and inlet needle. Seat for inlet needle is
not serviceable and should not be removed.
For one-barrel carburetor, remove fl oat pin, fl oat,
and inlet needle. Seat for inlet needle is not
serviceable and should not be removed.
4. Clean carburetor bowl and inlet seat areas as
required. To reassemble fuel bowl go to step 18,
otherwise go to step 5.
Fuel System
2924 690 06 Rev. P KohlerEngines.com