209-1023 CLC Cabinets
5
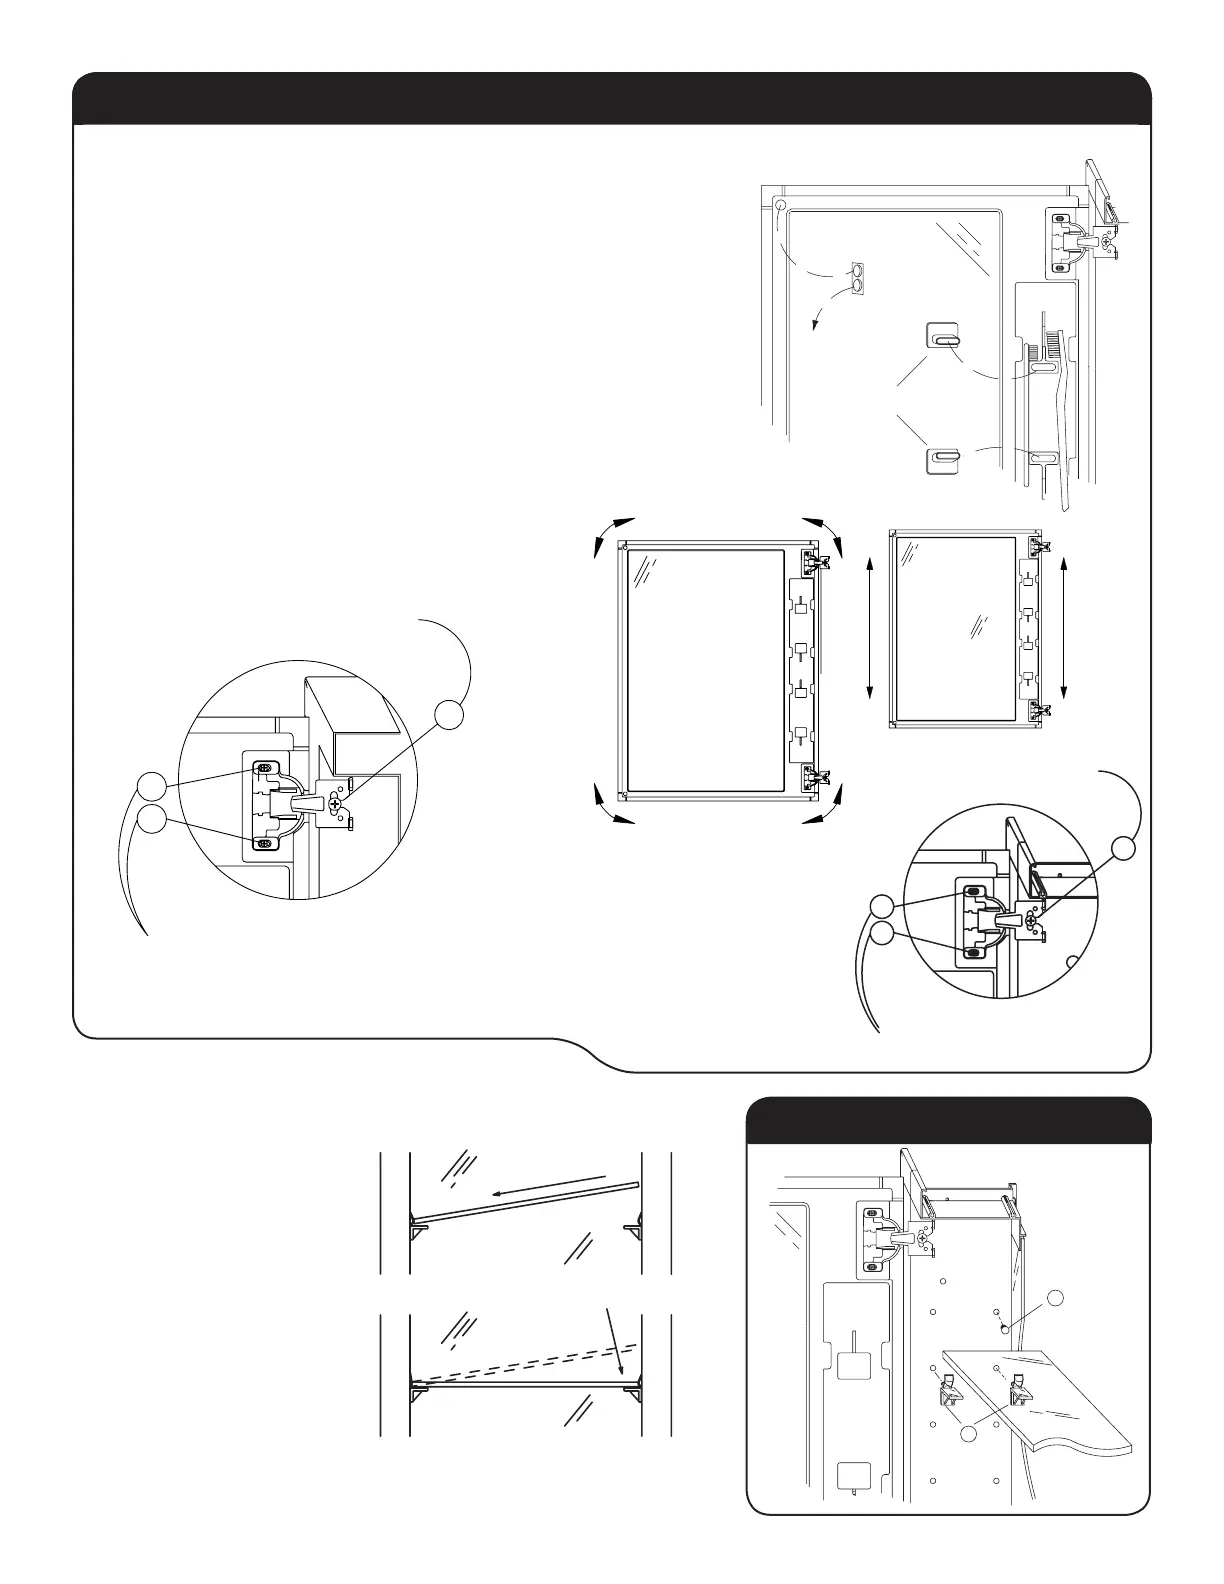
4. Door adjustments
8-32 x 1/2" (SS829)
6-32 x 3/8"
(SS679)
A. This screw releases the door form the cabinet and
allows up and down adjustment. Fig.9
B. These screws allow you to plumb the door as
shown in Fig. 10.
C. The screws you use for attaching the hinges.
(Supplied with hinges)
5. Installing the shelves – see Fig. 11
1. Push/twist the pins
into place
A. Push one side of
the shelf into the
left or right clips
B. Snap the shelf
down into the
opposite side. If
the shelf is too
tight, repeat the
process from the
other side.
2. Fill the remaining
holes with the plugs.
Fig. 11
Fig. 9
Fig. 10
Door
Bumpers
Toothbrush
Covers
5. Installing the toothbrush covers & door bumpers – see Fig. 9
1. Push the toothbrush covers into place, one up, one
down, one up, one down.
2. These covers can be “wiggled “ free to clean the
bristle area when required.
3. Each door can hold four brushes, 2 large bent handle
type brushes (Reach®, Oral B®, Precision®, etc) 2
straight handle or childrens brushes
4. Install the clear door bumpers in the round indent
area at the top and bottom of the door.
Fig. 9
BELOW FOR 1 & 2 DOOR CABINET ONLY* (See page 4 for Three Door instructions.)
A
B
1
2
 Loading...