8.14
Section 8
Disassembly
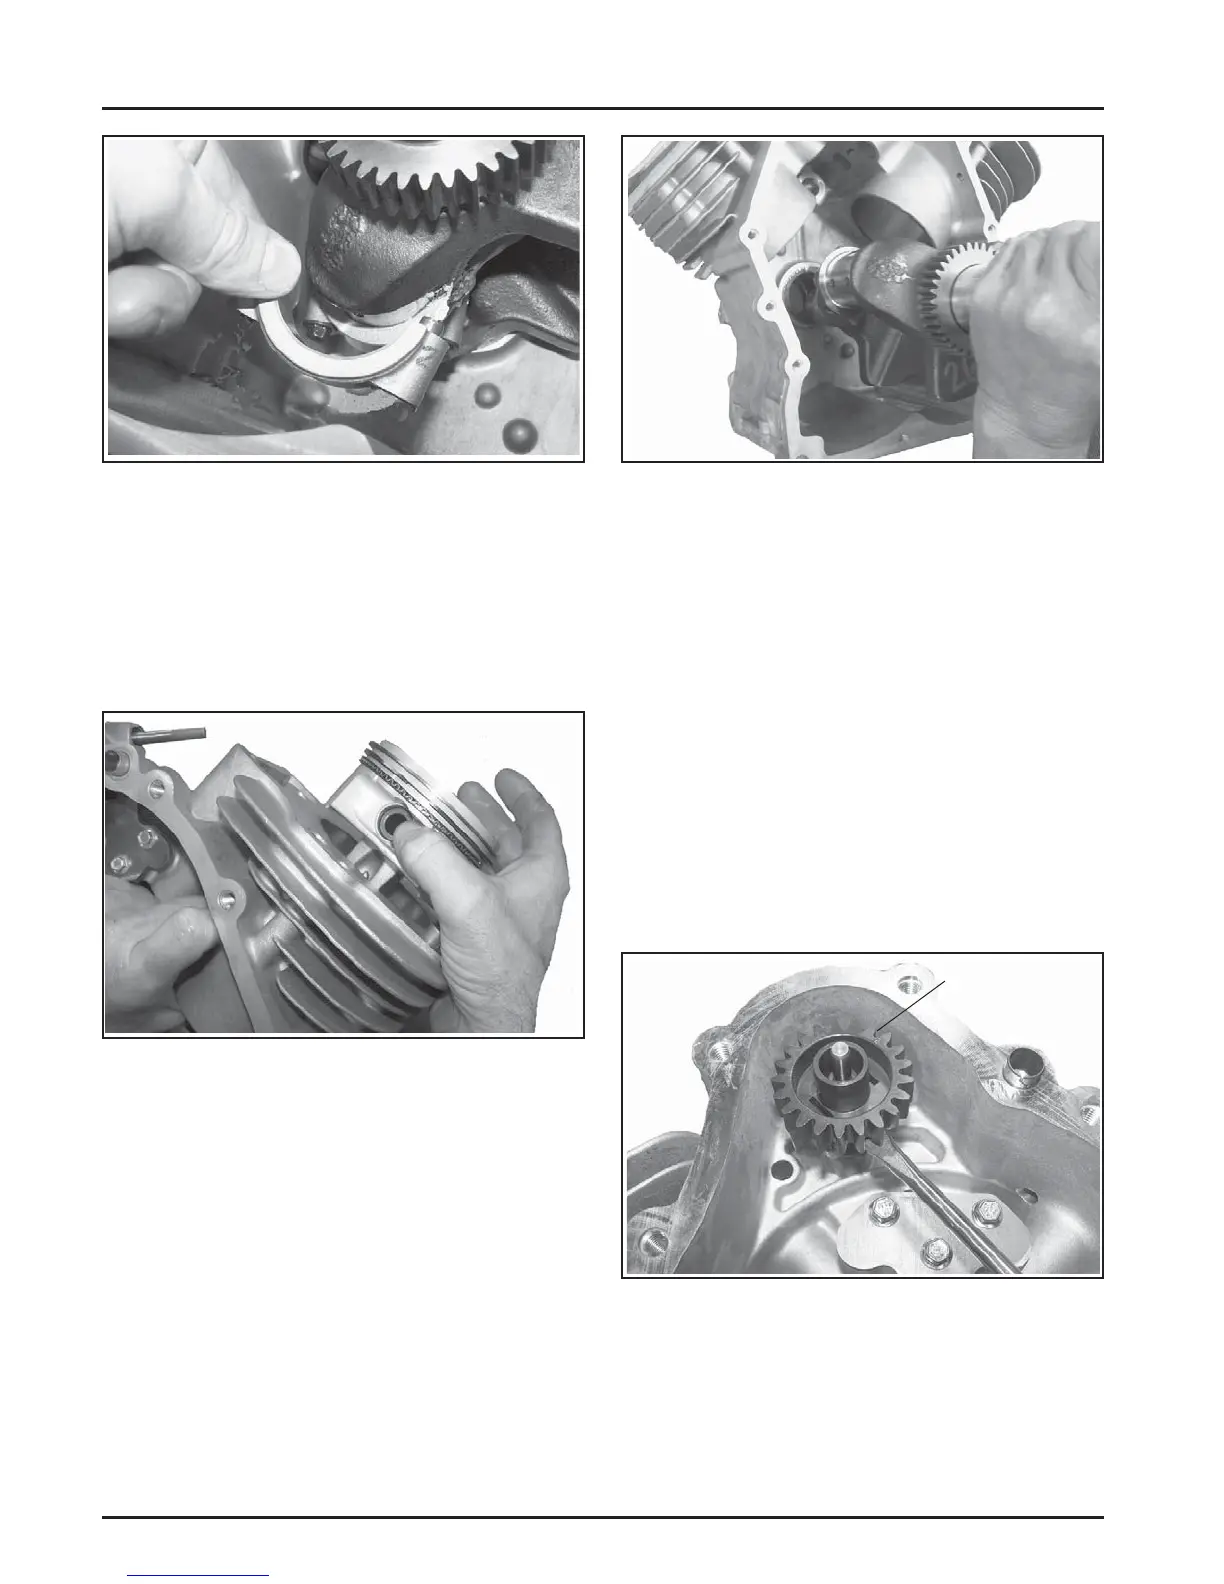
Figure 8-57. Remove Connecting Rod Caps.
NOTE: The cylinders are numbered on the crankcase.
Use the numbers to mark each end cap,
connecting rod and piston for reassembly. Do
not mix end caps and connecting rods.
2. Carefully remove the connecting rod and piston
assembly from the cylinder bore. See Figure 8-58.
Figure 8-58. Removing Piston/Connecting Rod
Assemblies.
3. Repeat the above procedures for the other
connecting rod and piston assembly.
Remove Crankshaft
1. Carefully pull the cranksha from the crankcase.
See Figure 8-59. Note thrust washers and shims if
used.
Figure 8-59. Removing Crankshaft.
Removal of Governor Gear Assembly
The governor gear is held onto the sha by small
molded tabs in the gear. When the gear is removed
from the sha , these tabs are destroyed and the gear
must be replaced. Therefore, remove the gear only
if absolutely necessary. If the governor cross sha ,
yoke, or gear condition does not require removal,
the governor gear may be le in place. If removal is
necessary, perform as follows:
1. Remove the locking tab thrust washer and note
orientation.
2. Using a screwdriver, carefully pry upward to
unseat the governor gear assembly from the
governor gear sha . Remove the regulating pin
and governor gear assembly. See Figure 8-60.
Governor Gear
Figure 8-60. Removing Governor Gear.
3. Inspect the governor gear sha for wear or
damage. Remove the sha only if replacement is
needed.
 Loading...