Install Connecting Rods with Pistons and Rings
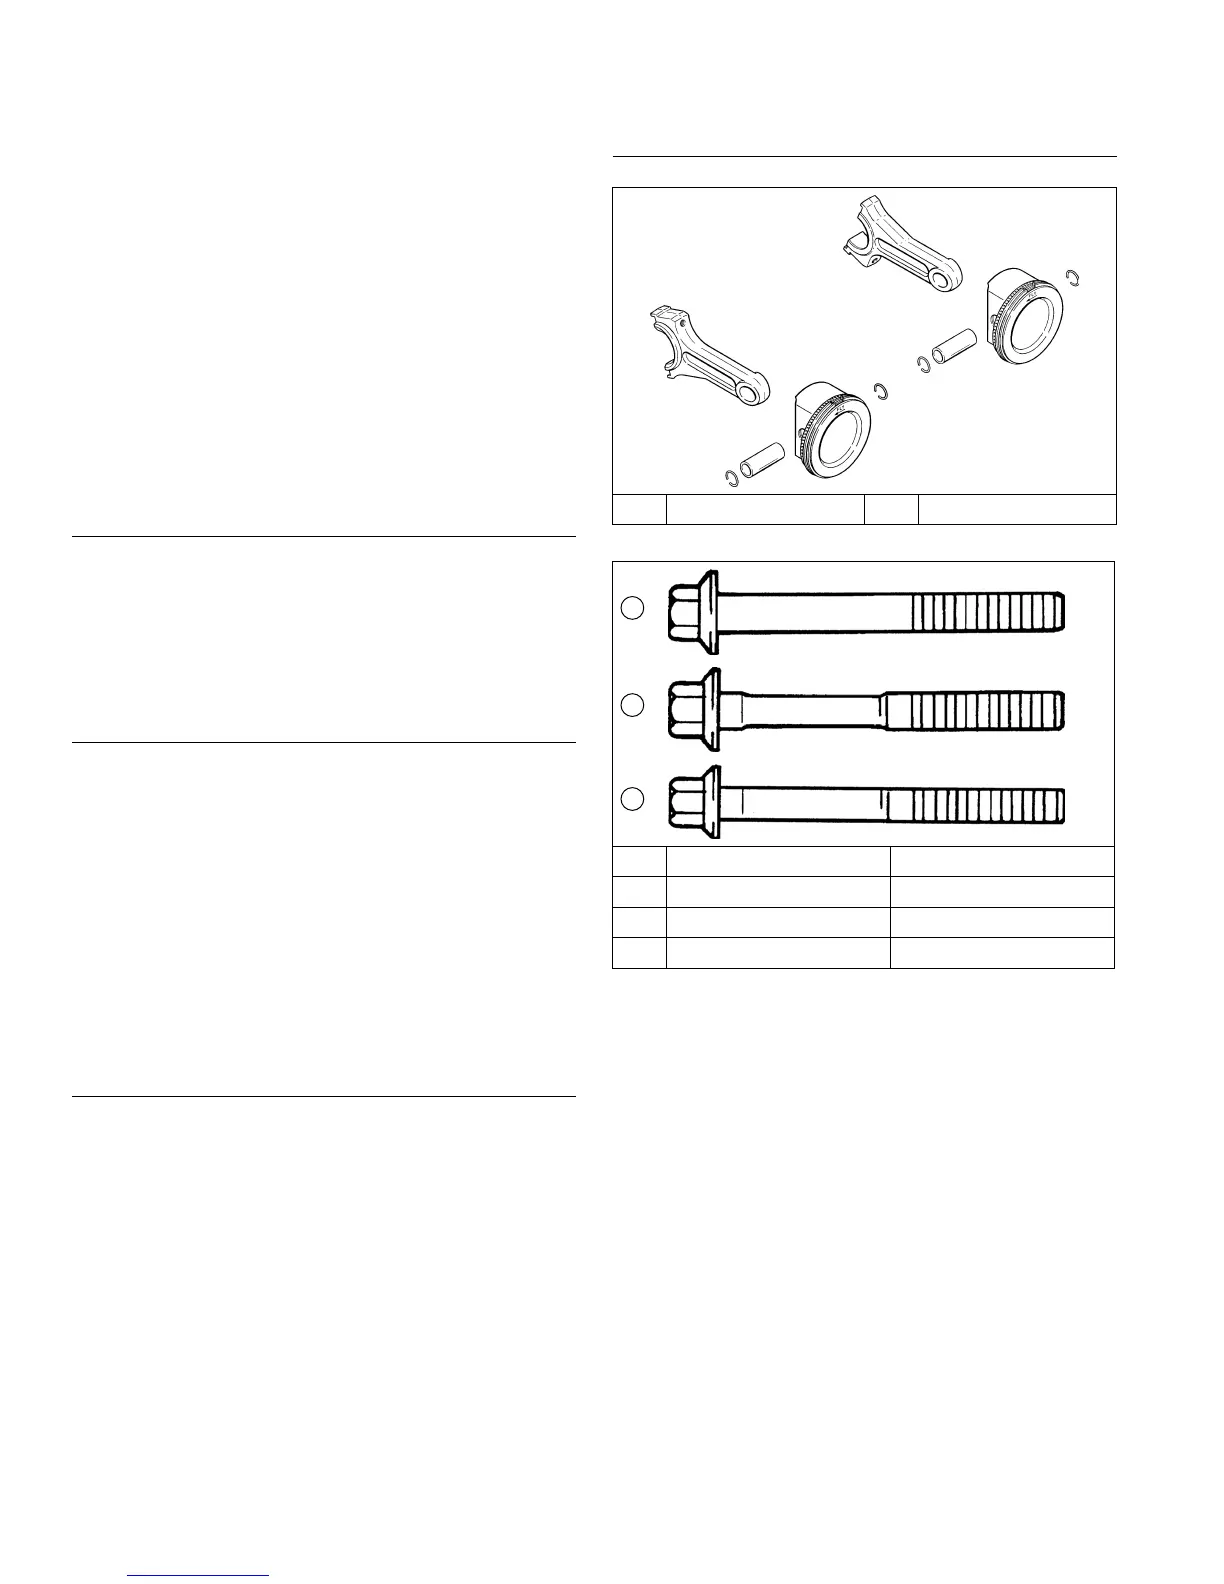
Piston and Connecting Rod Details
B
A
A Cylinder 1 B Cylinder 2
Connecting Rod Bolt Details
A
B
C
Type Torque
A 8 mm Straight Shank 22.7 N·m (200 in. lb.)
B 8 mm Step-Down 14.7 N·m (130 in. lb.)
C 6 mm Straight Shank 11.3 N·m (100 in. lb.)
NOTE: Cylinders are numbered on crankcase. Make
sure to install piston, connecting rod, and end
cap into its appropriate cylinder bore as
previously marked at disassembly. Do not mix
end caps and connecting rods.
NOTE: Proper orientation of piston/connecting rod
assemblies inside engine is extremely important.
Improper orientation can cause extensive wear
or damage. Be certain pistons and connecting
rods are assembled exactly as shown.
NOTE: Align chamfer of connecting rod with chamfer of
its mating end cap. When installed, at faces of
connecting rods should face each other. Faces
with raised rib should be toward outside.
1. If piston rings were removed, see Disassembly/
Inspection and Service procedure to install new
rings.
2. Lubricate cylinder bore, piston, and piston rings with
engine oil. Compress rings using a piston ring
compressor.
3. Lubricate crankshaft journals and connecting rod
bearing surfaces with engine oil.
NOTE: Make sure engine is assembled using all
specied torque values, tightening sequences,
and clearances. Failure to observe specications
could cause severe engine wear or damage.
Always use new gaskets. Apply a small amount
of oil to threads of critical fasteners before
assembly, unless a sealant or Loctite
®
is
specied or preapplied.
Make sure all traces of any cleaner are removed before
engine is assembled and placed into operation. Even
small amounts of these cleaners can quickly break down
lubricating properties of engine oil.
Check oil pan, crankcase, cylinder heads, and valve
covers to be certain that all old sealing material has
been removed. Use gasket remover, lacquer thinner, or
paint remover to remove any remaining traces. Clean
surfaces with isopropyl alcohol, acetone, lacquer thinner,
or electrical contact cleaner.
Install Flywheel End Oil Seal
1. Make sure seal bore of crankcase is clean and free
of any nicks or burrs.
2. Apply a light coat of engine oil to outside diameter of
oil seal.
3. Drive oil seal into crankcase using a seal driver.
Make sure oil seal is installed straight and true in
bore and tool bottoms against crankcase.
Install Governor Cross Shaft
1. Lubricate governor cross shaft bearing surfaces in
crankcase with engine oil.
2. Slide small lower washer onto governor cross shaft
and install cross shaft from inside of crankcase.
3. 6 mm governor shaft: Install plain washer and then
insert hitch pin into smaller, lower hole of governor
cross shaft.
8 mm governor shaft: Install nylon washer onto
governor cross shaft, then start push-on retaining
ring. Hold cross shaft up in position, place a 0.50
mm (0.020 in.) feeler gauge on top of nylon washer,
and push retaining ring down shaft to secure.
Remove feeler gauge, which will have established
proper end play.
Install Crankshaft
Carefully slide ywheel end of crankshaft through main
bearing in crankcase.
Reassembly
76
24 690 07 Rev. HKohlerEngines.com