Maintenance
lnstructions
1
11
AwARNING
Before working
on
engine
or
equipment,
disable
~
Accidental
Starts
can
cause
engine
as
follows:
1)
Disconnect
spark
plug
severe
injury
or
death.
lead(s). 2)
Disconnect
negative(-)
battery
cable
~
. Disconnect
and
ground spark
from
battery .
plug
lead(s) before servicing.
Normal
maintenance,
replacement:onepair of emission control
devices
and
systems
may
be
rierformed
by
any
repair
establishment or individual;
however,
warranty
repairs
must
be
performed
1y
a
Kahler
authorized
dealer
found
at KohlerEngines.com or 1-800-544-2444
(U.S.
and
Canada).
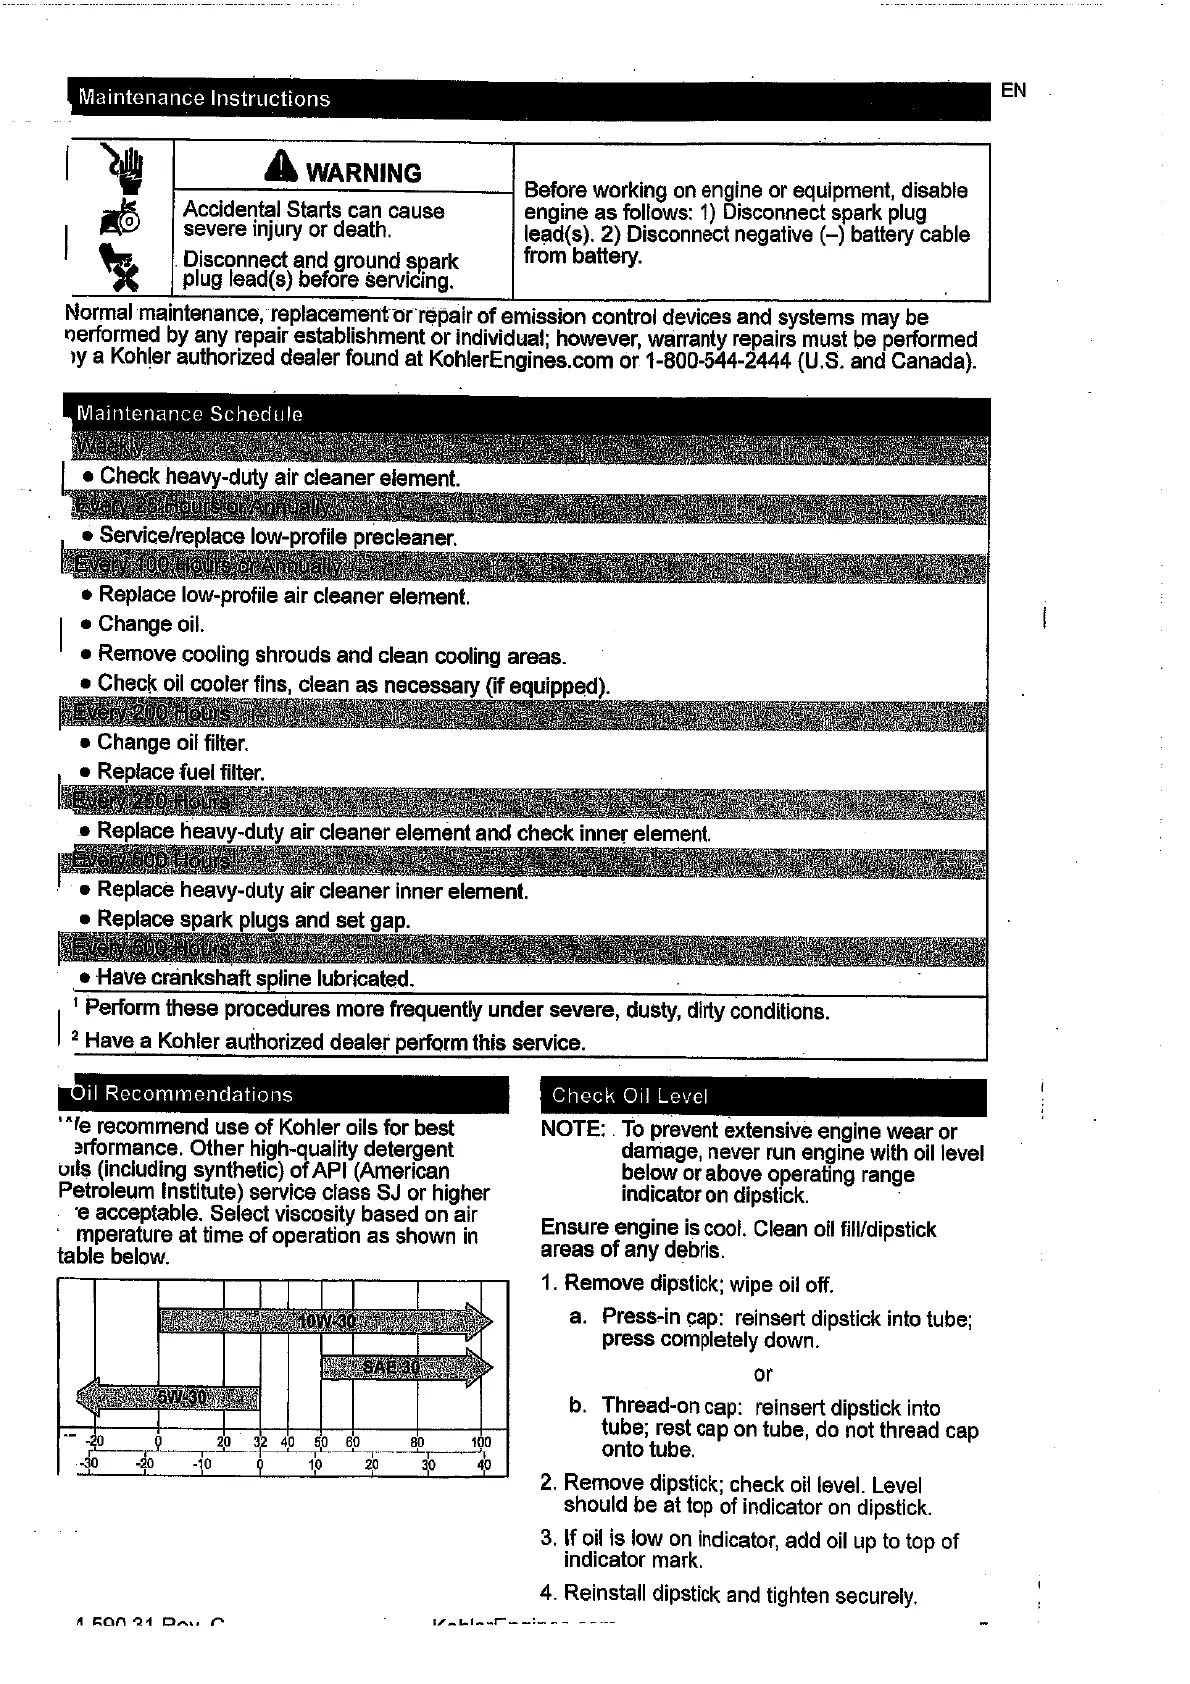
•
Replace
low-profile air cleaner
element.
•
Change
oil.
•
Remove
cooling
shrouds
and
clean
cooling
areas.
•
Chec!<
oil
cooler
fins,
cle~n
as
necessary
(if equipped).
• Have crankshaft spline lubricated.
1
1
Perform
these
procedures
more
frequently under severe,
dusty,
dirty
conditions.
2
Have
a Kahler authorized dealet
perform
this service. .
11
Recommendat,ons
••re
recommend
use
of Kahler oils for
best
3rformance.
Other high-quality detergent
uds
(including synthetic) of
API
(American
Petroleum
Institute) service class
SJ
or
higher
·e
acceptable. Select viscosity
based
on
air
mperature at time of operation
as
shown
in
table
below.
Check
Oll Level
NOTE:
.
To
prevent
extensive
engine
wear
or
damage,
never
run
engine
with
oil
level
below
or
above
operating
range
indicator
on
dipstick.
·
Ensure engine
is
cool.
Clean
oil
fill/dipstick
areas of
any
debris.
1.
Remove
dipstick;
wipe
oil
off.
a.
Press-in
cap:
reinsert
dipstick
into
tube;
press
completely
down.
or
b.
Thread-on
cap:
reinsert
dipstick
into
tube;
rest
cap
on
tube,
do
not
thread
cap
onto
tube.
2.
Remove
dipstick;
check
oil
level.
Level
should
be
at
top
of
indicator
on
dipstick.
3.
lf
oil
is
low
on
indicator,
add
oil
up
to
top
of
indicator
mark.
4.
Reinstall
dipstick
and
tighten
securely.
EN