9.3
Section 9
Inspection and Reconditioning
9
Honing
While most commercially available cylinder hones
can be used with either portable drills or drill presses,
the use of a low speed drill press is preferred as it
facilitates more accurate alignment of the bore in
relation to the cranksha crossbore. Honing is best
accomplished at a drill speed of about 250 RPM and
60 strokes per minute. A er installing coarse stones in
hone, proceed as follows:
1. Lower hone into bore and a er centering, adjust
so the stones are in contact with the cylinder
wall. Use of a commercial cu ing-cooling agent is
recommended.
2. With the lower edge of each stone positioned
even with the lowest edge of the bore, start drill
and honing process. Move the hone up and down
while resizing to prevent the formation of cu ing
ridges. Check the size frequently.
NOTE: Kohler pistons are custom-machined to
exacting tolerances. When oversizing a
cylinder, it should be machined exactly
0.25 mm (0.010 in.) or 0.50 mm (0.020 in.)
over the new diameter (Section 1). The
corresponding oversize Kohler replacement
piston will then fi t correctly.
3. When the bore is within 0.064 mm (0.0025 in.) of
the desired size, remove the coarse stones and
replace them with burnishing stones. Continue
with the burnishing stones until the bore is
within 0.013 mm (0.0005 in.) of the desired size
and then use fi nish stones (220-280 grit) and
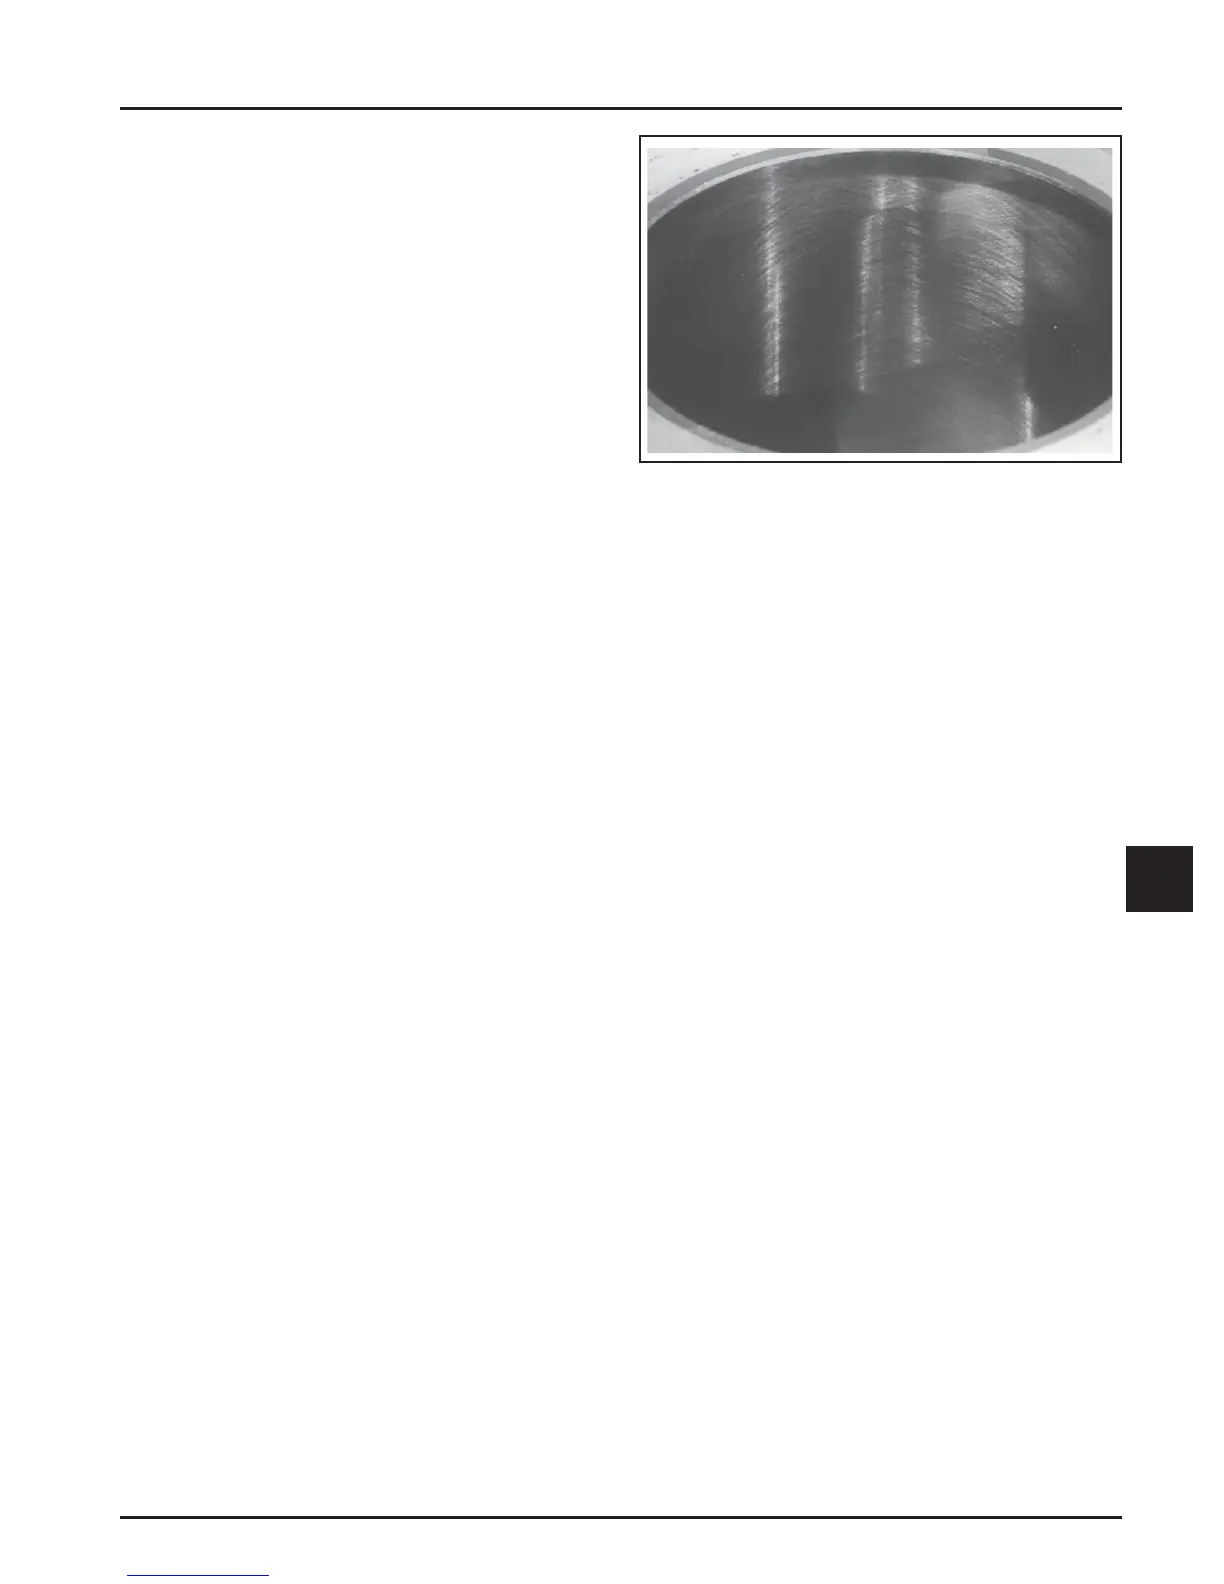
polish the bore to its fi nal size. A crosshatch
should be observed if honing is done correctly.
The crosshatch should intersect at approximately
23°-33° off the horizontal. Too fl at an angle could
cause the rings to skip and wear excessively,
and too steep an angle will result in high oil
consumption. See Figure 9-3.
Figure 9-3. Cylinder Bore Crosshatch after Honing.
4. A er resizing, check the bore for roundness,
taper, and size. Use an inside micrometer,
telescoping gauge, or bore gauge to take
measurements. The measurements should be
taken at three locations in the cylinder – at the
top, middle, and bo om. Two measurements
should be taken (perpendicular to each other) at
each of the three locations.
Clean Cylinder Bore After Honing
Proper cleaning of the cylinder walls following boring
and/or honing is very critical to a successful overhaul.
Machining grit le in the cylinder bore can destroy
an engine in less than one hour of operation a er a
rebuild.
The fi nal cleaning operation should always be a
thorough scrubbing with a brush and hot, soapy
water. Use a strong detergent that is capable of
breaking down the machining oil while maintaining
a good level of suds. If the suds break down during
cleaning, discard the dirty water and start again
with more hot water and detergent. Following the
scrubbing, rinse the cylinder with very hot, clear
water, dry it completely, and apply a light coating of
engine oil to prevent rusting.
Measuring Piston-to-Bore Clearance
Before installing the piston into the cylinder bore, it
is necessary that the clearance be accurately checked.
This step is o en overlooked, and if the clearances are
not within specifi cations, engine failure will usually
result.
NOTE: Do not use a feeler gauge to measure piston-
to-bore clearance – it will yield inaccurate
measurements. Always use a micrometer.

 Loading...