Installation Guide
Guide d’installation
Guía de instalación
Stainless (Non-Staining) Plumbers Putty
Mastic de plombier non tachant
Masilla de plomería que no manche
2
For Single-Hole Sinks: Install
the plate. Secure with a screw if
provided.
Pour les lavabos à un trou :
Installer la plaque. Fixer en place
avec une vis si fournie.
En lavabos de un solo orificio:
Instale la placa. Fije con un
tornillo, si se incluye.
1
Clean the sink surface.
Nettoyer la surface du lavabo.
Limpie la superficie del lavabo.
Do not use petroleum-based
plumbers putty on marble or stone
surfaces.
Ne pas utiliser du mastic de plombier
à base de pétrole sur les surfaces en
marbre ou en pierre.
No utilice masilla de plomería
derivada del petróleo en superficies
de mármol o de piedra.
Important Information
If possible, assemble the faucet and
drain to the bathroom sink before
installing the sink.
Renseignements importants
Si possible, assembler le robinet et
le drain sur le lavabo avant d'installer
ce dernier.
Información importante
De ser posible, ensamble la grifería
y el desagüe al lavabo antes de
instalarlo.
Record your model number.
Noter le numéro du modèle.
Anote su número de modelo.
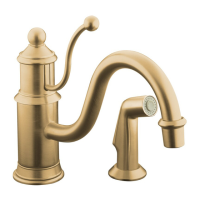
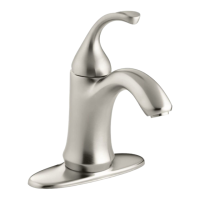
7
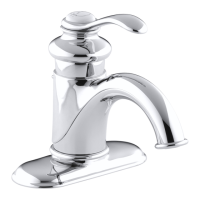
Insert the faucet.
Insérer le robinet.
Introduzca la grifería.
6
For All Installations:Insert the
lift rod through the hole in the
back of the faucet.
Pour toutes les installations :
Insérer la tige de levage dans
l'orifice à l'arrière du robinet.
En todas las instalaciones:
Introduzca el tirador a través del
orificio en la parte posterior de la
grifería.
5
Install the escutcheon.
Installer la rosace.
Instale el chapetón.
4
For Three-Hole Sinks: Apply
plumbers putty to escutcheon if
no foam seal is provided.
Pour les lavabos à trois trous :
Appliquer du mastic de plombier
sur l'applique si aucun joint en
mousse n'est fourni.
En lavabos con 3 orificios:
Aplique masilla de plomería al
chapetón si no se incluye un sello
de hule espuma.
3
Apply plumbers putty to plate if
no foam seal is provided.
Appliquer du mastic de plombier
si aucun joint en mousse n'est
fourni.
Aplique masilla de plomería a la
placa si no se incluye un sello de
hule espuma.
Stopper Bolt
Boulon d'arrêt
Perno del obturador
Type 2: Insert the rod and tighten
the nut.Then insert the stopper. Turn
the stopper bolt to adjust the height.
Type 2 : Insérer la tige et serrer
l'écrou. Insérer ensuite le bouchon.
Tourner le boulon d'arrêt pour régler
la hauteur.
Tipo 2: Introduzca el tirador y apriete
la tuerca. Luego introduzca el
obturador. Gire el perno del
obturador para ajustar la altura.
11
Type 1: Insert the stopper. Then
insert the rod and tighten the nut.
Type 1 : Insérer le bouchon
d'arrêt. Insérer ensuite la tige et
serrer l'écrou.
Tipo 1: Introduzca el obturador.
Introduzca la varilla y apriete la
tuerca.
10
Install the flange.Tighten the nut.
Wipe away excess plumbers
putty.
Installer la bride. Serrer l'écrou.
Essuyer tout excédent de mastic
de plombier.
Instale la brida. Apriete la tuerca.
Limpie el exceso de masilla de
plomería.
Stainless
(Non-Staining)
Plumbers Putty
Mastic de plombier
non tachant
Masilla de plomería
que no manche
9
Disassemble the drain. Apply
plumbers putty to the underside of
the flange.
Désassembler le drain. Appliquer
du mastic de plombier sur le
dessous de la bride.
Desensamble el desagüe. Aplique
masilla de plomería a la cara
inferior de la brida.
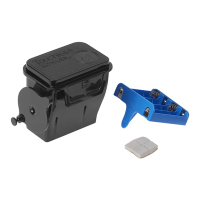
8
Install the bracket. Tighten the
nut.
Installer le support. Serrer l'écrou.
Instale el soporte. Apriete la
tuerca.
15
Reinstall the aerator. Use the key
if needed.
Réinstaller l'aérateur. Utiliser la
clé si nécessaire.
Vuelva a instalar el aireador.
Utilice la llave si es necesario.
14
Remove the aerator. Use the key
if needed. Flush the lines.
Retirer l'aérateur. Utiliser la clé
si nécessaire. Purger les con-
duites.
Retire el aireador. Utilice la llave
si es necesario. Haga circular
agua por las líneas.
13
Connect and tighten the supply
hoses. Check for leaks.
Connecter et serrer les tuyaux
d'alimentation. Rechercher des
fuites éventuelles.
Conecte y apriete las mangueras
de suministro. Verifique que no
haya fugas.
12
Tighten the thumbscrew. Connect
the lift rod using the clip. Connect
the trap to the tailpiece.
Serrer la vis de serrage.
Raccorder la tige de levage à
l'aide du clip. Connecter le siphon
à la pièce de raccordement.
Apriete el tornillo de mariposa.
Conecte el tirador por medio del
clip. Conecte la trampa al tubo
final.
1391558-2-A
www.divapor.com