Do you have a question about the Kohler Mazz R72511-SD-VS and is the answer not in the manual?
Covers assembling the faucet, preparing the mounting ring, and securing it to the sink base.
Details connecting supply hoses and flushing the system to remove debris.
Guides installation of the spray hose, its weight, and checks for smooth operation.
Instructions for installing the soap dispenser components and filling the bottle.
Completes the installation by attaching the supply tube to the pump and installing the pump.
Describes how to clean the faucet nozzles to dislodge debris while water is running.
Explains how to disconnect the sprayhead and clean the screen washer to improve flow.
This document provides a comprehensive guide for the installation, usage, and maintenance of a KOHLER faucet, designed for both three-hole and single-hole sink configurations. The guide emphasizes safety, proper assembly, and routine care to ensure optimal performance and longevity of the faucet.
The installation process begins with a crucial safety warning regarding fresh water contamination. The faucet incorporates back-siphonage protection, and users are explicitly cautioned against removing any internal components to prevent water contamination. For new installations, it is recommended to assemble the faucet to the sink before installing the sink itself. Adherence to all local codes and shutting off the water supply are also critical preliminary steps.
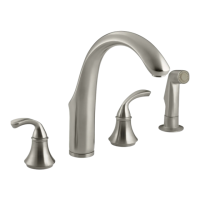
For three-hole sinks, the initial step involves assembling the faucet as illustrated in the manual. This typically includes positioning the main body of the faucet. Following this, the faucet is installed onto the sink, and the nuts on the studs are hand-tightened securely to hold it in place.
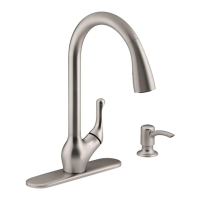
For single-hole sinks, the installation is more straightforward, involving directly installing the faucet into the single hole.
A common step for both configurations involves preparing the mounting ring. Screws are partially threaded into the ring until they extend approximately 1/4" (6 mm) out on the opposite side. This ring is then slid onto the faucet's shank and threaded into place, providing a secure mounting base. The screws on the ring are then positioned to the front and back and tightened, ensuring the faucet is firmly affixed to the sink.
Once the faucet body is secured, the supply hoses are connected and tightened. This step is crucial for establishing the water connection to the faucet. After connecting the hoses, the water supplies are turned on, and both hot and cold water are flushed through the faucet for one minute. This initial flush helps clear any debris from the lines before regular use.
The installation of the spray hose is another key component. A weight is attached to the spray hose, which helps in retracting the hose back into the faucet body when not in use. The spray hose is then aligned with the outlet tube and clicked into place, ensuring a secure connection for the spray function. The weight's position on the spray hose is then adjusted as needed for proper positioning and operation, allowing for smooth extension and retraction.
The manual also covers the installation of a soap dispenser. This involves installing the soap dispenser escutcheon, which is the decorative trim piece that sits on the sink surface. Following this, the soap bottle is installed and filled, completing the soap dispenser setup. The final step for the soap dispenser involves installing the flat end of the tube to the pump and then installing the pump itself, making the dispenser ready for use.
The KOHLER faucet is designed for ease of use, offering both a standard water flow and a spray function. The spray hose, equipped with a weight, allows for extended reach and flexibility, making tasks like rinsing dishes or cleaning the sink more convenient. The soap dispenser integrated into the design provides a neat and accessible solution for dispensing liquid soap, reducing clutter around the sink area.
Regular maintenance is essential to ensure the faucet's smooth operation and longevity. The manual highlights two primary maintenance tasks:
Dislodging Debris from Nozzles: With the water running, users are instructed to rub the nozzles of the sprayhead. This action helps to dislodge any mineral buildup or debris that might accumulate over time, ensuring a consistent and strong water flow. This simple step can prevent clogs and maintain the spray pattern's integrity.
Cleaning the Screen Washer: To improve water flow, especially if it becomes diminished, users can disconnect the sprayhead. Inside the sprayhead, there is a screen washer that can collect sediment and debris from the water supply. Cleaning this screen washer is crucial for restoring optimal flow. After cleaning, the sprayhead should be reassembled. This process helps maintain the faucet's performance and extends its lifespan by preventing blockages.
The emphasis on not removing internal components due to back-siphonage protection is a critical maintenance instruction, reinforcing the safety aspect of the faucet's design.
In summary, this KOHLER faucet is a well-designed fixture that prioritizes ease of installation, user convenience, and straightforward maintenance. Its features, from the flexible spray hose and integrated soap dispenser to the clear maintenance guidelines, aim to provide a reliable and long-lasting solution for kitchen or utility sink needs.
| Brand | Kohler |
|---|---|
| Model Number | R72511-SD-VS |
| Category | Kitchen & Bath Fixtures |
| Collection | Mazz |
| Finish | Vibrant Stainless |
| Number of Handles | 1 |
| Installation Type | Deck Mount |
| Number of Holes Required | 1 |
| Valve Type | Ceramic Disc |
| ADA Compliant | Yes |
| Warranty | Limited Lifetime |
| Faucet Type | Pull Down |
| Spout Reach | 9-1/2 inches |
| Flow Rate | 1.5 GPM |