EasyManua.ls Logo

Kohler STANCE - User Manual

Kohler STANCE
10 pages
Print Icon
To Next Page IconTo Next Page
Loading...
13-1 528437
INSTALLATION INSTRUCTIONS
8mm
PIVOT DOOR, SCREEN, 1 D2P, 8mm
K-37468T
STANCE
-1-
, 2010
Copyright Kohler China Ltd., 2010
BEFORE YOU BEGINBEFORE YOU BEGIN
·
·
·
·
·
·
3
(
) 50~80mm
3mm/m
·
·
·
·
·
·
Before you install your shower door, please read
these instructions carefully to familiarize yourself
with the required tools, materials, and installation
sequences. Follow the sections that pertain to your
particular installation. This will help you avoid costly
mistakes. In addition to proper installation, read all
operating and safety instructions.
All information is based on the latest product
information available at the time of publication.
Kohler China Ltd. reserves the right to make
changes in product characteristics, packaging, or
availability at any time without notice.
These instructions contain important care, cleaning,
and warranty information-
Make sure that the bath and the finished wall
material are completely and correctly installed prior
to installing your shower door. Prepare waterproof
layer to wall and floor of the showering area. It is not
allowed for any presence of electric switches and
sockets. Make sure the floor drain runs smoothly.
Before starting the door installation, lay out and
identify all the parts. Use the exploded view
illustrated on page 3 for reference.
For the installation method of customized shower
with different dimensions, please refer to this
instructions.
Tempered glass cannot be cut, drilled or
knocked by hard object. Make sure corner area
of the glass refraining from knocking so as to
cause personal injury due to broken glass.
Please install this door on Kohler
receptors or curbs. (Not included). If the curb is not
Kohler-branded, please note its top width should fall
within the range of 50~80mm.
The shower door requires a flat vertical
finished wall. The squareness of the wall is
recommended no more than 3 mm/m. KOHLER
Company won t take responsibility of the installation
quality.
please leave these
instructions for the consumer.
CAUTION: Risk of injury or product damage.
ATTENTION:
IMPORTANT:
1160469-T01-A
Question and Answer IconNeed help?

Do you have a question about the Kohler STANCE and is the answer not in the manual?

Summary

Installation Requirements

Tools Required

List of tools needed for installation, including screwdrivers, drills, measuring tape, and safety glasses.

Materials Required

List of materials needed for installation, such as drop cloth, tape, and silicone sealant.

Overview

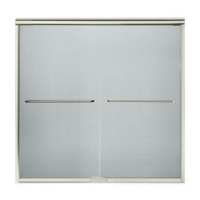
This document provides installation instructions for the KOHLER Stance Pivot Door Shower Screen (K-37468T), designed for non-standard openings. It is a frameless shower enclosure featuring an 8mm thick tempered glass pivot door and a fixed side panel.

Function Description:

The KOHLER Stance shower screen is designed to create a functional and aesthetically pleasing shower enclosure within a bathroom. It consists of a pivot door and a fixed side panel, both made of tempered glass, supported by aluminum wall jambs, top and bottom frames, and glass brackets. The pivot door allows for easy entry and exit, while magnetic seals ensure a secure and watertight closure. The design emphasizes a clean, minimalist look, suitable for modern bathrooms. The enclosure is intended to be installed on a flat, vertical finished wall, preferably on Kohler receptors or curbs, though it can accommodate non-Kohler curbs with a top width between 50-80mm.

Important Technical Specifications:

  • Model: K-37468T
  • Type: Pivot Door Shower Screen, non-standard opening, one fixed panel, one pivot door.
  • Glass Thickness: 8mm tempered glass.
  • Dimensions (SKU K-37468T):
    • Width (B): 1200-2000 mm (adjustable range)
    • Height (H): 1850-2000 mm (adjustable range)
  • Wall Verticality Requirement: The finished wall must be flat and vertical, with a recommended squareness tolerance of no more than ±3 mm/m. Deviations beyond this may affect installation quality and are not covered by Kohler's warranty.
  • Curb/Receptor Compatibility: Designed for Kohler receptors or curbs. If using a non-Kohler curb, its top width should be between 50-80mm.
  • Materials: Tempered glass, aluminum profiles (wall jambs, frames), magnetic seals, plastic components (pivot pins, cover caps, seals), metal hardware (handle, glass brackets).

Usage Features:

  • Pivot Door Mechanism: The door pivots on a pin assembly, allowing for smooth opening and closing. The pivot pin assembly is designed to be vertical after tightening, ensuring proper door alignment.
  • Magnetic Seals: Magnetic strips are installed on the door glass and side panel, ensuring a tight seal when the door is closed, preventing water leakage. These strips should touch along their entire length when the door is shut.
  • Adjustable Width and Height: The design allows for some adjustability in width and height, accommodating various non-standard opening sizes within the specified ranges (1200-2000mm width, 1850-2000mm height).
  • Frameless Aesthetic: The use of minimal framing and 8mm thick glass contributes to a contemporary, frameless appearance, enhancing the visual spaciousness of the bathroom.
  • Safety Glass: Tempered glass is used for enhanced safety, as it breaks into small, relatively harmless pieces if shattered, reducing the risk of injury.
  • Handle: A dedicated handle assembly is provided for convenient operation of the pivot door.
  • Glass Shelf (Optional/Included): The inclusion of glass shelf brackets suggests the possibility of integrating a glass shelf for storage within the enclosure.

Maintenance Features:

  • Care and Cleaning Information: The instructions mention that the manual contains important care and cleaning information, which should be retained by the consumer. While specific cleaning instructions are not detailed in the provided excerpts, it is implied that regular cleaning is necessary to maintain the appearance and functionality of the enclosure.
  • Silicone Sealant Application: A thin bead of silicone sealant is applied between the wall channels and the bottom frame during installation. This sealant is crucial for waterproofing and should be maintained to prevent leaks.
  • Post-Installation Curing Time: It is explicitly stated that the enclosure should not be used for at least 24 hours after installation to allow the sealant to cure properly, ensuring a watertight seal.
  • Durable Materials: The use of tempered glass and aluminum profiles contributes to the durability and longevity of the shower screen, requiring minimal maintenance beyond regular cleaning.
  • Component Replacement: The detailed parts identification and installation steps suggest that individual components could potentially be replaced if damaged, though this is not explicitly stated as a maintenance feature. The availability of spare parts would be crucial for such repairs.

Installation Requirements and Precautions:

  • Pre-Installation Checks: Before installation, all components must be checked for completeness and correctness. Any missing parts should be reported to the helpline.
  • Wall and Floor Preparation: The bath and finished wall material must be completely and correctly installed, with waterproof layers applied to the showering area's walls and floor. No electrical switches or sockets are allowed within the showering area. The floor drain must function smoothly.
  • Tempered Glass Handling: Extreme caution is advised when handling tempered glass. It cannot be cut, drilled, or knocked by hard objects. Special care must be taken to avoid knocking the corner areas to prevent shattering and potential personal injury.
  • Vertical Alignment: The wall jambs must be kept perfectly vertical during installation to ensure proper alignment and functionality of the door. The wall frame side with holes should face inwards, and the raised side of the frames should face outwards.
  • Component Orientation: Specific attention is required for the correct direction of glass insertion (hole end close to the top frame, labeled side with arrows against the wall) and the correct orientation of plastic inserts in the pivot mechanism. Glass brackets must be positioned horizontally.
  • Full Support: The door must be fully supported at all times during installation to prevent damage or injury.
  • Gap Evenness: During final adjustments, the wall frames should be pushed to ensure an even gap between the glass and the top and bottom frames.

The manual emphasizes the importance of following all instructions to avoid costly mistakes and ensure proper installation, operation, and safety. It also highlights Kohler China Ltd.'s right to make product changes without prior notice.

Kohler STANCE Specifications

General IconGeneral
BrandKohler
ModelSTANCE
CategoryPlumbing Product
LanguageEnglish

Related product manuals