EasyManua.ls Logo

Kolpin Outdoors 2724 User Manual

Kolpin Outdoors 2724
5 pages
To Next Page IconTo Next Page
Page #1 background imageLoading...
Page #1 background image
1
© 2020 Kolpin Outdoors Inc. REV 02
Honda Pioneer 700 - Rear Windshield Panel
Product Instructions | Part No: 2724
Kolpin Outdoors, Inc. | 9955 59th Ave N | Plymouth, MN 55442
(877) 956-5746 or (763) 478-5800 | www.kolpin.com | customerservice@kolpin.com
Application: Verify accessory fitment at Kolpin.com.
Before You Begin: Read these instructions and check to
be sure all parts are accounted for. If any items are missing,
do not return to the store. Call us at 1-877-956-5746 for
assistance. Please retain these instructions for future refer-
ence and parts ordering information.
Dealers: Provide Instruction Manual to customer at time of
purchase.
Tools Required: 4mm Hex Wrench or Socket, 10mm
Wrench, Wire Cutter or Shears, and Torque Wrench
Product Contents:
Item Description Qty Part Number
1 Upper Panel 1
2 Lower Side Panel 2
3 Lower Center Panel 1
4 Clamp - 1.75" Diameter 2
K100137 (Qty 1)
5 Clamp Spacer - 1.6mm Thick *2
K100138 (Qty 1)
6 Button Head Screw - M6 x 18mm 12
K100172 (Qty 3)
and
K100179 (Qty 4)
7 Button Head Screw - M6 x 26mm *7
8 Lock Washer - M6 *19
9 Domed Shoulder Washer - M6 *17
10 Flat Shoulder Washer - M6 *6
11 Nylon Spacer - 14mm Lg *2
12 Lock Nut - M6 *6
13 Threaded Coupling Nut - 18mm Lg 2
PUR3377
14 Adhesive Backed Foam - 36” (Not Shown) 1
PUR3360
*Extra Component Quantity Supplied Can Be Discarded
3
2
1
6
8
8
6
9
5
4
7
8
9
13
11
10
12
6
8
9
7
8
9
Question and Answer IconNeed help?

Do you have a question about the Kolpin Outdoors 2724 and is the answer not in the manual?

Kolpin Outdoors 2724 Specifications

General IconGeneral
BrandKolpin Outdoors
Model2724
CategoryAutomobile Accessories
LanguageEnglish

Summary

Product Preparation and Tools

Before You Begin

Read instructions, verify parts, contact for missing items, and retain for future reference.

Required Tools for Installation

Lists necessary tools for installation: hex wrench, torque wrench, wire cutters, and socket.

Installation Steps

Panel Assembly

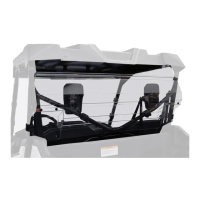
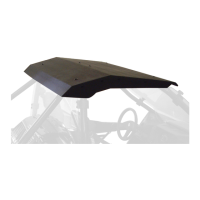
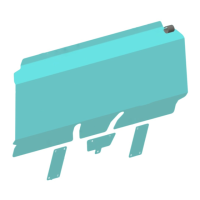
Attach lower side and center panels to the upper panel, then attach clamps to the upper panel.

Mounting to Vehicle

Secure windshield assembly to the roll cage using clamps and spacers, and attach to headrests.

Final Tightening and Checks

Align windshield evenly, tighten all hardware to torque specs, remove protective film, and re-inspect.

Safety and Care Information

Critical Safety Warnings

Avoid serious injury or death by following specific precautions, especially regarding towing and UTV operation.

Windshield Cleaning Procedures

Instructions for safe and effective cleaning of the windshield using mild soap and water.

Product Warranty

Related product manuals