4
© 2018 Kolpin Outdoors Inc. REV 02
Installation Prep:
1. To facilitate installation, make sure that your vehicle is clean and free of debris.
2. All directions referring to right and left are when the rider is sitting on the machine.
Installation:
1. Remove the Windshield (Item 1) from the box and set on
a clean flat surface.
2. Peal off the protective film from the inside and outside
surfaces of the panel.
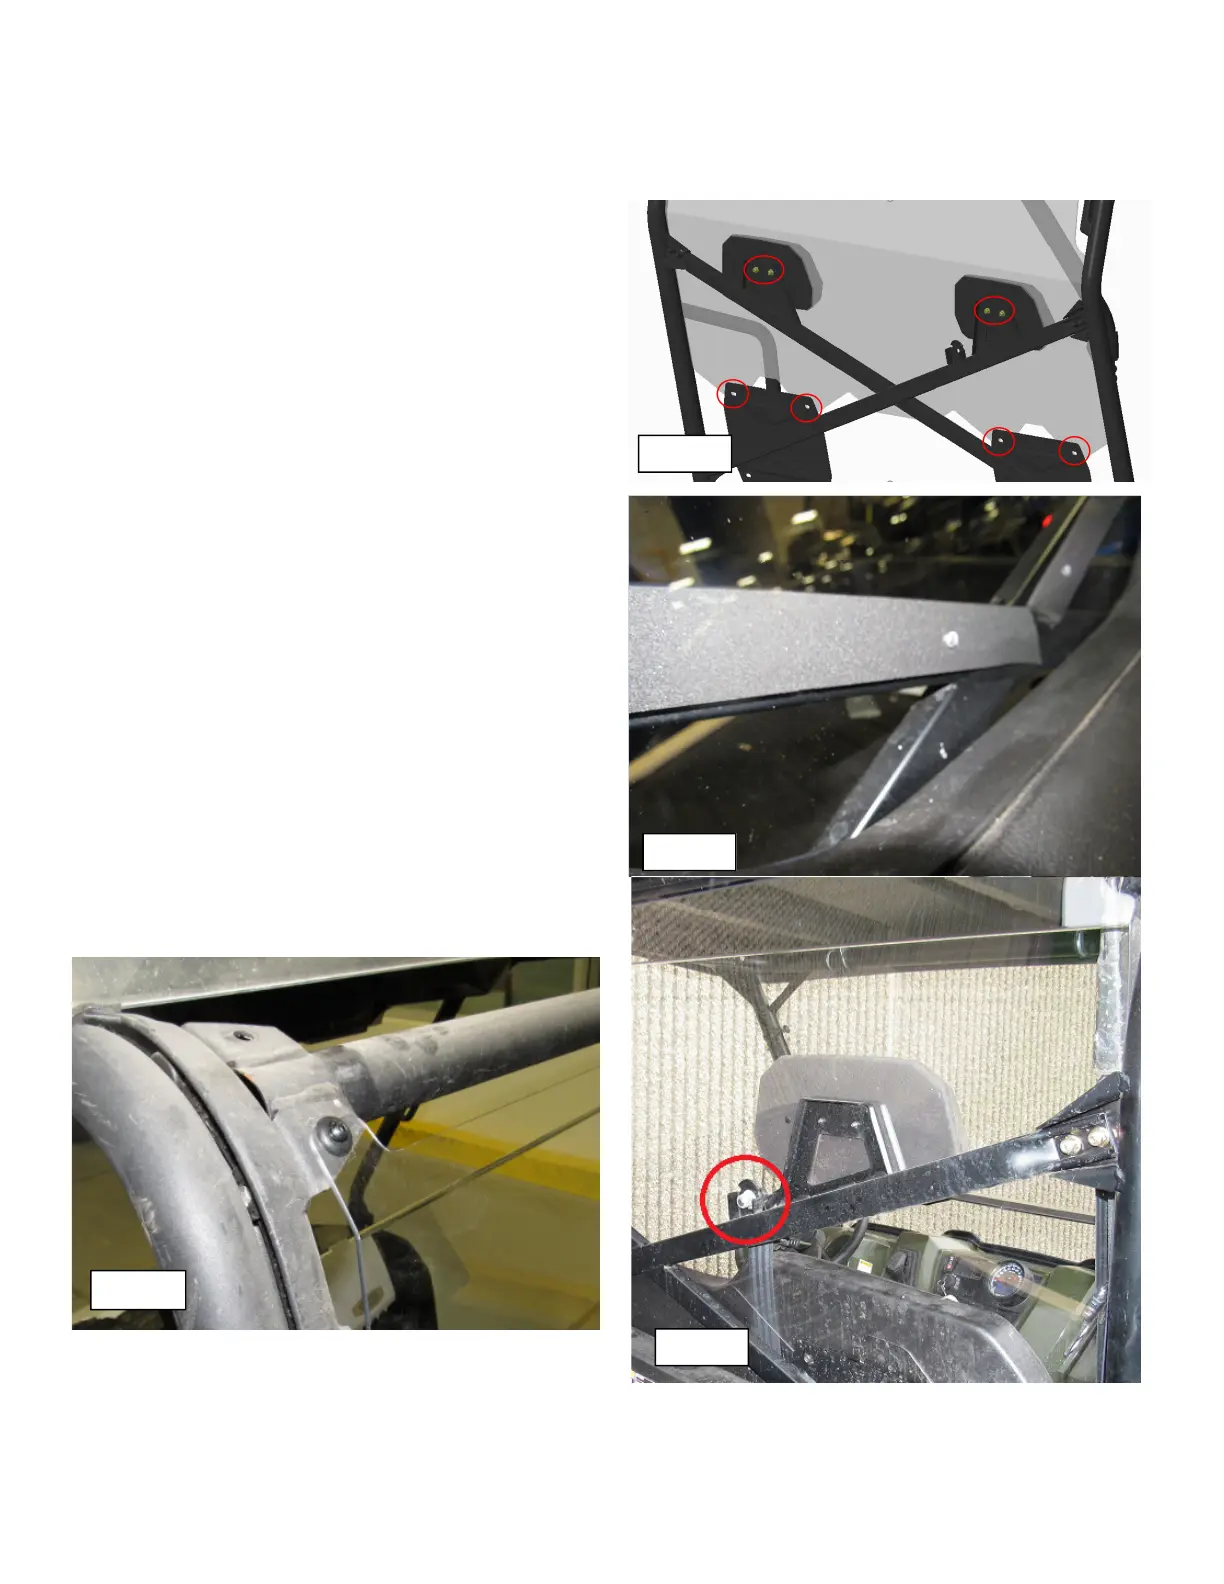
3. Remove the OEM headrest and backrest fasteners. See
Illustration 1-1. Note: For model years with riveted head-
rests, drill out the OEM rivets using a 3/16” drill bit.
4. Install Self Adhesive Foam Strip along the upper X por-
tion of the headrest rail. See Illustration 1-2.
5. For select model year Rangers, the passenger seat belt
mounting bolt needs to be removed prior to installing the
windshield. If your vehicle seat belt mounting bracket is
as shown, remove the mounting bolt. See Illustration 1-3.
6. To install windshield, slide the glass down into place en-
suring the lower section fits between the backrest and the
steel mounting plates and top section fits on top of the
corner mounting plates. On the drivers side, install (1)
M6 x 18mm Button head, (Item 2), (1) M6 Lock Washer,
(Item 3), (1) M6 Domed Shoulder Washer, (Item 5) and
(1) M6 Locknut (Item 4) into the top corner. Repeat instal-
lation on opposite side. See Illustration 1-4.
Ill. 1– 3
Ill. 1– 1
Ill. 1– 2
Ill. 1– 3
Ill. 1– 4



 To Next Page