2
© 2017 Kolpin Outdoors Inc. REV 04
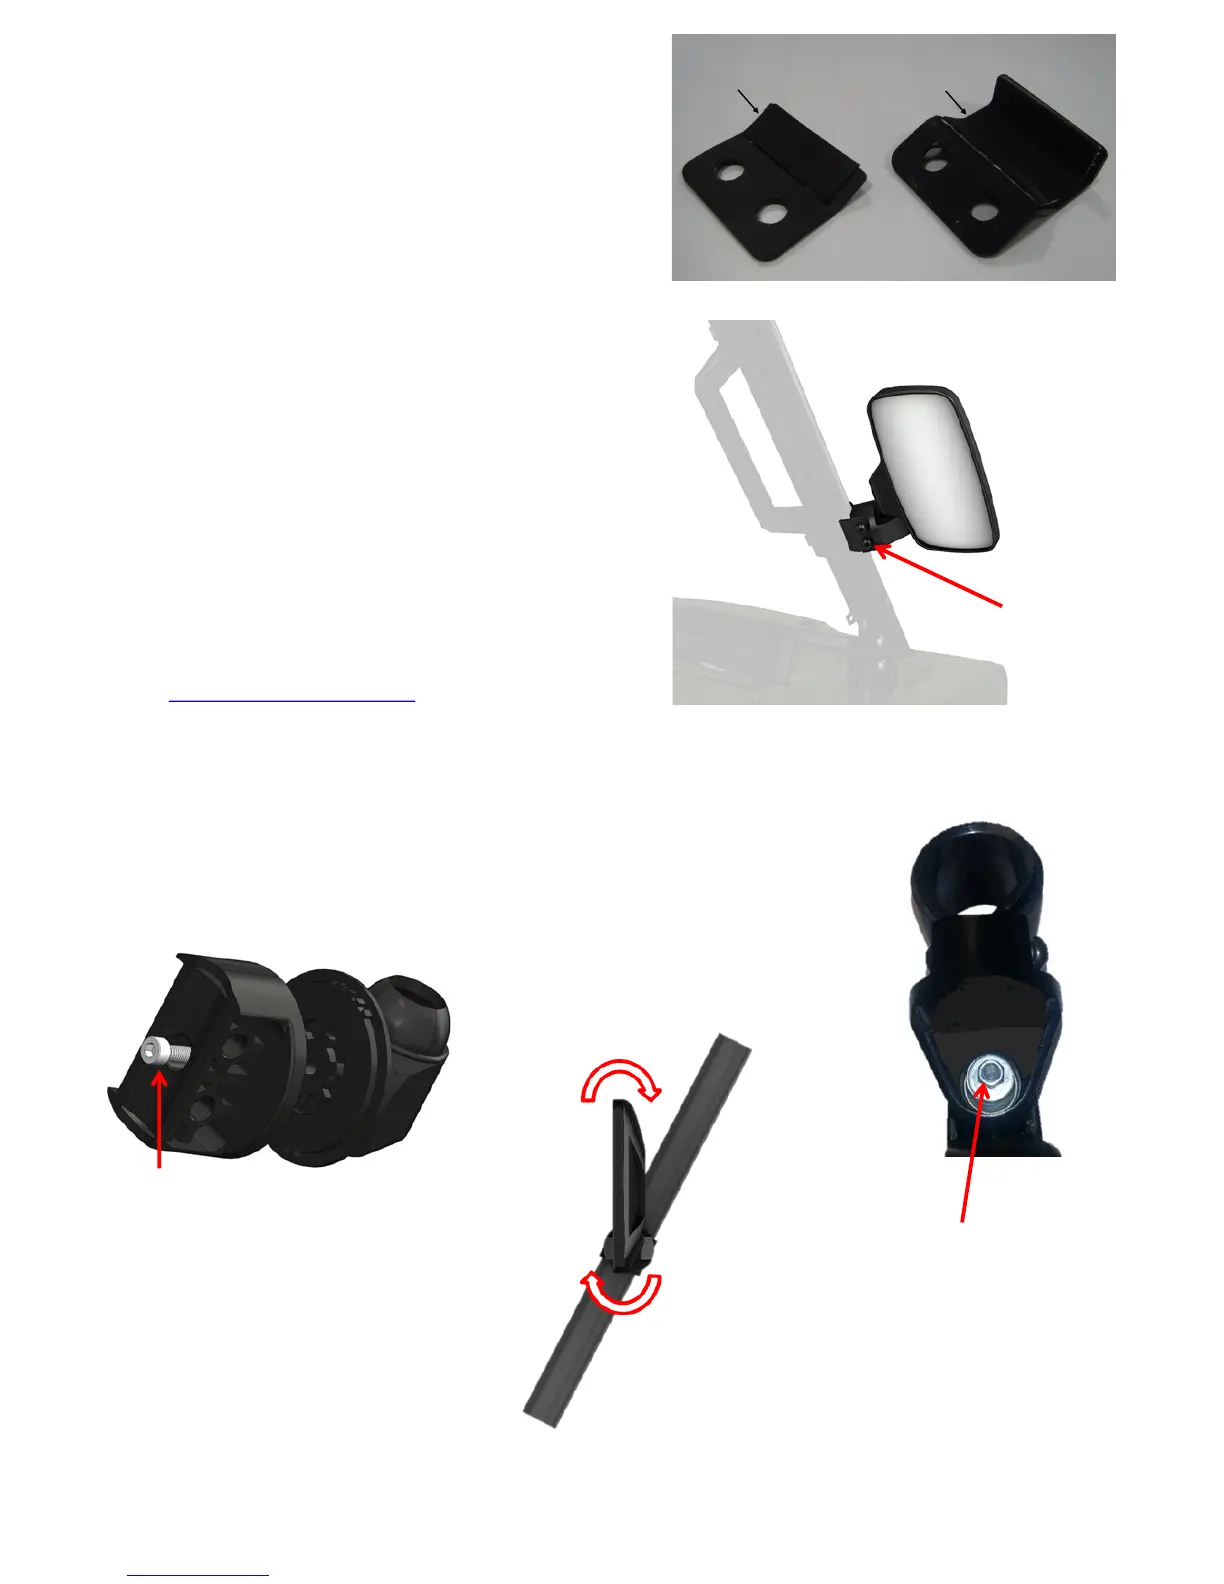
Small pad on
back clamp
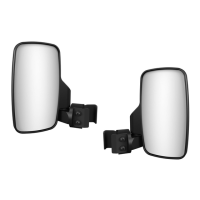
Install Preparaon:
1. Adhere the small rubber grip pad (item 19) to the inside
surface of the back clamp (item 20) as shown. The small
pad serves as a gripping pad to the vehicle prole tubing.
2. Adhere the big rubber grip pad (item 3) to the inside
surface of the front clamp (item 11) as shown. The big pad
serves as a gripping pad to the vehicle prole tubing.
Mirror Mounng:
1. Aach to desired area on UTV vehicle tube, secure front
and back clamps using M6 barrel nut (item 12), M6 at
washer (item 14), M6 lock washer (item 15) and M6 screw
(item 16).
2. Loosen M5 socket head cap screw (item 13) inside female
pivot joint (item 9) using a 4mm allen key wrench.
3. Pivot mirror to desired angle and secure M5 socket head
cap screw (item 13). You can also rotate mirror in and out
to desired viewing angle.
4. To increase the amount of force needed to rotate mirror,
simply ghten the tensioning nut (item 8) 2 revoluons.
WARNING: Do not over ghten hardware or damage can oc-
cur.
For addional assistance, please contact Kolpin customer
service department at (877) 956-5746 or (763) 478-5800
or email customerservice@kolpin.com
Note: If any hardware is missing, do not return to the
store. Call us to help, Toll Free 1-877-956-5746.
Pivot Screw
Tensioning Nut
M6 screw & M6 barrel nut
Big pad on
front clamp
 Loading...