Manual EDU 2AE/TOP e EDU 2AE/TOP/TA Rev.1.1 Page 11
4. Set the first torque level percentage by pressing o , then press OK.
5. Complete a fastening cycle.
6. If you’re sure of the torque level displayed on your torque tester press OK, then set the displayed
value and press OK again to save. Otherwise press ESC and start again.
7. The following screen will be displayed. Set the percentage of the second torque by pressing or
and press OK.
8. Repeat the procedures described on points 4 and 5.
9. When calibration ends, “Setting end” will be displayed. You will hear two beep sounds, too.
ATTENTION: If you press ESC after confirming “calibration ON”, the display will show the torque screen
again and the displayed values are the default ones or the ones set during the previous calibration (if done
before).
USE OF T&A (Torque & Angle)
Choose the T & A mode (see point 26: Modify function on the program menu)
It is possible to set 6 different modes:
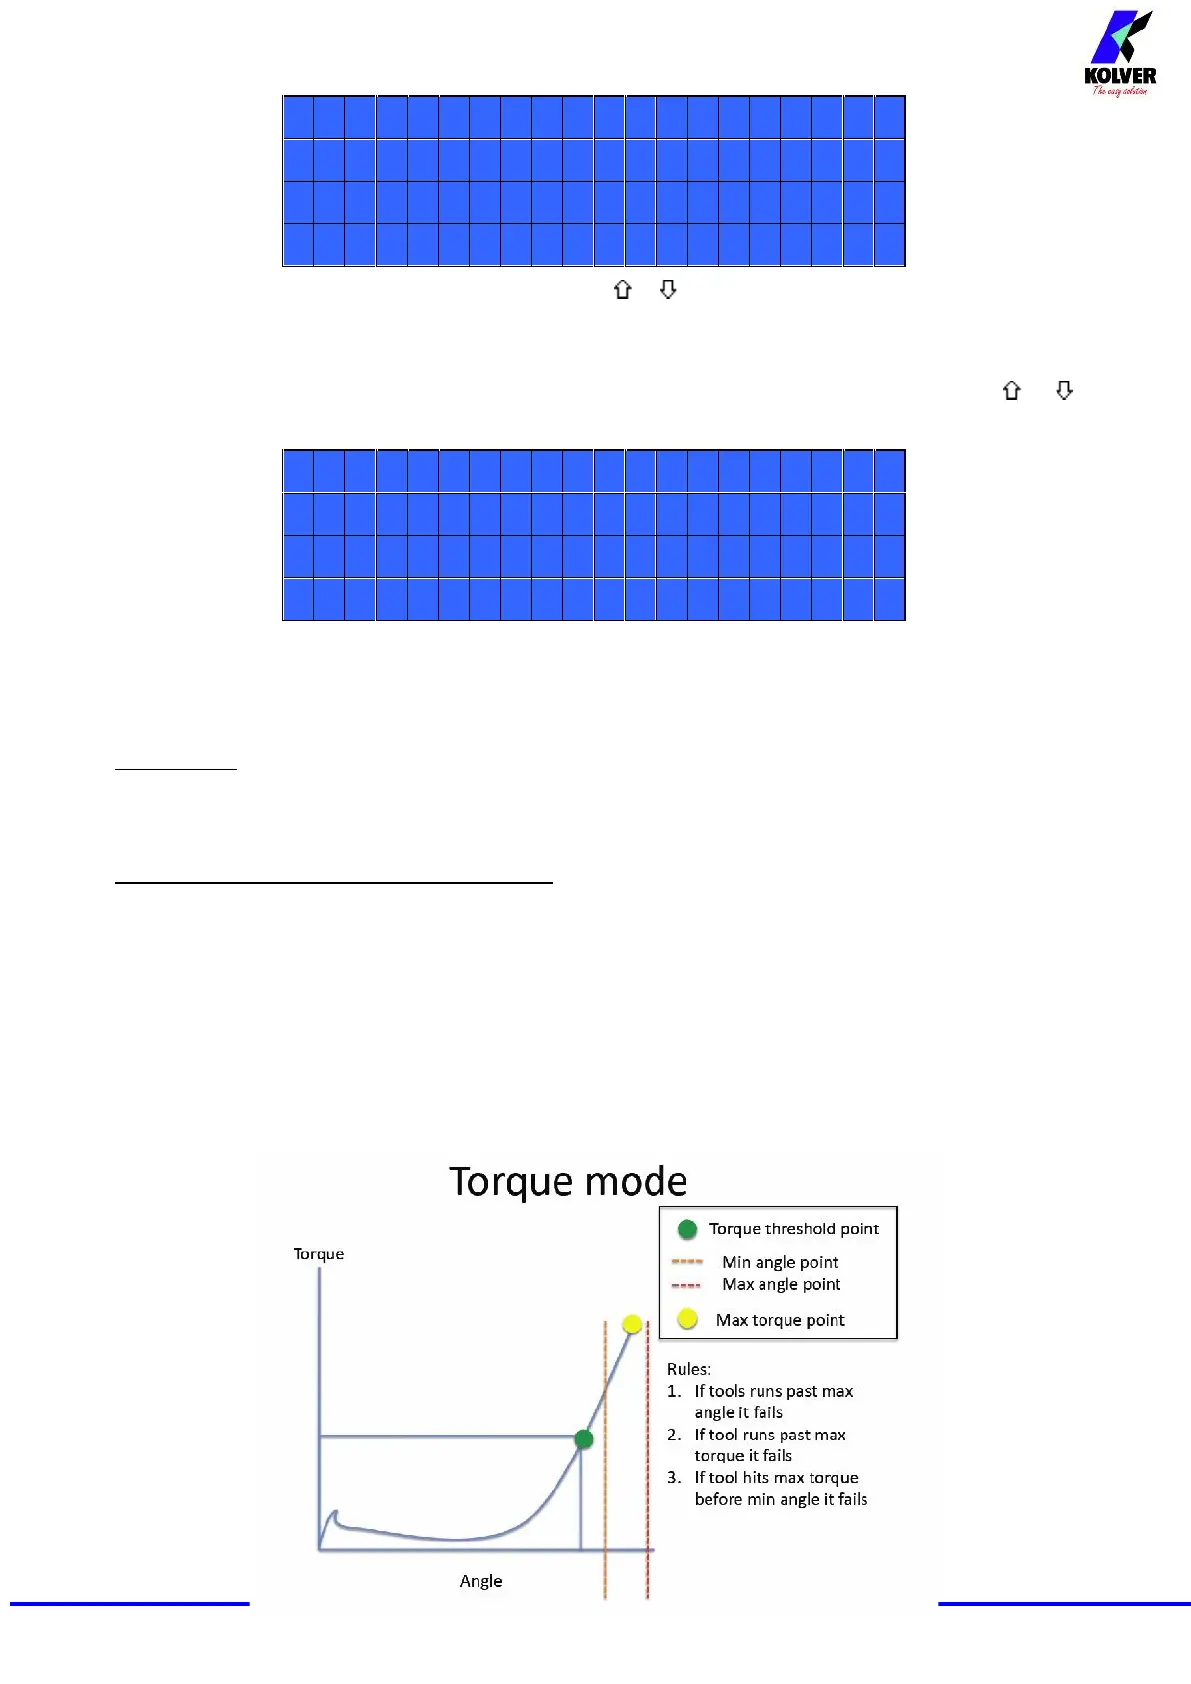
TORQUE (Torque): It’s the most common use mode. The control unit shows the tightening torque and
the torque starting from a certain torque percentage (threshold torque, see point 27). If the final torque
and angle values are within the preset minimum and maximum values, the screw is correctly tightened.
If the torque and/or angle are outside the preset values, the screw will be considered as incorrectly
tightened. In this case the red led will light up and the message “Error Max (Min) Angle” or “Error Max
(Min) Torque” will be displayed.
 Loading...