.
MAINTENANCE
SERVICE PROCEDURE
REVERSE AND REPLACE THE END BITS AND CUTTING EDGES
WARNING
It is dangerous if the work equipment moves by mistake when the cutting edges and end bits are being reversed or replaced.
Set the work equipment in a stable condition, then stop the engine and lock the blade control lever securely with the work
equipment lock lever.
Turn 180 deg. or replace the end bits and cutting edges before it is worn out to the blade end.
1. Raise the blade to a proper height, position a block under the
frame to prevent the blade from falling.
2.
Operate the work equipment lock lever to LOCK position.
If the cutting edge and the end bit on both sides are worn out,
replace with new one.
If the mounting surface is worn, correct it before turning or
replacing the end bits.
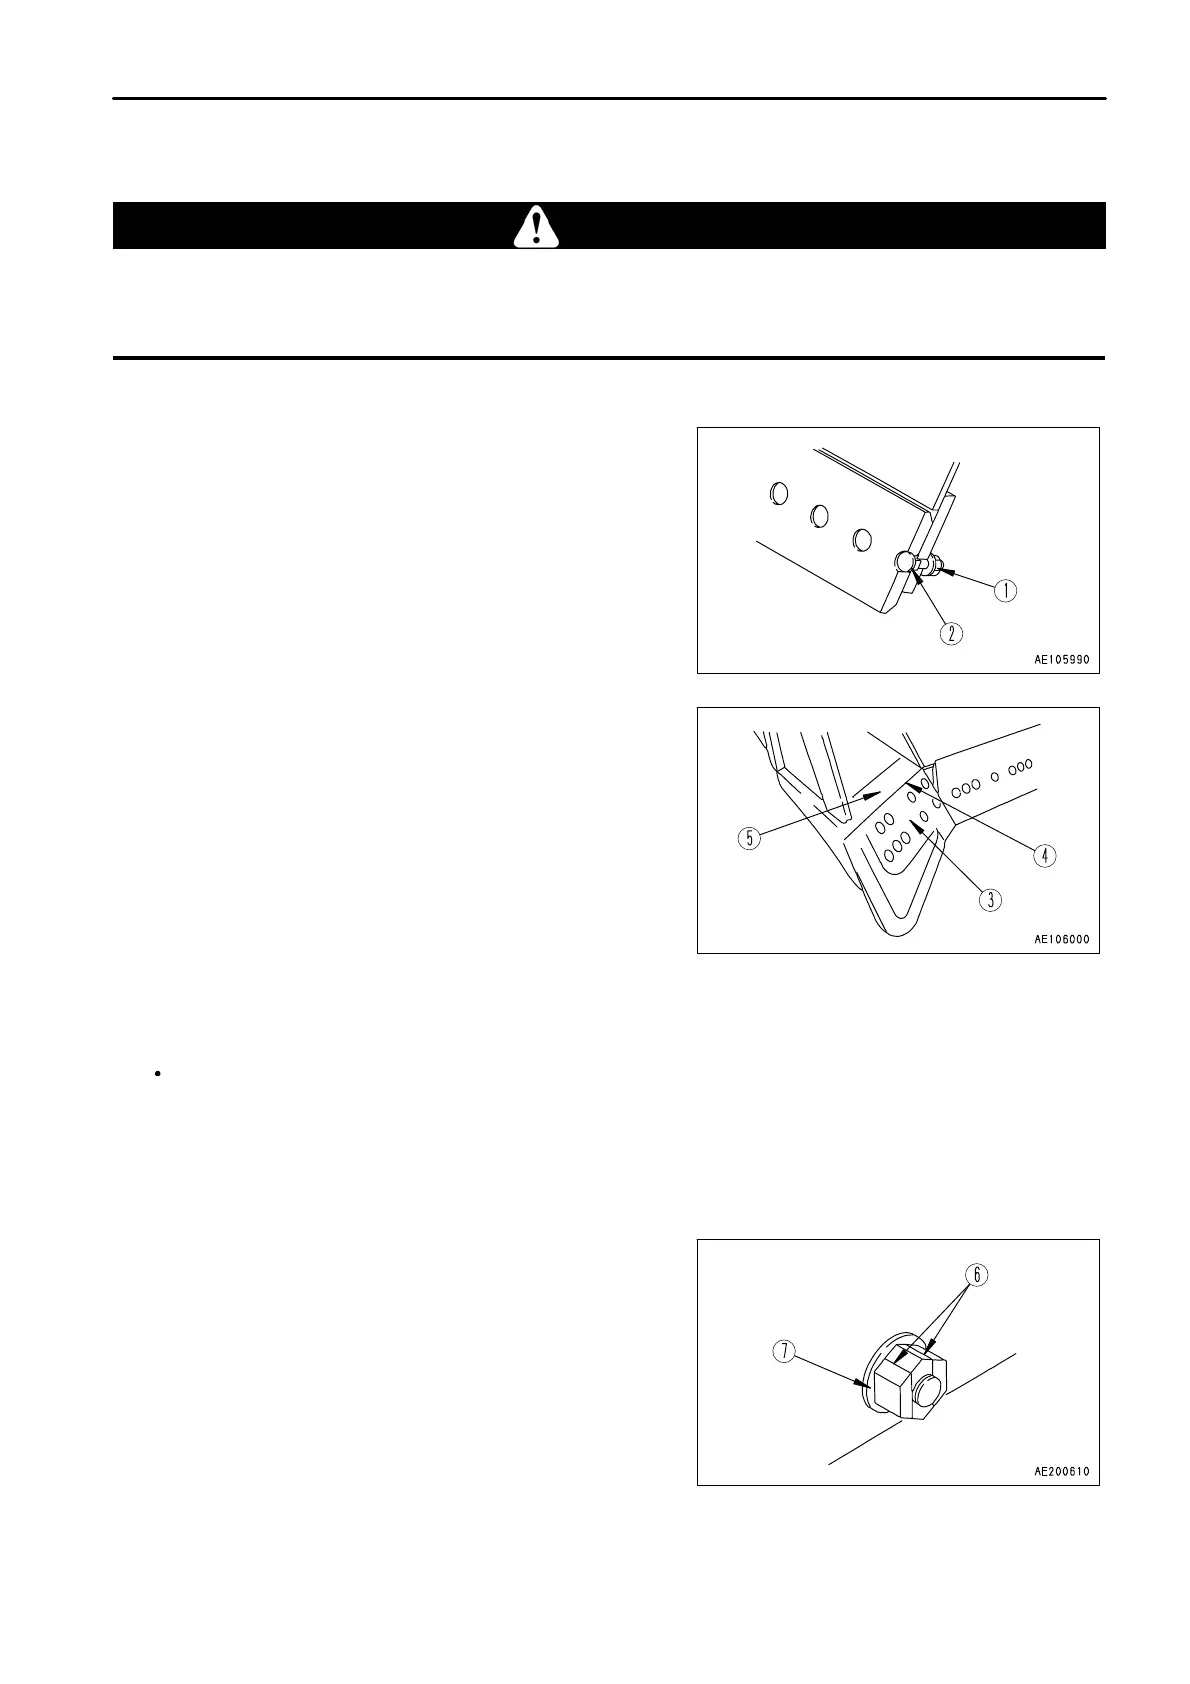
3.
Loosen nut (1) and remove bolt (2). Then remove the cutting
edge and the end bit and clean the mounting surface.
4. Turn 180 deg. or replace the cutting edge and the end bit when
worn out.
If bolt (1) and nut (2) are damaged, replace them with new ones
at the same time.
5.
Install the edge to the blade, then tighten partially. Drop the blade 3 to 5 times on to the ground or rock to remove
any play in bolt (2), then tighten it to the correct tightening torque. When installing end bit (3), put top surface (4)
of the end bit in close contact with stopper (5), then tighten with the bolts.
Tightening torque: 3340 ± 373 Nm (341 ± 38 kgm, 2466.3 ± 274.8 lbft)
6. After several hours of running, retourque the nuts.
REMARK
The tightening operation is easier if the power wrench that has been supplied is used.
When the nut is rusted and is removed by gas cutting, cut on both
side (6) of the nut as shown in the diagram.
Be careful not to damage seat surface (7).
If it is damaged, repair it. Be careful not to get spatter on the
mounting surface.
4 - 35
 Loading...