Pairing ProcessValve Check after successfully pairing
Quick Start for LevelSmart installation:
BEFORE BEGINNING BRING WATER TO DESIRED LEVEL
For more detailed instructions visit www.KonaLabs.com/Pages/Help
Follow us on
Follow us on
After a successful pairing, you want to make sure the
valve is connected to the valve controller successfully,
completing the circuit to power the valve on and off. To
check the valve and actuate it for 5 seconds follow the
steps below.
*Do not hold magnet on valve controller for more than 15
seconds as it will reset entire unit, and un pair your
LevelSmart*
Once paired and you have a solid green SENSOR LED
on your valve controller, make sure you used wire nuts
to attach the valve to the valve controller. It does not
matter which black or red wire is tied to the valve
controller wires.
Using the magnet on the valve controller hold the
magnet on valve controller until you seethe red ALARM
LED illuminate. Hold it there for 5 seconds and remove
the magnet
Once removed, the ACTION LED will now illuminate for
5 seconds. When this happens, it also means the valve
is open. It will only open for 5 seconds then shut off.
Make sure valve opens and closes during the valve test.
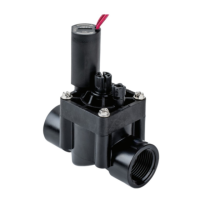
On the hunter valve, you will hear a soft click and you
will be able to hear or feel water going through the
valve indicating it is working. On the commercial kit,
you will hear the valve open and close. If it does not
open during this test, check your connections and try
again.
If Valve test Fails
1
2
3
4
The pairing process is a 2.5 minute process to make sure
you have good communication between your sensor in
the pool and the valve controller, as well as calibrate and
set the level you want the LevelSmart to maintain.
Before starting make sure the Antennas are all connected
along with the antenna tip and off the ground.
The sensor is in the pool or on coping above installation
spot.
Make sure valve controller is in pairing mode flashing all 3
LED in a sequence. To put into pairing mode place magnet
on controller or 16 seconds or longer and remove magnet.
Once removed, all 3 LEDs will be scrolling bottom to top.
Once Valve controller is in pairing mode take the magnet
to the sensor and engage the sensor by holding it on the
sensor for 5 seconds and remove.
You will see 3 green flashes from the top of the sensor
face immediately after you remove the magnet from the
sensor. You can now leave the sensor near the spot it will
be adhered and go to controller to observe pairing process
on Valve controller.
The Valve controller will start to flash the ACTION LED
once per second for 30 seconds. Immediately after the first
30 flashes it will flash every 4 seconds while it calibrates
and sets the water level.
For 2 minutes ACTION LED will flash every 4 seconds until
you see a solid green Sensor LED.
At the end of the 2.5 minutes of the ACTION LED flashing,
you will have one of three results.
A solid green sensor LED indicating a successful
pairing.
A completely Solid ACTION LED indicating it is not
commun cating effectively and we need to place
the antenna in a new spot, or place the sensor in a
different location and try again the pairing process
again.
The Valve controller automatically went right back
into pairing mode indicating a failed pairing and
you need to move antenna or sensor and try
process over. If pairing was unsuccessful you need
to place valve controller back into pairing mode.
To get back into pairing mode it will automatically
go back to it, or you will need to un plug for 10
seconds and plug back in
1
2
3
4
5
6
Make sure your valve controller is showing a green
sensor LED.
Bring water to new desired water level, making sure
it is still on the sensor.
Use the magnet to reset the sensor in the pool by
holding the magnet on the sensor for 5 seconds and
removing it
Make sure you got three green flashes on the sensor
when you removed the magnet
Now observe the valve controller green sensor LED
flash for about a minute as it re calibrates your new
set level.
Make sure you end with a solid green sensor LED.
1
2
3
4
5
6
LevelSmart User Manual
 Loading...