EasyManua.ls Logo

Konig & Meyer Jazz User Manual

Konig & Meyer Jazz
4 pages
Go to English
To Next Page IconTo Next Page
Page #1 background imageLoading...
Page #1 background image
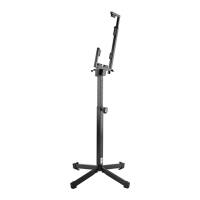
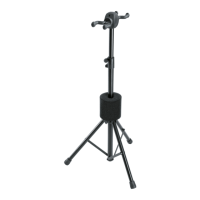
14330 Saxophonständer »Jazz«
- praktisch, handlich & standfest
- stabil und doch sehr leicht dank Aluminiumprofilen
- mit großer Rändelschraube als zentralem Bedienelement
- instrumentenschonende Gummierung
- eingepasste Parkettschoner
- besonders geeignet für Musiker die viel auf Achse sind: der »Jazz« ist klein zusammenlegbar und kann im
- mitgelieferten Veloursbeutel im Schalltrichter des Instruments verstaut und transportiert werden
SICHERHEITSHINWEISE
AUFSTELLANLEITUNG
Vielen Dank, dass Sie sich für dieses Produkt entschieden haben. Diese Anleitung informiert Sie über alle wichtigen Schritte bei
Aufbau und Handhabung. Wir empfehlen, sie auch für den späteren Gebrauch aufzubewahren.
- Instrument mit Bedacht in die Bügel einhängen und an den unteren Gummikappe anlehnen
- auf geeigneten und ebenen Untergrund achten
- die Möglichkeit das Produkt zusammenzuklappen oder in der Breite zu verstellen, birgt naturgemäß Einklemmgefahren;
- umsichtige und aufmerksame Handhabung bei Aufbau, Betrieb und Abbau sind daher unverzichtbar
- die Parkettschoner sind aus hochwertigem Material und so weit wie möglich frei von Weichmachern; zum Schutz von ganz
- empfindlichen Böden (evtl. bestimmte Parkettsorten) sollte ggf. eine rutschfeste Unterlage verwendet werden
A Jazz aus dem
Veloursbeutel
entnehmen.
B Rändelschraube
nach oben drehen
(=Richtung OPEN).
C Drei Rechteckprofile
bis zum Anschlag
nach oben klappen.
D Rändelschraube
wieder festdrehen
(=Richtung CLOSE).
Question and Answer IconNeed help?

Do you have a question about the Konig & Meyer Jazz and is the answer not in the manual?

Konig & Meyer Jazz Specifications

General IconGeneral
CategoryRacks & Stands
ModelJazz
ManufacturerKonig & Meyer
MaterialSteel
ColorBlack
Height AdjustmentYes
Base TypeTripod

Summary

Safety Notes

General Safety Warnings

General warnings about handling the product, potential pinching hazards, and floor protection.

Setup Instructions

Step A: Remove Stand from Bag

Instruction to take the saxophone stand out of its velour bag.

Step B: Open Knurled Screw

Instruction to turn the knurled screw upwards in the OPEN direction.

Step C: Extend Support Arms

Instruction to extend the three rectangular profiles until they stop.

Step D: Secure Knurled Screw

Instruction to tighten the knurled screw in the CLOSE direction.

Step E: Extend Support Arms Fully

Instruction to extend the support arms out as far as they will go.

Step F: Place Stand on Surface

Instruction to place the Jazz stand on a stable surface.

Step G: Position Instrument Bell

Instruction to place the instrument bell onto the support arm close to the edge.

Step H: Place Saxophone Lower Part

Instruction to place the saxophone on the small supports on the lower part of the stand.

Step J: Instrument Resting Position

Confirmation that the instrument now rests on the support arms.

Step K: Disassembly

Note that disassembly is performed in the reverse order of setup.

Step L: Store Stand in Bag

Instruction to place the stand in the velour bag and into the instrument bell.

Check, Maintenance, and Cleaning

Fault Finding and Repair

Guidance on troubleshooting common issues like instability or slipping, and general maintenance advice.

Technical Data and Specifications

Related product manuals